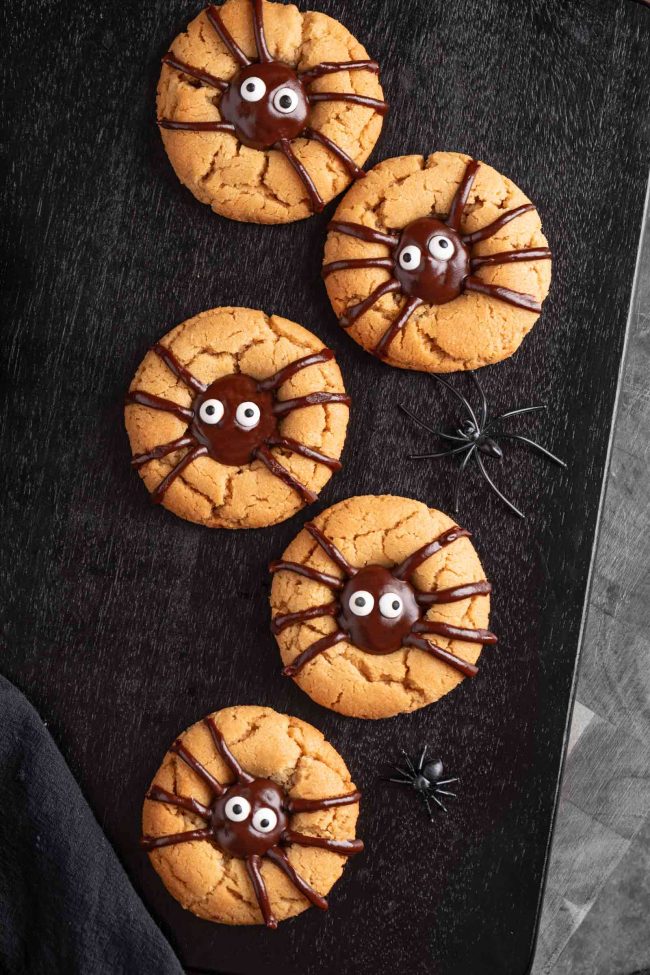
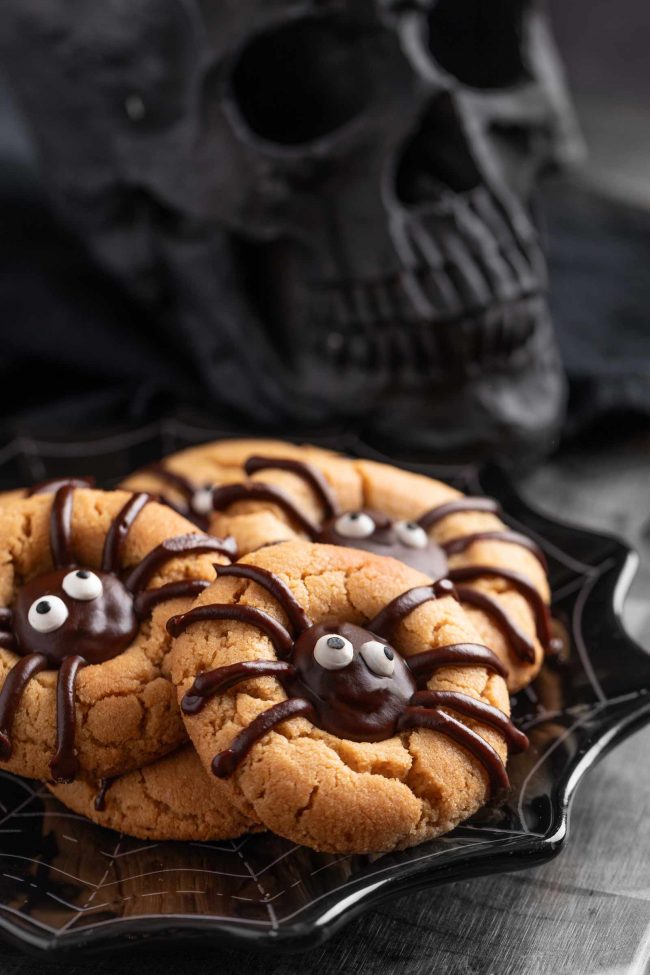
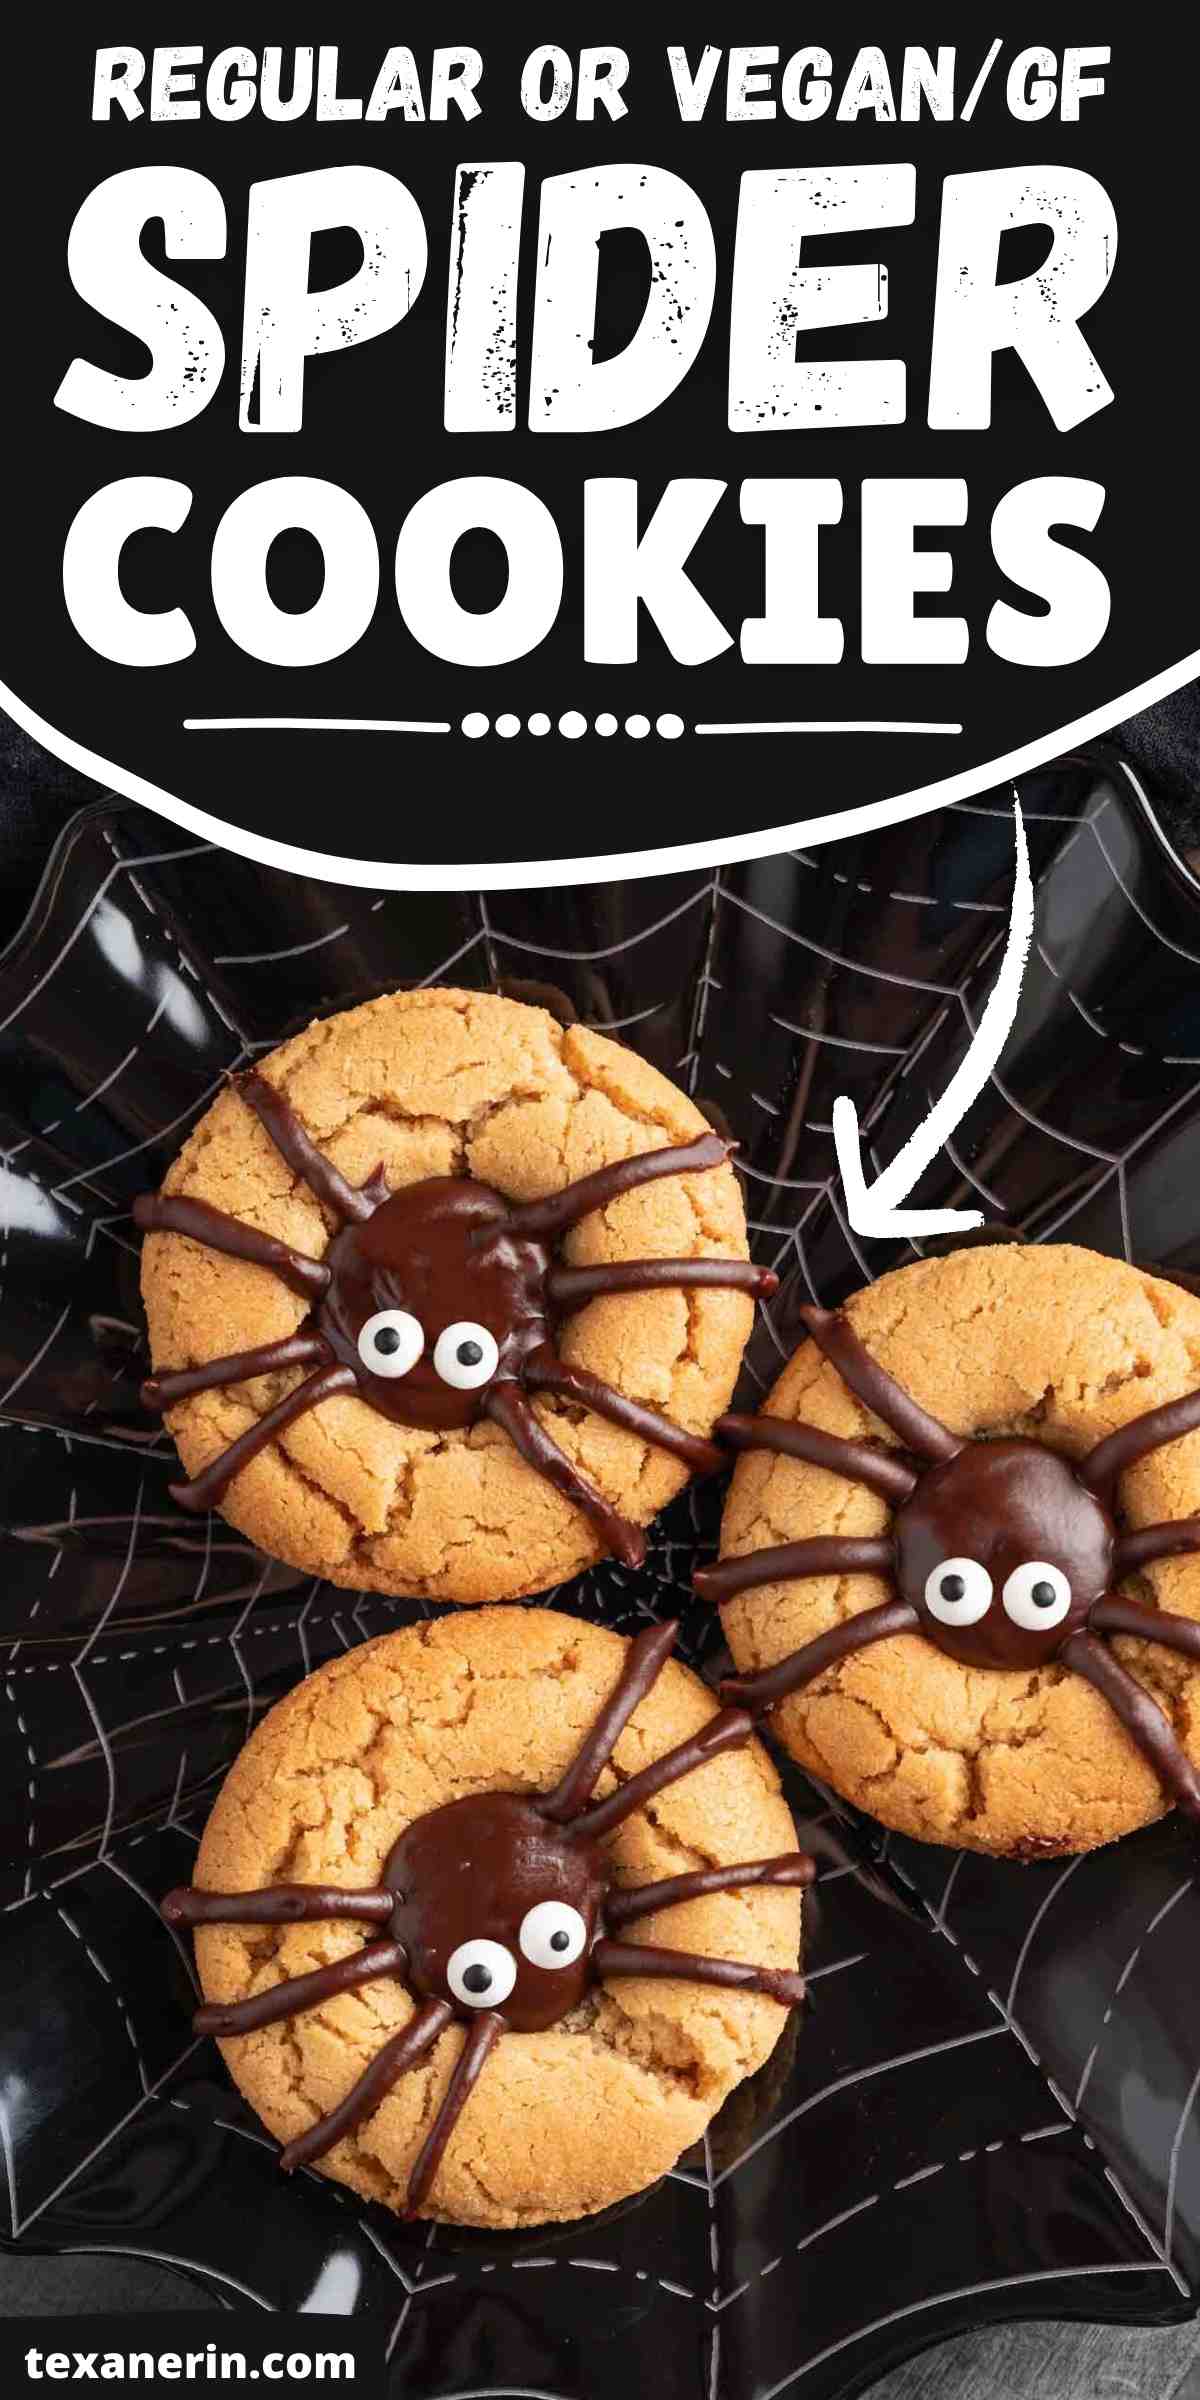
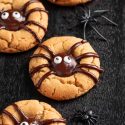
These spider cookies are a fun twist on peanut butter thumbprint cookies and are topped off with an easy spider design using ganache and candy eyeballs. You can make them traditionally with regular flour and dairy, or you can make them vegan, nut-free and/or gluten-free.
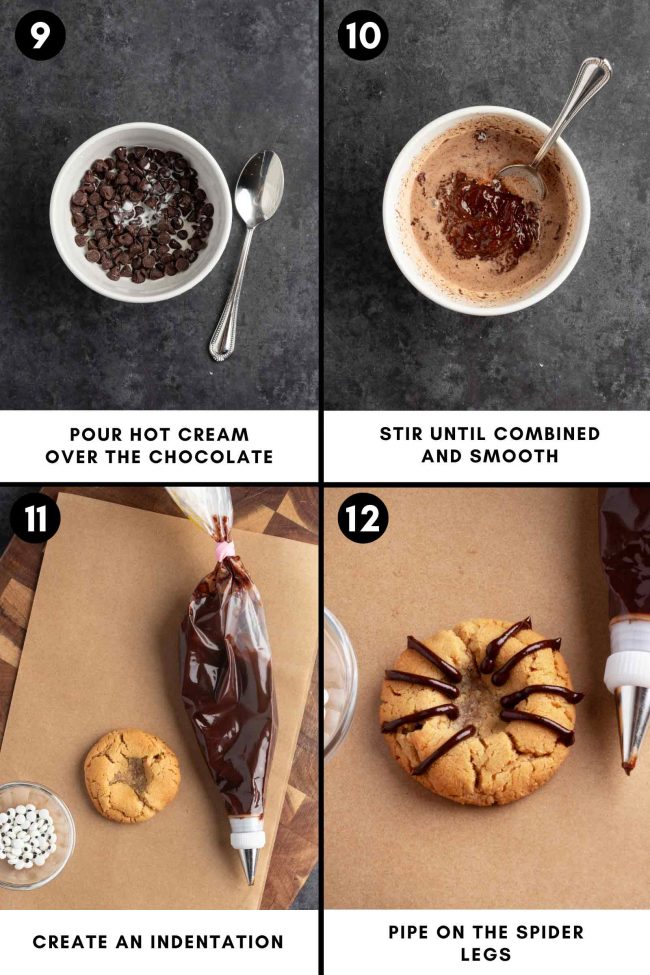
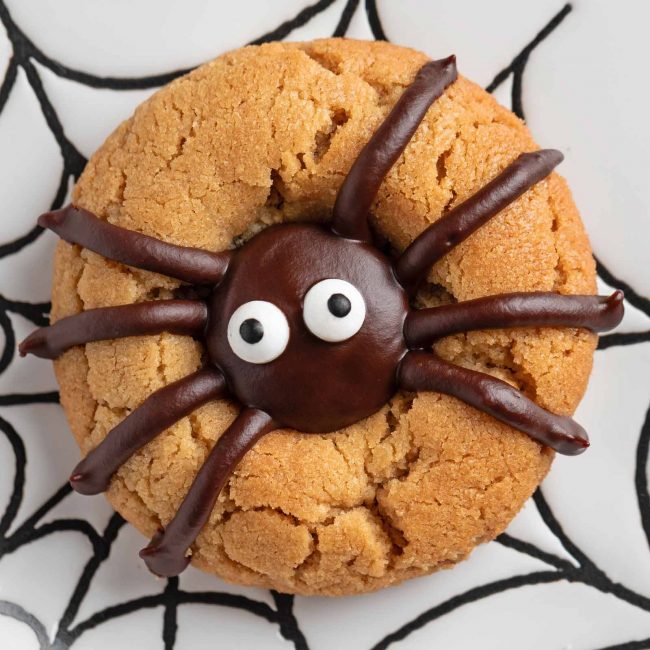
These cookies are like thumbprints in that you create an indentation to make the spider design.
No need for mini peanut butter cups or other candy that you usually see on spider cookies. And I think they came out just as cute.
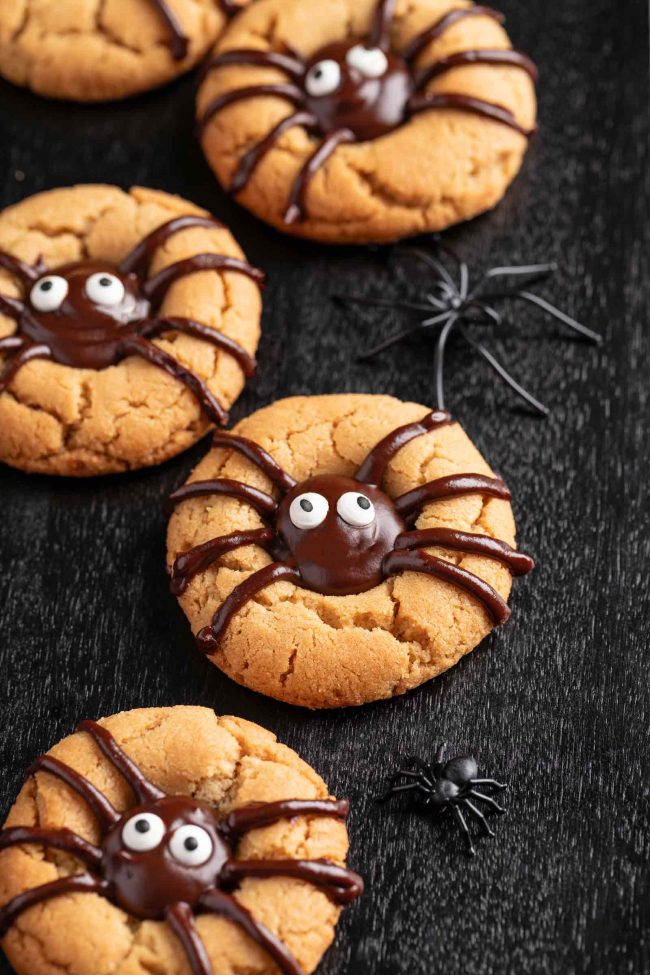
To make the spiders, you pipe on the chocolate ganache using a small round tip for the legs and a large round tip to fill the center of the cookie.
If you’re terrible at piping and decorating – don’t worry! So am I. If I can do it, you can, too.
I have so many fun Halloween recipes. I’ve made these Witch Finger Cookies every year since I posted them, but these spider cookies will be my new go-to Halloween cookie.
They’re much, much easier and quicker to make and peanut butter + chocolate definitely wins over shortbread.
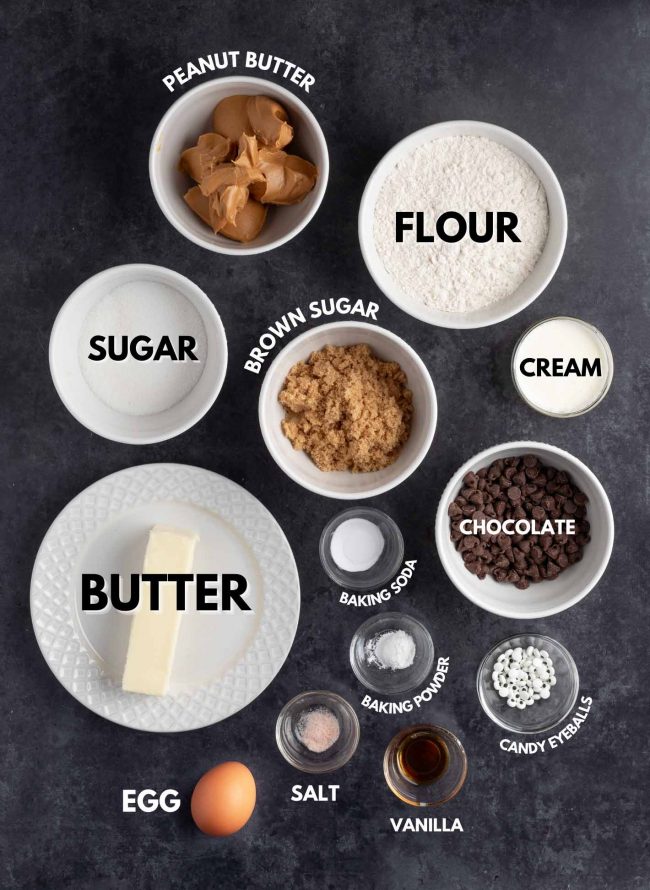
Ingredients
Here’s an overview of what you’ll need. The full recipe, with measurements and directions, is at the bottom of the post. And if you’re wondering why I always say this, it’s because I get emails (usually angry ones) asking why I don’t actually write out the recipes.
- Peanut butter – you can use natural or regular peanut butter. I go into detail about the differences below. Sunflower seed butter works great for a nut-free sub!
- Butter – for a dairy-free version, you can use vegan butter or coconut oil instead of butter.
- Granulated and brown sugar – or coconut sugar, but your cookies will come out darker.
- Egg – you can use a chia egg (along with the coconut oil sub above) for a vegan version of these cookies.
- Flour – you can use all-purpose flour, whole wheat flour, white whole wheat flour or a gluten-free baking blend. More on that below!
- Vanilla, baking soda, baking powder and salt
- Semi-sweet chocolate chips or chopped chocolate – used for creating the spider bodies and legs. You can also use dark or milk chocolate.
- Heavy whipping cream – you can use canned coconut milk or another vegan cream sub for a vegan and dairy-free version.
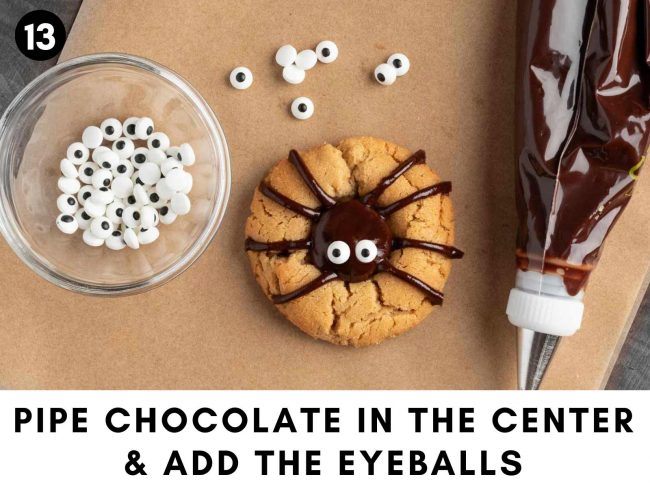
- Candy eyeballs – you could also use mini white chocolate chips or whatever else you’d like to create the eyes. I talk about homemade options below.
For the spiders
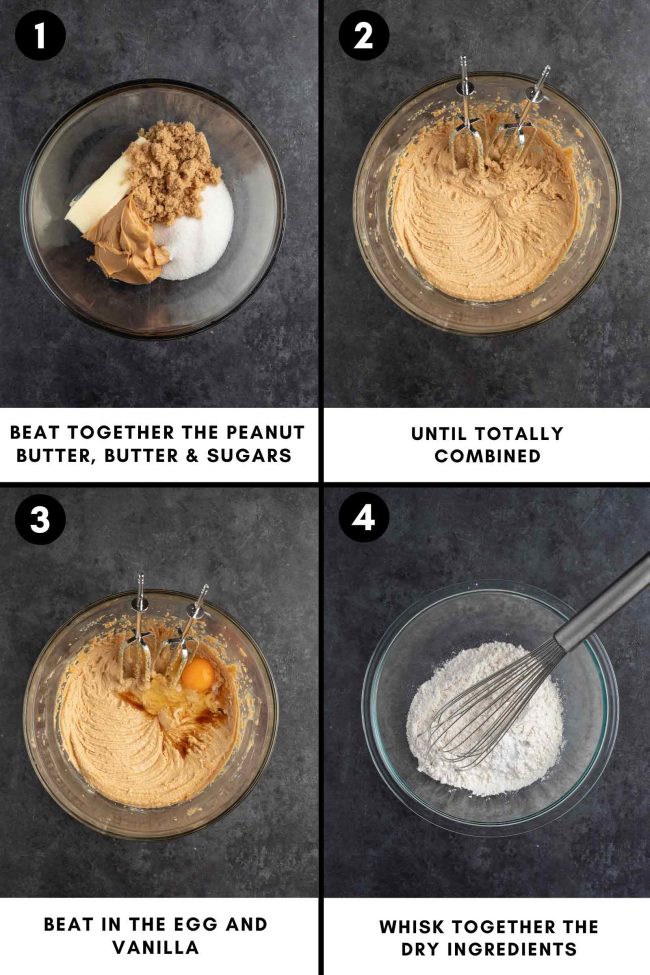
How to make the cookies
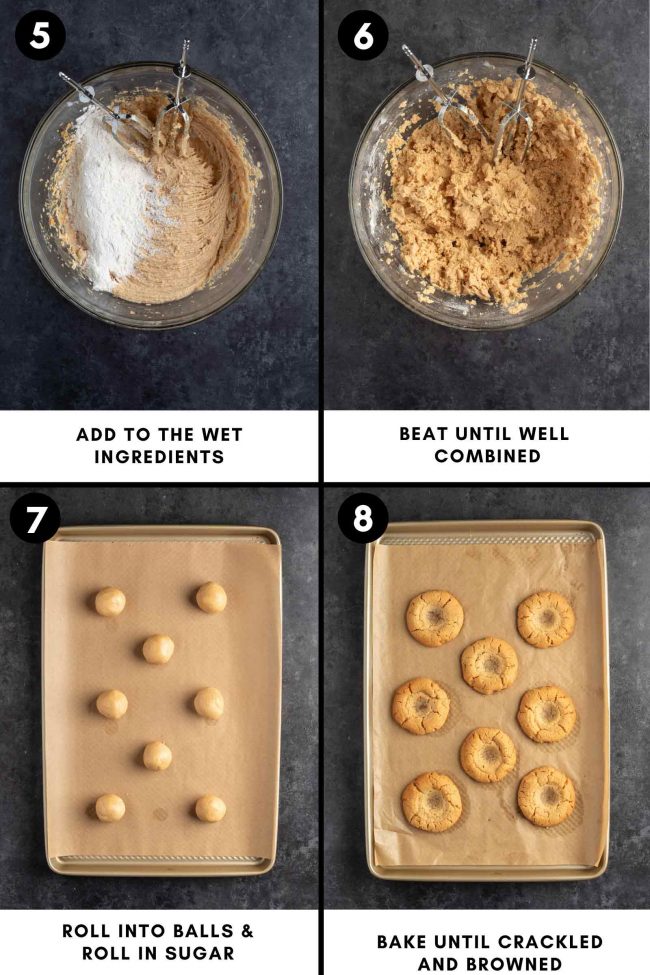
You mix together the wet ingredients and then the dry ingredients in a separate bowl.
Stir the dry mix into the wet.
Roll the dough into balls and coat in sugar.
Please note that the photographer forgot this step! But you should really do it, although you don’t have to coat them in sugar.
They’re sweet enough without the added sugar. But there are many reasons to coat them in sugar, which is why I call for it in the recipe.
As I wrote in my Raspberry Thumbprint Cookies and Strawberry Cheesecake Cookie recipe, coating them in sugar adds some extra stability. Since these cookies are on the larger side, filled, and have piping on them, they’re more delicate than regular cookies.
Rolling the cookie dough balls in sugar also gives the baked cookies a nice crunch. The sugar crystals additionally contribute a slight sparkle to their appearance, which I think is nice for special occasions like Halloween parties.
After you’ve rolled them in sugar, bake until golden and cracked on top.
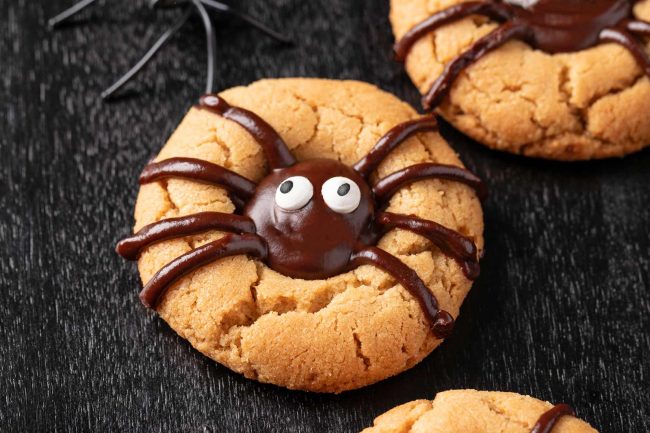
After they’ve cooled, make the spider bodies.
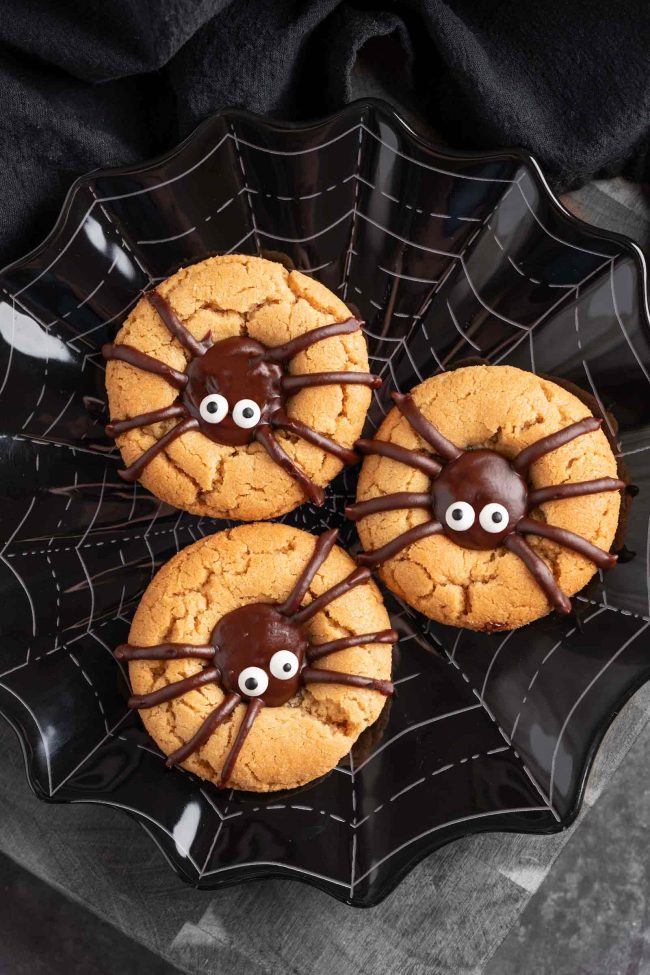
You can’t tell by the photos, but the ganache hardens nicely once it’s sat for several hours at room temp or after having chilled for 10-20 minutes.
After the ganache had firmed up, I was able to pack these cookies into a tupperware box without them sticking together. You need to keep them refrigerated, though.
If your kitchen gets a bit warm, then the ganache may soften a tiny bit, and that’s enough to ruin the spiders’ legs.
I don’t think you’d be able to stack them if you skip rolling them in sugar. I think the cookies would be too soft.
When I was working on the recipe, I did try a few without the sugar coating, decided that the sugar-coated ones worked much better, and ate up the non-sugar-coated ones right away. So I didn’t test their stackability.
Peanut butter type
You can use regular peanut butter like Jif or Skippy, or you can use natural peanut butter. This recipe has been tested with both.
When I say natural peanut butter, I mean the kind that consists of nothing but peanuts and salt. If you’re unaware of what’s in your peanut butter, take a look at the label.
Peanut butter usually has added fat and sugar in it. This includes many brands of peanut butter that say natural!
Peanut butter with added fat and sugar is much firmer than real natural peanut butter, which is super runny.
When looking into this, everything says that natural peanut butter can cause the cookies to spread too much, resulting in thinner, flatter cookies rather than the soft and slightly puffy texture that you’re aiming for.
But I had the exact opposite happen with this recipe.
In some recipes, regular and natural peanut butter aren’t interchangeable at all. I didn’t think regular peanut butter would work at all in this recipe, so it was a nice surprise that the results were almost the same.
The cookies in the photos were made with Great Value No Stir Creamy Natural Peanut Butter Spread. I also tested them with store-brand regular peanut butter. The version I made with homemade natural peanut butter were a bit thicker and sturdier.
But unless you want to transport these, it probably doesn’t make a big difference. And even if you do, as long as you roll them in sugar as instructed in the recipe, they’ll be good to go!
If natural peanut butter is too expensive, then you can buy some salted, roasted peanuts and make your own with a food processor or high-speed blender. It only takes a few minutes! Check out this guide on → How to Make Peanut Butter.
And as long as your peanuts taste good, your peanut butter will, too. I’ve bought so many jars of natural peanut butter that have not been tasty.
Candy eyeballs
The candy eyeballs I used on these Spider Cupcakes for Halloween are made with some pretty questionable ingredients.
As a healthier option, you can make homemade candy eyes by piping white chocolate onto the chocolate ganache and adding a mini chocolate chip for the pupil. If you’ve got some time on your hands, you can make your own eyeballs.
I’ve made a few different candy eyeball recipes, and this one is definitely my favorite. The ingredients are powdered sugar, cornstarch (or arrowroot/tapioca starch), vanilla extract, water and black cocoa. They’re gluten-free, dairy-free and vegan.
There are many ways to use black cocoa if you decide to make those eyeballs like these Mummy Cookies that also use candy eyeballs, these Black Cookies or this Black Milkshake.
They’re all great options for Halloween and the black cocoa powder makes them all taste like Oreos.
Note that making your own candy eyeballs can take some time to get them perfect. But if you don’t rush it, you’ll quickly get the hang of it.
How to store and freeze
To store your cookies without the chocolate ganache, store them in an airtight container at room temperature for up to 4 days.
Typically, chocolate ganache can sit at room temperature for about 2 days. However, factors like living in a warmer environment or high humidity can affect its shelf life, as these conditions can promote mold growth.
I think it’s best to refrigerate the decorated cookies right from the beginning to ensure that the ganache remains safe to eat.
They last up to 5 days if you store them in the fridge.
For freezing, you can either freeze the baked cookies without the ganache or freeze the cookies after adding the ganache once it has set.
Freeze them in an airtight container with parchment paper between the layers, and they’ll keep for up to 3 months.
If you’re considering freezing the cookies with the candy eyeballs on them, the black irises will probably bleed once they’ve defrosted. To avoid this, you could freeze the cookies without the candy eyeballs, and add them after the cookies have thawed.
Once the cookies are room temp, you should be able to attach the eyeballs. If the ganache is too firm, you can melt some chocolate, dip the eyeballs in that, and then attach the eyeballs to the cookies.
Or you can use a kitchen torch to melt the center of the spider bodies just a bit. You don’t want to warm up the entire cookies and risk that the legs get messed up.
But you know what? There’s a very easy fix to all this, and that’s to decorate the cookies after defrosting and letting them come to room temp. :)
As an Amazon Associate, I earn from qualifying purchases. For more info, see my disclosure.
[
Gluten-free option
These spider Halloween cookies can easily be made gluten-free using a gluten-free flour blend that’s a 1:1 substitute for all-purpose flour. I tested them with Bob’s Red Mill 1-to-1 Gluten-free Baking Flour and King Arthur Flour Gluten-free Measure for Measure Flour.
The texture with King Arthur was quite a bit better, so that’s what I’m recommending in the recipe. Bob’s was a bit gritty, and people could tell the cookies weren’t “normal” cookies. I’m guessing a lot of other brands would yield you a bit of grittiness.
Make sure to use gluten-free chocolate chips and candy eyeballs as well.
Most chocolate chips are naturally gluten-free, but always read the label.
For more information and a list of safe brands, check out → Are Chocolate Chips Gluten-free?

Dairy-free option
You have to use vegan butter or coconut oil in place of the butter and canned coconut milk or some other plant-based cream sub for the ganache.
Normally I would reduce the amount of coconut oil a bit, like 7 tablespoons of coconut oil instead of 8 tablespoons of butter, but I forgot to do that during testing.
And they came out great! So it’s a direct sub in this recipe.
Also make sure your chocolate chips are dairy-free/vegan.
I love Enjoy Life chocolate chips, which are vegan and labeled as gluten-free.
Vegan option
You have to do all the things mentioned above to make them dairy-free. And then you have to use an egg sub.
I tested them with a chia egg, and they came out just like the regular egg version. Since I haven’t tried other options in this recipe, I don’t know for sure if they’d work. But because there’s only 1 egg in the recipe, other egg subs would probably work.And you’ll probably need to make your own eyeballs. I wrote about this in detail about these up above.
Nut-free option
I used homemade sunflower seed butter in place of the peanut butter. They weren’t such a nice color but were just as tasty!
I tried them once with some sunflower seed butter that I had somehow messed up and didn’t taste very good. I thought that perhaps the sugar in the cookies would make up for the less-than-stellar taste. It did not!
Then I tried with the sunflower seed butter that actually tasted good, and not surprisingly, the cookies were much better.
The point is – if your sunflower seed butter, or peanut butter for that matter, doesn’t taste good, then neither will your cookies.
But note! Baked goods with sunflower seed butter can sometimes turn green due to a chemical reaction between the chlorogenic acid present in sunflower seeds and the baking soda or baking powder used in the recipe. When sunflower seed butter is exposed to alkaline conditions (such as those created by baking soda or baking powder), the chlorogenic acid can react and produce a green pigment.
This reaction is harmless but can be surprising if you’re not expecting it. To minimize or prevent this green coloration, you could try adding an acid like lemon juice to balance the pH.
But I have no idea how you’d need. I’m guessing a teaspoon would be enough.
None of my cookies turned green, but I also didn’t have them around for more than a day. If you want to be on the safe side, then I’d recommend making them no more than a day ahead of time.
More homemade Halloween treats
I hope you’ll enjoy these spider cookies! If you try them out, I’d love to hear your thoughts below in the comments. Thanks! :)
Spider Cookies
- Prep Time:
- Cook Time:
- Ready in:
- Yield: 24 cookies
See notes for the allergy-friendly subs!
Ingredients
- 3/4 cup (192 grams) creamy peanut butter1
- 1/2 cup (113 grams) unsalted butter, room temp
- 1/2 cup (100 grams) granulated sugar2
- 1/2 cup (100 grams) brown sugar
- 1 large (50 grams, out of shell) egg, room temp
- 1 teaspoon vanilla extract
- 1 1/2 cups (188 grams) all-purpose flour
- 3/4 teaspoon baking soda
- 1/2 teaspoon baking powder
- 1/4 teaspoon salt
- 3 tablespoons granulated sugar for rolling the dough balls in3
- 1 1/2 cups (256 grams) semi-sweet chocolate chips or chopped semi-sweet chocolate
- 6 tablespoons heavy whipping cream
- 48 candy eyeballs
For the cookie dough:
For the spiders:
Directions
- In a large mixing bowl, using an electric hand mixer at medium speed, beat together the peanut butter, butter, granulated sugar and brown sugar until smooth and creamy. Add the egg and vanilla extract and mix until fully combined.
- In a separate medium mixing bowl, whisk together the flour, baking soda, baking powder, and salt. Gradually stir this dry mixture into the peanut butter mixture. My dough was quite firm and easy to roll into balls. If yours isn’t, wrap the dough in plastic wrap and refrigerate until firm enough.
- Preheat the oven to 375 °F (190 °C) and line a baking sheet with a piece of parchment paper.
- Place the 3 tbsp of sugar in a small bowl.
- Shape the dough into twelve (you'll do the rest later) 1-inch (31-gram) balls and roll them in the granulated sugar.
- Place the dough balls on the prepared baking sheet, spacing them about 3 inches apart.
- Bake in the preheated oven for about 10-11 minutes or until the cookies develop cracks on the surface, and they’ve browned nicely.
- Right after you take them out of the oven, use the bottom of a rounded teaspoon to make an indentation in the center of the cookies for the spider's body. Don't press so hard that you break through the cookies.
- Remove to a cooling rack after 10 minutes to let cool completely.
- Place the chocolate and cream in a microwave-safe bowl.
- Melt in 30-second increments at half power, stirring after every increment, until melted.
- If it's too thin to pipe right now, let sit until firm enough to pipe spider legs onto the cookies. Mine was good to go immediately.
- Pipe 8 legs onto the 24 cookies using a small round tip, making sure that the legs start inside of the indentation, and not on top of it.
- Switch to a larger round tip and fill in the indentation with ganache and make the spider body a bit rounded by piping over the top of the indentation. They should look 3D and not flat.
- Add on 2 eyeballs per cookie (if the ganache is still too soft to do that, you may need to wait a bit or toss them into the fridge very briefly, but I had no issue with it).
- To store the cookies without the chocolate ganache, store them in an airtight container at room temperature for up to 4 days.
- Once you've added the ganache, I think it's fine to let them sit at room temp for a day, but anything after that, I think it’s best to refrigerate to ensure that the ganache remains safe to eat. They last up to 5 days if you store them in the fridge.
- For freezing, you can either freeze the baked cookies without the chocolate or freeze the cookies after adding the chocolate once it has set. I wouldn't recommend freezing them with the eyeballs on them.
Make the dough:
Make the spiders:
How to store:
Notes
- The cookies in the photos were made with Great Value No Stir Creamy Natural Peanut Butter Spread. It says natural, but it contains added fat and sugar, just like regular peanut butter. If you use actual natural peanut butter, which contains only peanuts and salt, your cookies will be a little thicker and better-looking. Regular peanut butter like Jif and Skippy also work and yield cookies that look exactly like the photos.
- You can replace both types of sugar with coconut sugar.
- Please note that the photographer forgot to do this step. If you like how the cookies look and won't be transporting them, you can skip this step. Read the post to learn more about the benefits of rolling them in sugar.
- For all dietary-friendly options, you might want to make homemade googly eyes. If you're not super sensitive to gluten or dairy, then store-bought could be an option. Just read the ingredients. They typically don't contain dairy or gluten, but you never know.
- For dairy-free: you have to use vegan butter or coconut oil in place of the butter and canned coconut milk or some other plant-based cream sub for the ganache. And make sure your chocolate chips are dairy-free/vegan.
- For vegan: do the above and use an egg sub. I used a chia egg made by combining 1 tablespoon ground chia seeds with 3 tablespoons of water. Stir until gloopy like an egg. Most candy eyeballs aren't vegan so you'll need to make sure own or read the post for other ideas.
- For gluten-free: they came out great with King Arthur Flour Gluten-free Measure for Measure Flour, but other 1:1 subs for all-purpose flour could possibly work. But they might be a bit gritty! They were with Bob's Red Mill 1-to-1 Gluten-free Baking Flour. With King Arthur, they weren't gritty at all.
Join over 12,400 readers and sweeten up
your inbox with new posts for free!
This subscription is free of charge and can be canceled at any time.


2 comments on “Spider Cookies” — Add one!
These are super cute. I used to make this recipe all the time. Love peanut butter cookies. Wonder if I could turn them into a Christmas decoration somehow. Hey Erin! Hope you and the family are doing well!
Hello! It was nice to hear from you and I hope you all are doing well, too. When I heard all the notifications from your comments while I was making dinner, I was so annoyed because I thought it was this mentally unstable person or possibly a troll who has been harassing me. I was SO happy to see it was you. 😂 That’s funny you mention a Christmas version of these cookies because I thought the same. It looks like other people just use red and green sprinkles. I saw that Supernatural has red and green melting morsels and red and green sprinkles. They’d be perfect! I unfortunately have no way of getting them to try them out, though. Maybe in August when we visit the US next. Thanks for all your comments! :)