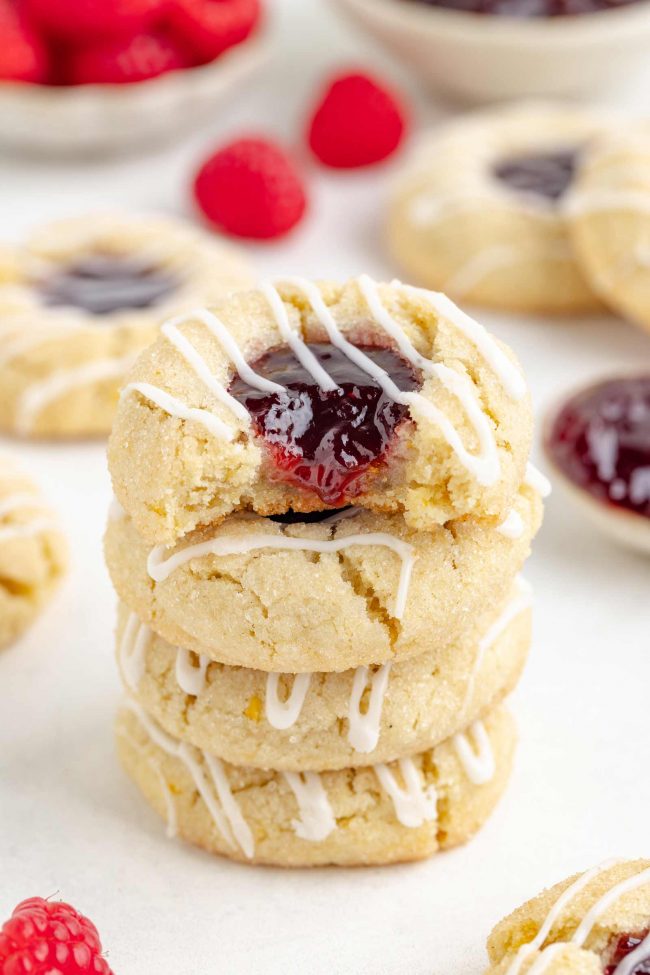
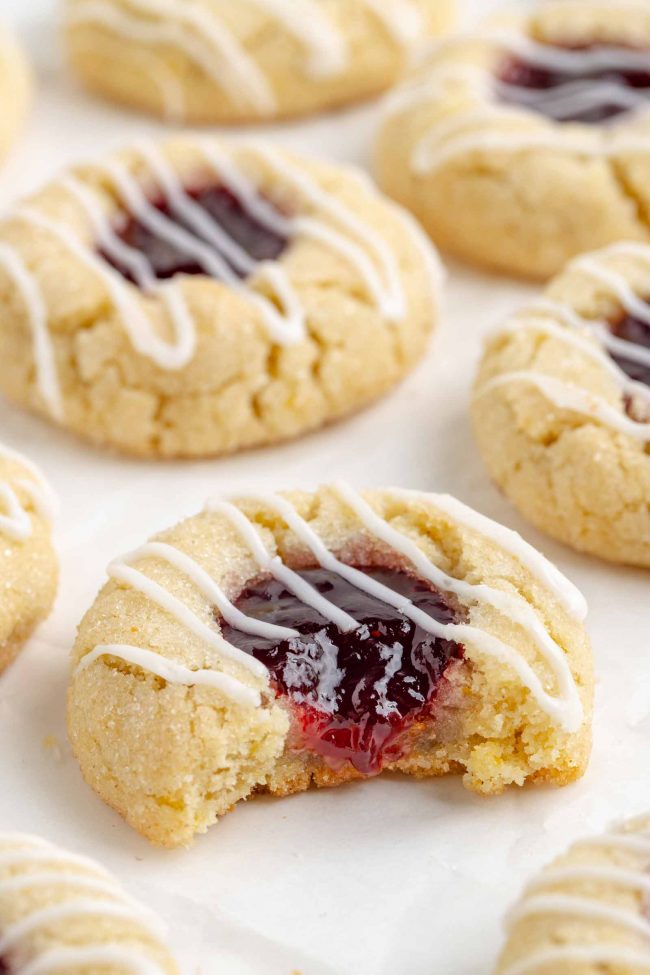
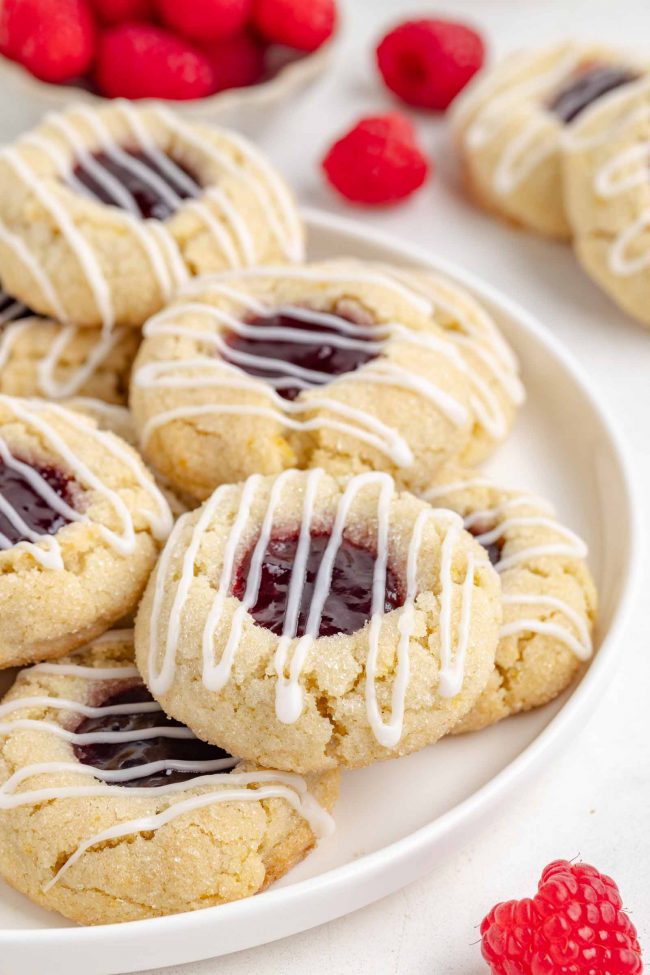
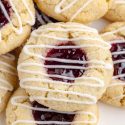
These raspberry thumbprint cookies are a classic treat that combine a buttery, chewy and tender cookie base with a burst of raspberry jam. Perfect for the holidays, the summer, or as a sweet surprise for back-to-school lunchboxes, these cookies are sure to become a favorite. They can also be made with all-purpose flour or with gluten-free flour.
Whether you’re baking for a special occasion or just want a quick treat, these easy thumbprint cookies fit the bill.
The addition of lemon zest and extract in the dough and glaze adds a refreshing twist that elevates the flavor to a whole new level. You don’t want to skip it!
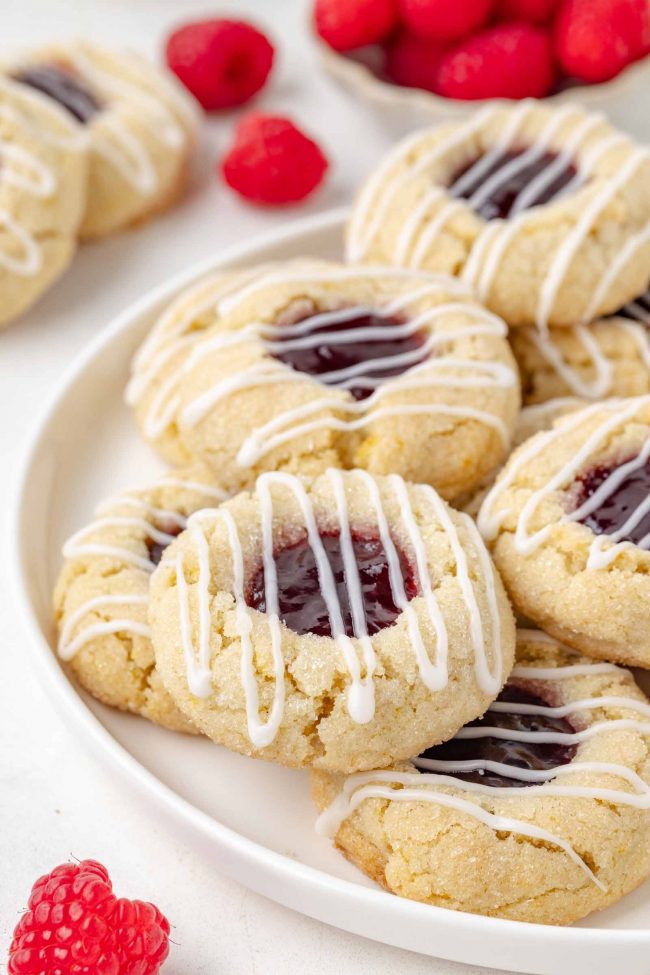
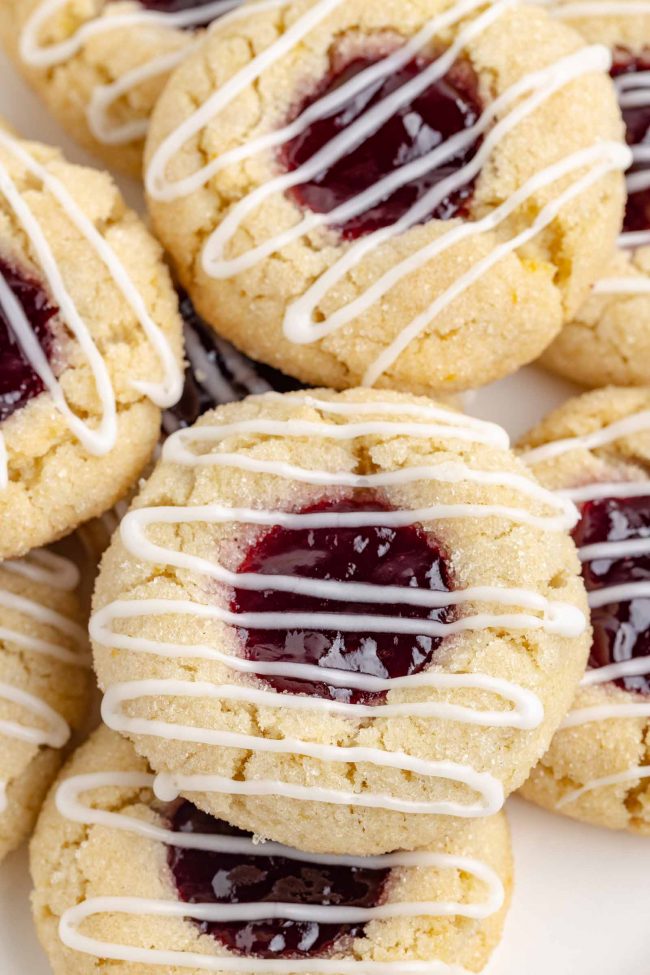
And when it comes to Christmas baking recipes, these cookies shine as a festive addition. Their bright raspberry centers and delicate powdered sugar glaze make them a beautiful and delicious choice for Christmas cookie trays.
When I make these around the holidays, I love to use almond extract to give them a more traditional festive flavor.
They also freeze great, so they’re perfect to make ahead of time, meaning you can be prepared with cookies for cookie swaps throughout the season. :)
Ingredients
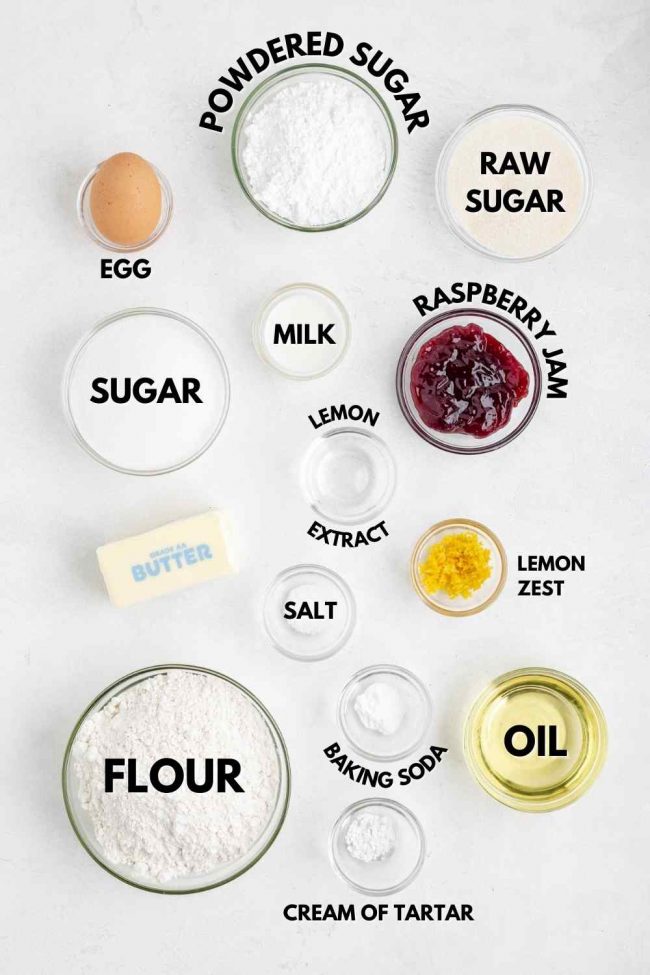
- All-purpose flour or gluten-free flour – for gluten-free, use King Arthur Flour Gluten-free Measure for Measure flour.
- Cream of tartar – acts as an acid that stabilizes baking soda, ensuring the cookies rise properly. This helps maintain the right texture and prevents the cookies from spreading too much.
- Baking soda – not baking powder!
- Salt – enhances the flavors and balances the sweetness in the cookies.
- Unsalted butter – adds richness, flavor, and a tender texture to the cookies.
- Vegetable or canola oil – keeps the cookies moist and soft.
- Granulated sugar – sweetens the cookies and helps with browning. No sub for this.
- Powdered sugar – gives the cookies a delicate texture and is also used in the glaze for a smooth finish.
- Egg – I, unfortunately, didn’t think to try out an egg-free version of this cookie, and I’m currently without a kitchen. I think an egg replacer would work since you only need 1 egg, but I can’t be sure without trying it.
- Lemon zest – adds a bright, citrusy flavor that pairs perfectly with the raspberry jam.
- Lemon extract – enhances the lemon flavor in both the dough and the glaze.
How to make them
The full recipe is at the bottom of this post. But here’s an overview of how you make them.

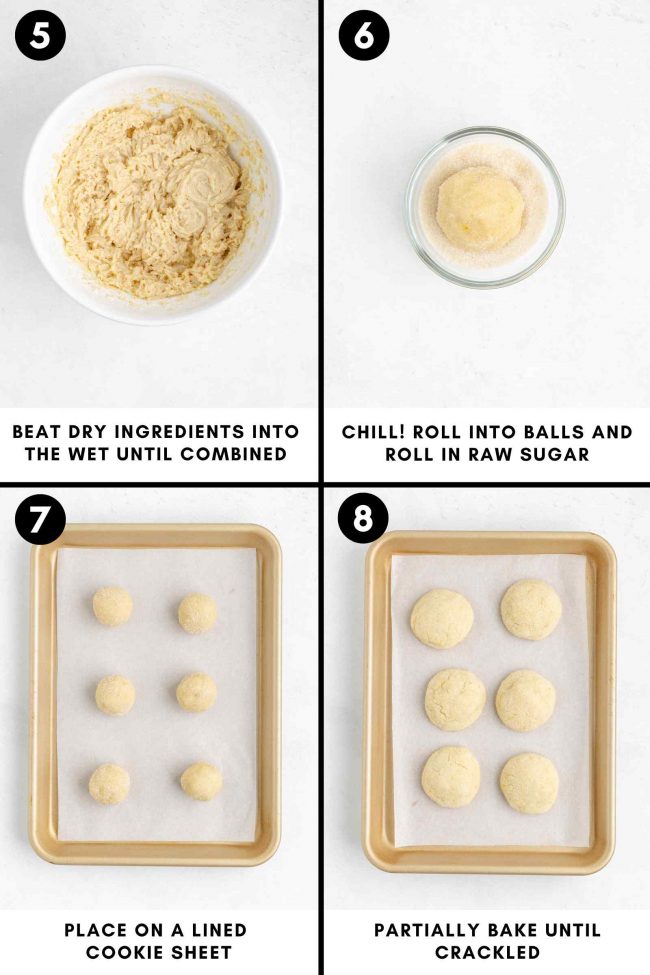
Rolling the dough balls in sugar does add an extra step, but raw sugar creates a nice contrast between the soft, tender cookie and the crunchy exterior, adding a pleasant texture to each bite.
It also gives the cookies a sparkly, festive look, which is especially nice for holiday baking.
But the main reason I recommend it is that it helps prevent spreading. It creates a slight barrier on the surface, helping the cookies hold their shape better during baking.
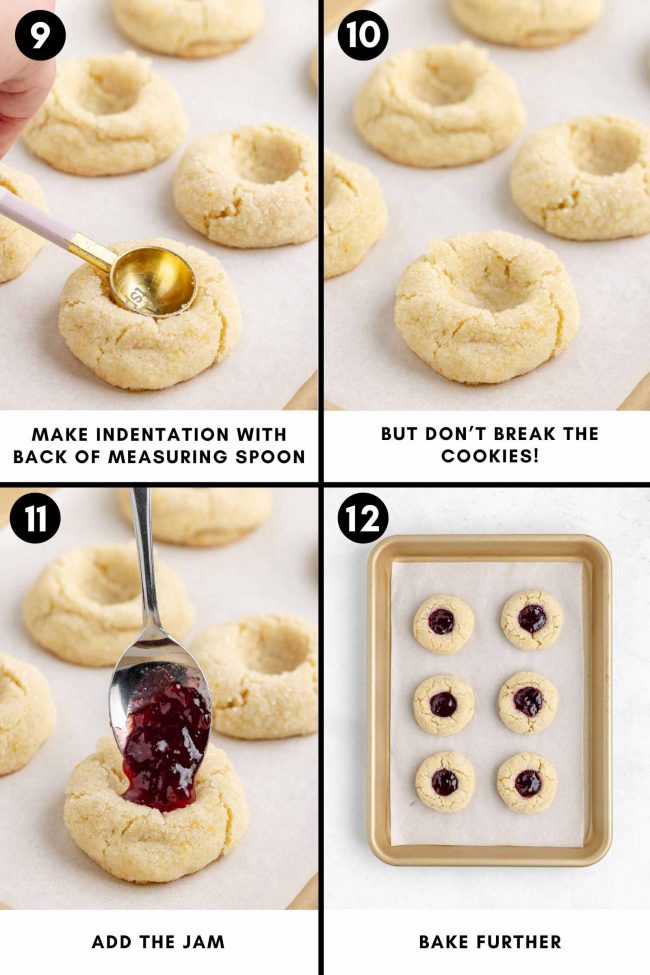
If you’re wondering why you don’t add the jam right at the beginning, I explain why below.
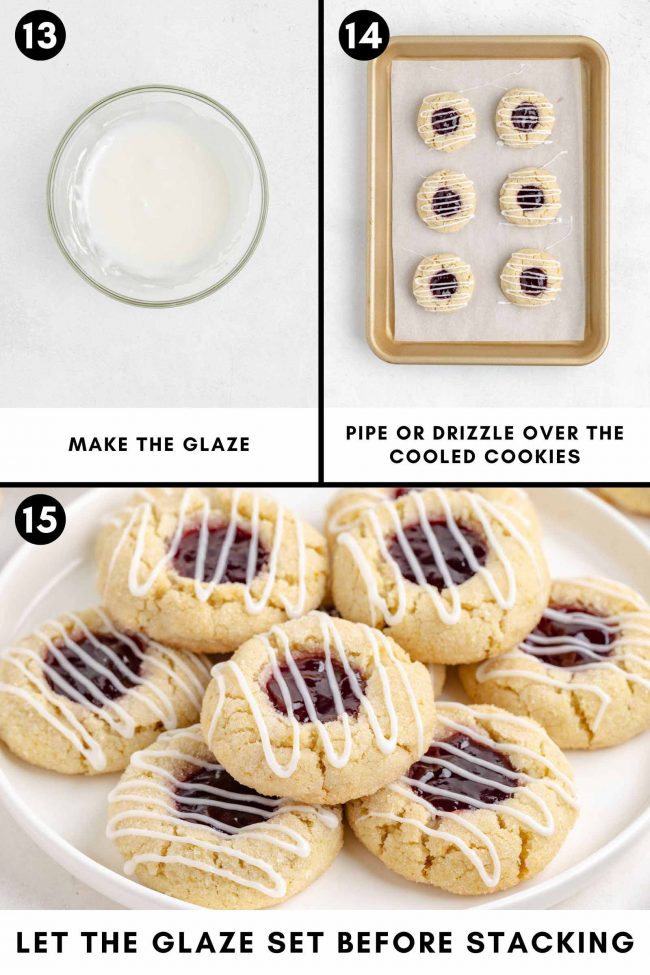
I really don’t recommend omitting the glaze. It makes the cookies!
Why not just add the jam at the beginning?
That would be more convenient! But there are loads of reasons not to.
Partially baking the cookies allows the dough to start cooking evenly before adding the jam. This can help the cookies maintain their shape and texture, ensuring the final product has a consistent and appealing appearance.
It also gives the cookies a chance to develop a slight crust before adding the jam. This can improve the overall texture of the cookies, giving them a nice contrast between the soft, jam-filled center and the slightly crisped edges.
Adding this extra step also allows the cookies to develop a rich, buttery flavor and a better texture. When you add the jam later and finish baking, the flavors meld together more harmoniously, as the dough has already started to caramelize and develop depth.
Also, if you add the jam before the initial baking, it can cause the jam to sink too deeply into the dough or spread too much, resulting in uneven or messy cookies.
Variations
Thumbprint cookies are incredibly versatile, allowing you to experiment with different flavors and ingredients to suit your taste or dietary needs. For a delicious twist on the classic raspberry thumbprint, you might want to try using other types of jam and preserves such as Peach Jam, Strawberry Preserves, Cherry Preserves or blueberry jam.
I don’t know if Rigoni di Asiago is easy to get in the US, but if you can find it, their apricot jam is my absolute favorite! All of their jams are sweetened with apple juice and have a super intense fruity flavor.

If you don’t want to use the powdered sugar glaze, you could drizzle melted chocolate over the cooled cookies. A simple white or dark chocolate drizzle can add an elegant touch and complement the sweet raspberry jam.
Sprinkles are another fun and easy way to add some flair to your cookies. Before the glaze sets, sprinkle a few colorful sugar crystals or nonpareils on top to give your cookies a bit of sparkle.
How to make ahead and store
The dough can be prepared and stored in the refrigerator for up to three days before baking.
If you want to prepare further in advance, the dough balls can be frozen on a baking sheet until solid, then transferred to a freezer-safe container. When you’re ready to bake, just thaw the dough in the refrigerator overnight, then proceed with rolling and baking.
After baking, these raspberry cookies can be stored in an airtight container at room temperature for up to 4 days. If you prefer to keep them longer, store them in the refrigerator for up to a week. They’re chewier when cold, so I keep mine refrigerated from the beginning.
For even longer storage, freeze the cookies, with or without the glaze, in a single layer on a baking sheet, then transfer them to a freezer-safe bag or container. They will keep in the freezer for up to 3 months. For more details, here’s how to freeze cookie dough.
To enjoy, thaw at room temperature for about 30 minutes.
Tips for success
Here are some tips to ensure your raspberry thumbprint cookies turn out perfectly every time:
- Chill the dough – chilling the dough is crucial for maintaining the shape of the cookies and preventing them from spreading too much during baking.
- Don’t skip the lemon zest – the lemon zest adds a bright, fresh flavor that complements the raspberry jam beautifully. It’s worth getting out that zester!
- Measure the flour correctly – too much flour can make the cookies dry and crumbly. Spoon the flour into your measuring cup and level it off for the most accurate measurement.
- Create deep indentations – when making the thumbprint in the center of the cookies, press deep enough to hold a good amount of jam but not so deep that you break through the cookie.
- Cool completely before glazing – let the cookies cool completely before adding the glaze to prevent it from melting and running off.
I hope you’ll enjoy these raspberry thumbprint cookies! If you try them out, I’d love to hear your thoughts below in the comments. Thanks! :)

Raspberry Thumbprint Cookies
- Prep Time:
- Cook Time:
- Ready in:
- Yield: 24
Ingredients
- 2 1/4 cups (281 grams) all-purpose flour or for gluten-free, use King Arthur Flour Gluten-free Measure for Measure Flour
- 1/2 teaspoon cream of tartar
- 1/2 teaspoon baking soda
- 1/2 teaspoon salt
- 1/2 cup (113 grams) unsalted butter, softened
- 1/2 cup vegetable or canola oil
- 1/2 cup (100 grams) granulated sugar
- 1/2 cup (60 grams) powdered sugar
- 1 large (50 grams, out of shell) egg, room temp
- 2 tablespoons lemon zest
- 1 teaspoon lemon extract1
- 3 tablespoons raw sugar for rolling
- 3-4 tablespoons raspberry jam
- 1/2 cup (60 grams) powdered sugar
- 1/4 teaspoon lemon extract
- 1-2 tablespoons milk, water or lemon juice
Cookies:
Filling and topping:
Directions
- In a large bowl, whisk together the flour, cream of tartar, baking soda and salt. Set aside.
- In another large mixing bowl with an electric hand mixer, beat together the butter, oil, granulated sugar and powdered sugar until well blended.
- Add the egg, lemon zest, and lemon extract and beat until fully incorporated.
- Gradually beat in the dry mixture to the wet mixture, mixing just until combined. Be careful not to overmix; the dough should be light and fluffy. It’ll be too wet to form into balls at this point.
- Chill for at least 6 hours. Overnight or 2-3 days also works.
- Line a baking sheet with a piece of parchment paper. Preheat the oven to 375 °F.
- Place the raw sugar in a small bowl.
- Roll the dough into 24 30-gram balls.
- Roll into the raw sugar and place the balls on the prepared baking sheet. Don't press down!
- Bake for 8-12 minutes or until the top center no longer looks wet.
- Remove from the oven and use the back of a 1-teaspoon measuring spoon to create an indentation. I pressed down almost all the way (but don't break through the cookie!).
- Fill with about 1/2 to 3/4 teaspoon jam.
- Put back in the oven and bake for another 4-7 minutes. They'll have crackled a bit.
- Remove from the oven and let cool completely on the baking sheet, about 2 hours.
- Mix the powdered sugar with the lemon extract and gradually add 1-2 tablespoons of milk until you achieve a drizzling consistency.
- Pipe over the cookies. Let the icing harden for about 2 hours or until firm. If you're in a hurry, you can refrigerate them.
- After cooling, these raspberry thumbprint cookies can be stored in an airtight container at room temperature for up to 4 days. If you prefer to keep them for longer, store them in the refrigerator for up to a week. I prefer them refrigerated as they're chewier when cold. They can also be frozen for up to 3 months.
How to store:
Notes
Join over 12,400 readers and sweeten up
your inbox with new posts for free!
This subscription is free of charge and can be canceled at any time.


2 comments on “Raspberry Thumbprint Cookies” — Add one!
1 comment is awaiting moderation!
I have to be egg free. what is your best guess as to an egg replacer?
I think chia eggs would make them look not so nice, and I don’t think the flavor of flax eggs would be nice in these cookies. Do you have Bob’s Red Mill GF vegan egg replacer? I like that one and it’s flavorless! I think it’d likely work here, but I haven’t tried it.