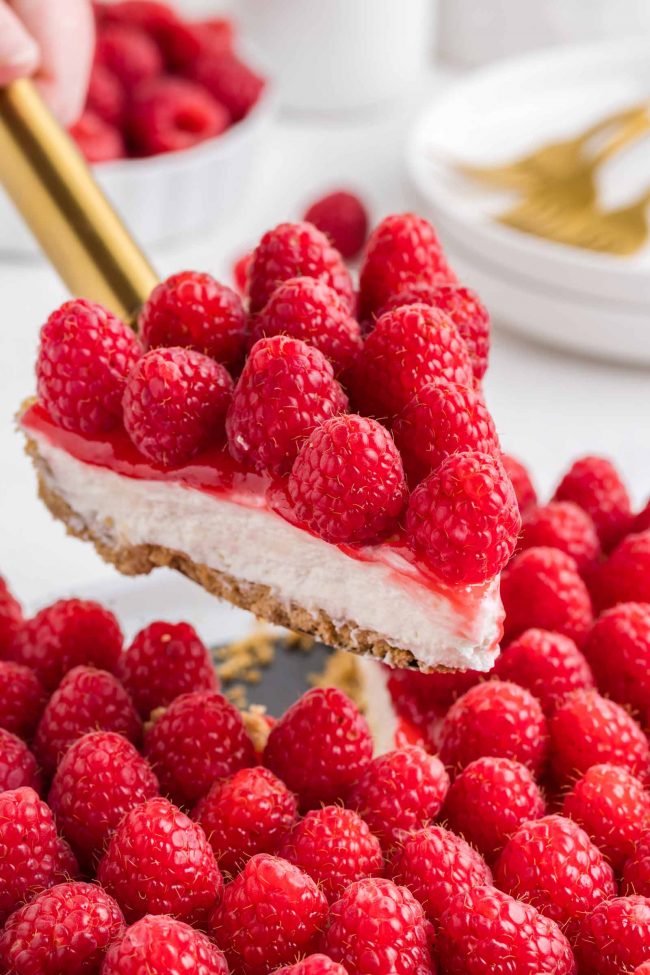
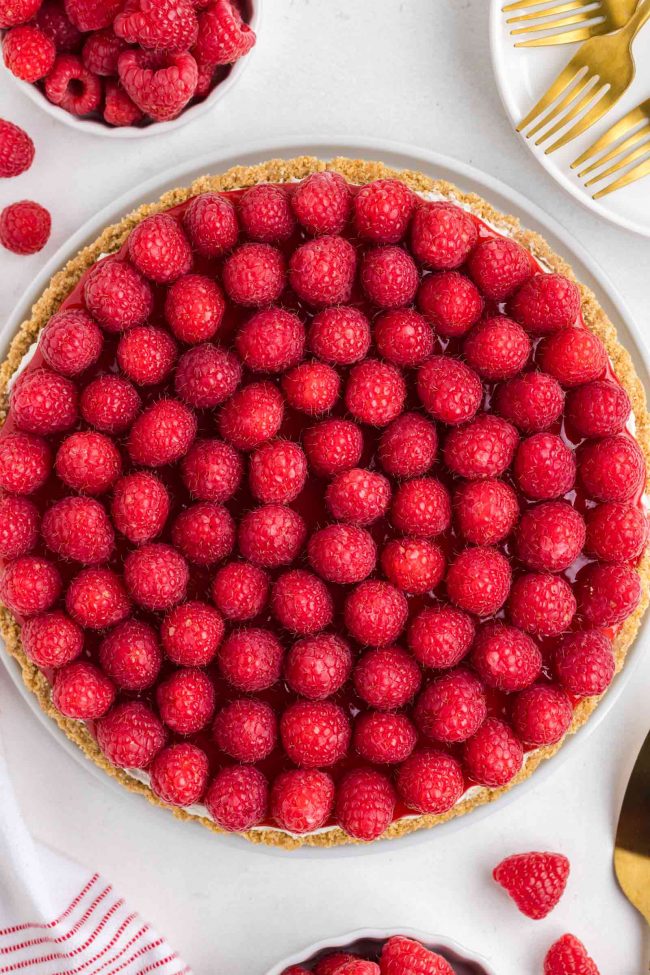
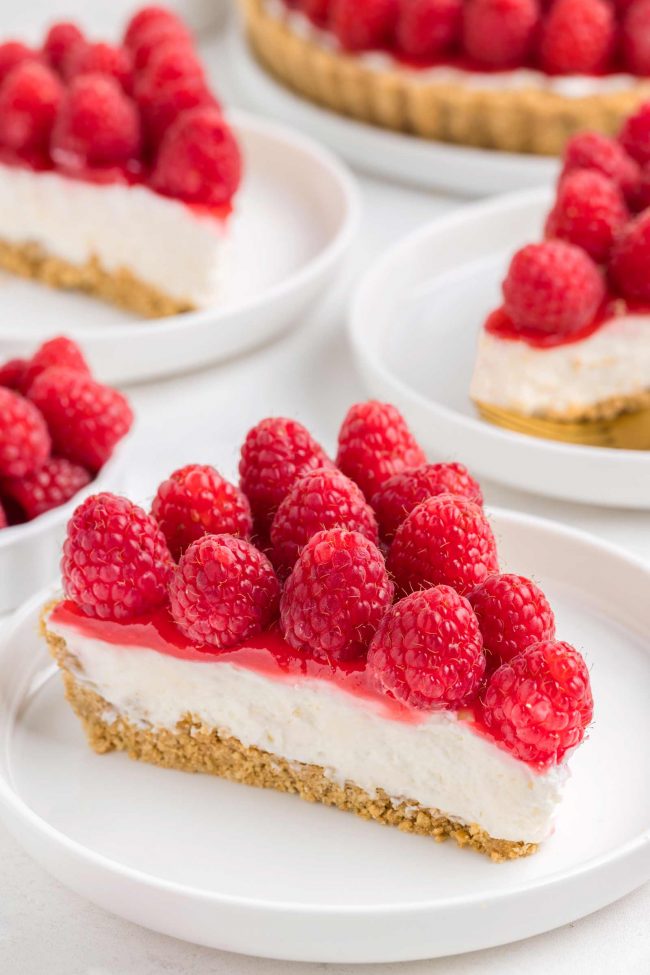
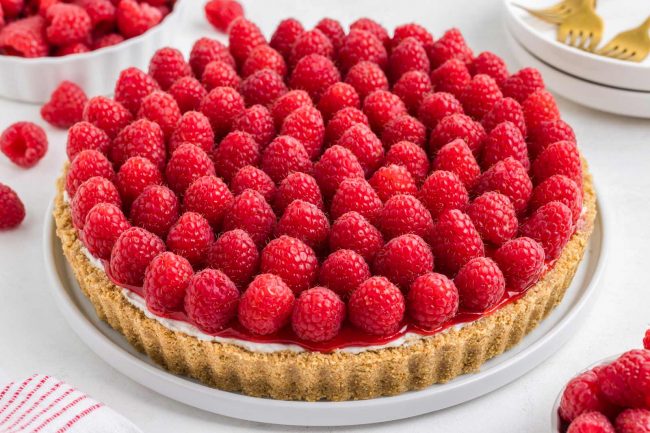
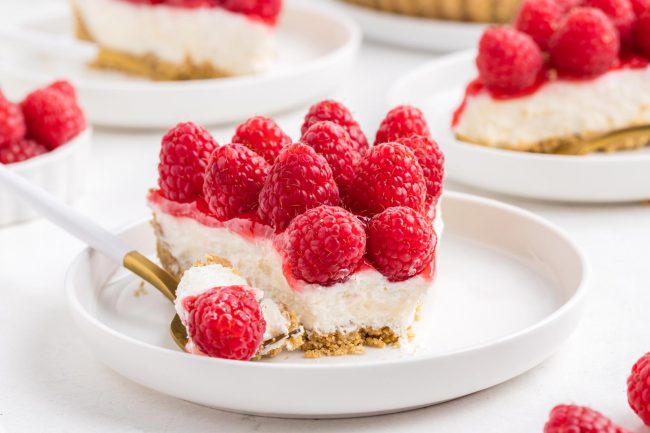
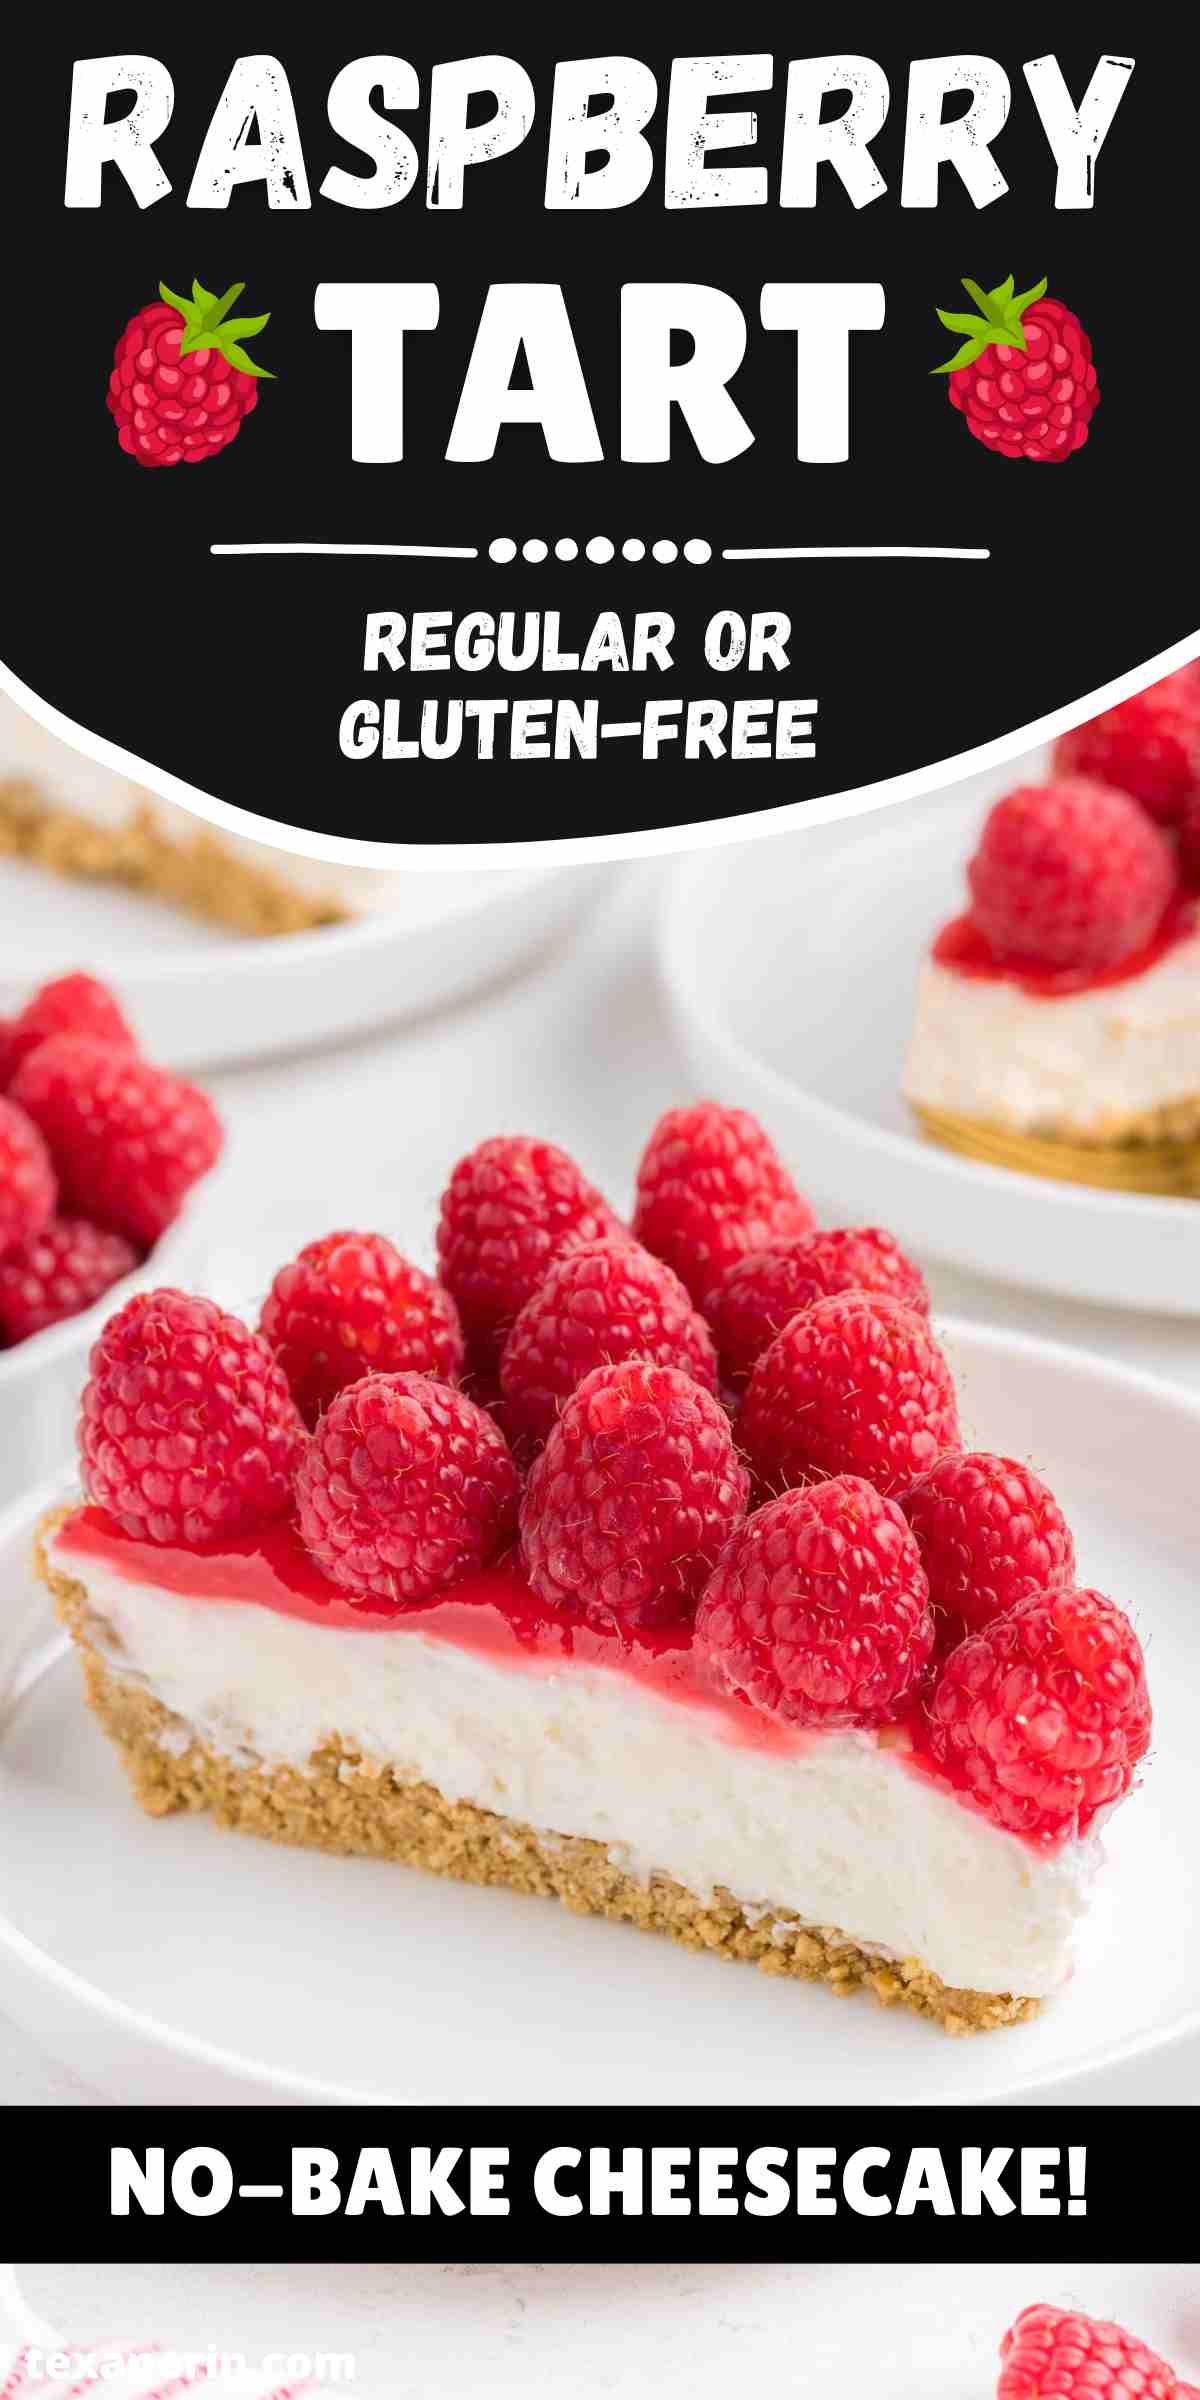
This raspberry tart is the ultimate no-bake dessert, combining a graham cracker crust, cheesecake filling, and a luscious raspberry sauce that’s quickly made on the stovetop. It’s topped with fresh raspberries for a stunning finish that’s perfect for any occasion. This easy tart with raspberries can be prepped ahead of time and made with regular, whole wheat or gluten-free graham crackers.
This is the recipe I referenced in my Cheesecake Pecan Pie Bars recipe. The one my husband asked me never to make again because it’s too irresistible.
My photographer’s husband also crowned this raspberry tart as his new favorite, dethroning the pecan pie bars.
I can’t pick a favorite. Caramel pecan anything is always great, but sometimes, I’m in the mood for something fruity.
This raspberry tart recipe is based on my Cheesecake Tart that has strawberries on top. If you added some mint leaves on top, it’d look great for Christmas.
I had actually intended to do the same with this raspberry tart, but I forgot. 🙃
Either way, this raspberry tart is a showstopper that’s guaranteed to impress — and disappear quickly!
Ingredients
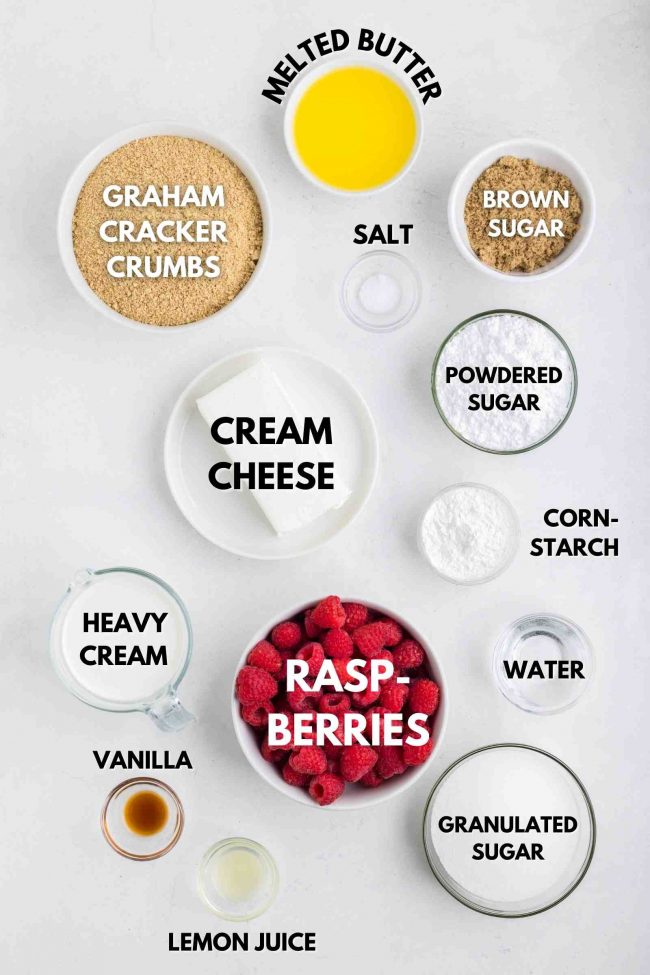
Here’s a look at the ingredients needed to make this tart.
Can I use a different crust?
A chocolate crust would be great! This Mint Chocolate Tart is also made in a 9″ tart pan and the crust is like a homemade chocolate Oreo cookie crust.
But you don’t need Oreos or to make chocolate cookies first. It only takes a few minutes to mix together, but you do have to bake it.
If you don’t want to bake it, you can use 62 grams of oat flour in place of the regular flour called for in the recipe.
Store-bought graham cracker crusts are another good option. They’re quick and convenient.
If you want to make a homemade graham cracker crust in a pie pan, then use the crust recipe from my Spider Pie.
Then top with the filling and topping from this raspberry tart. You’ll have enough cheesecake filling and raspberry sauce.
As tempting as a flaky pie crust might seem, it’s not ideal. It can get soggy with the cheesecake filling, so I’d skip it for this tart.
A flaky crust may not hold together as well with a no-bake filling compared to firmer crust options like graham cracker or cookie crusts. The no-bake filling relies on the crust for stability, and a flaky crust might not provide enough support.
Also, while a flaky crust is buttery and delicious, the mild sweetness and crumbly texture of graham cracker or cookie crusts often better complement the creamy and slightly tangy flavor of no-bake cheesecake.
Can I omit the raspberry sauce?
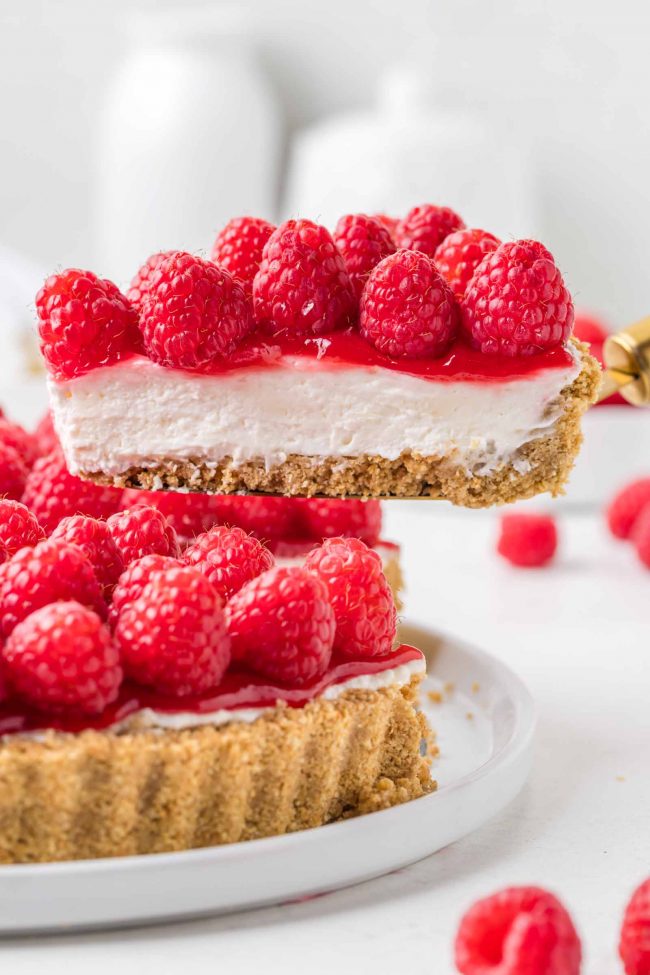
You can definitely omit the sauce. I just thought calling this a raspberry tart simply because it has raspberries plopped on top was kind of silly.
So I added the sauce, and I’m really glad I did because it’s an incredible addition.
Can I use a different fruit for the sauce?
Some types of fruit will require more or less sugar and cornstarch. I recommend finding a sauce that already calls for the type of fruit you’d like to use.
The blueberry filling from these Blueberry Tartlets would be perfect for this tart!
The cream
For the best results, use heavy cream in this recipe.
Whipping cream can be used as a substitute if you don’t have access to heavy cream as it’s not always available in other countries, but the filling will be softer, making it more difficult to cut and serve.
How to make
Here’s an overview of how to make this raspberry tart. For the full instructions, scroll to the recipe box at the bottom of the page.
The crust
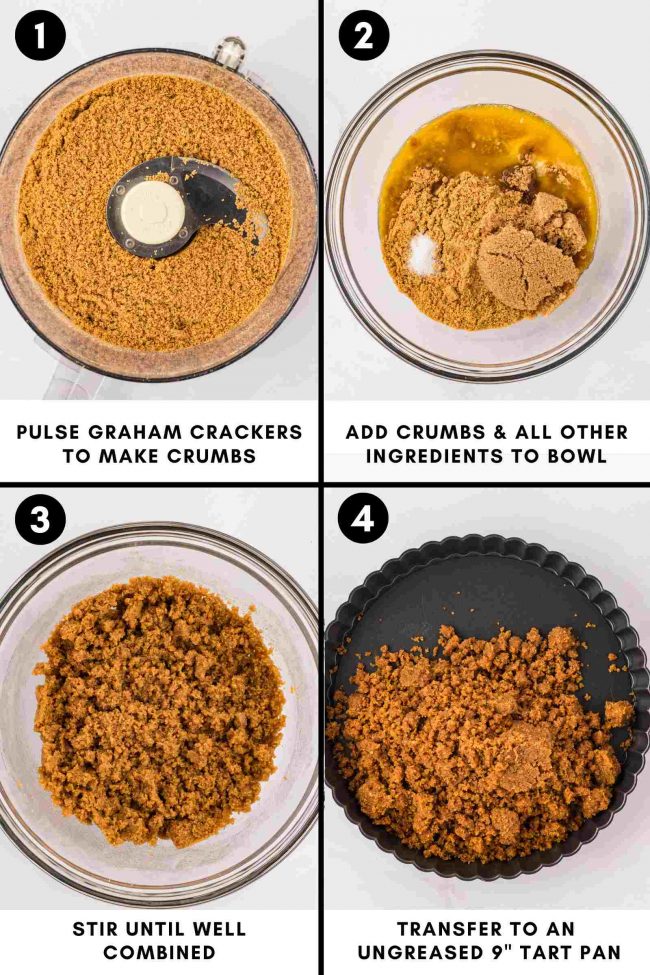
Make sure to freeze the crust before filling!
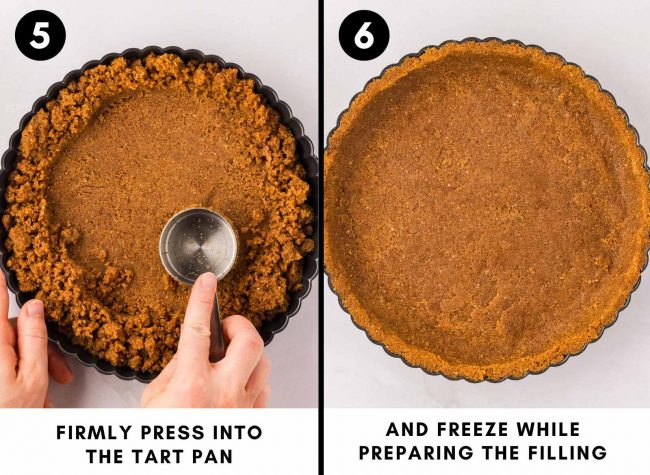
The filling will seep into the crust otherwise.
The filling

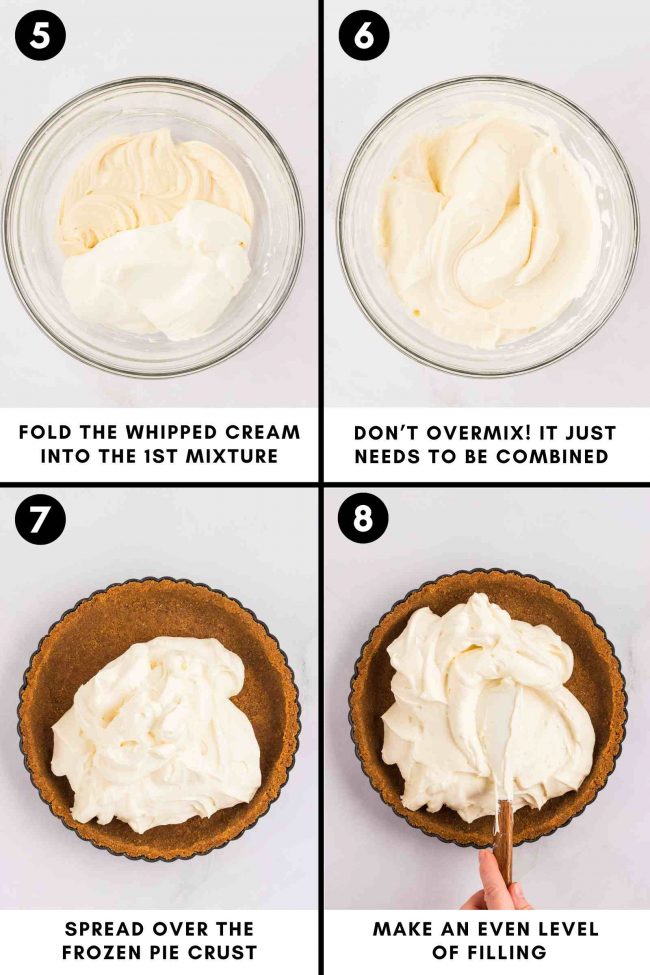
Make sure you don’t beat the cream so long that it turns into butter.
The sauce
If you make this ahead of time, just gently reheat on the stovetop until it’s runny enough to pour over the filling.
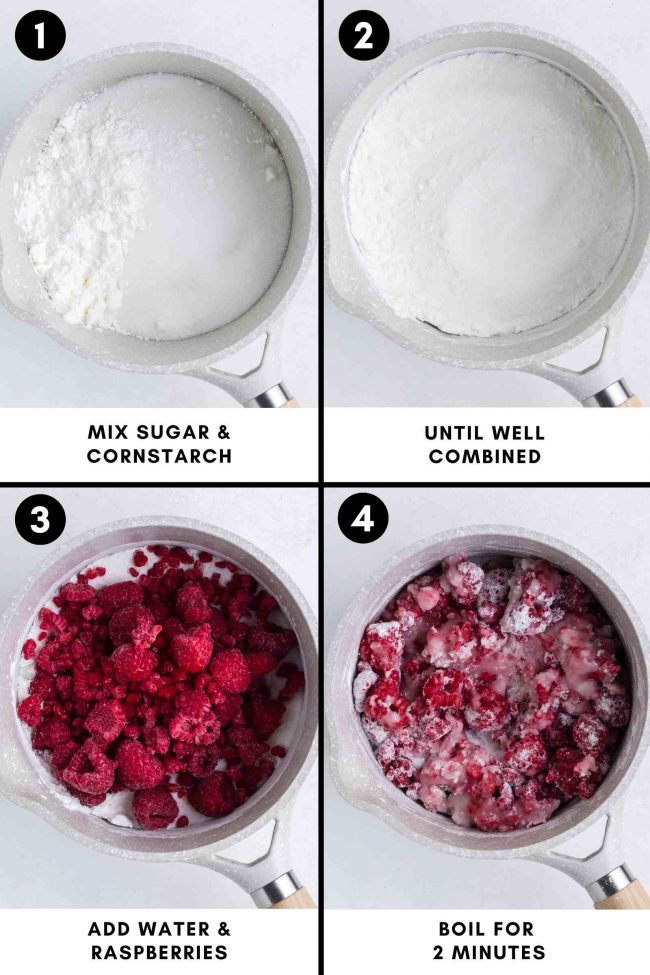
Do not pour it on while it’s still warm!
I recommend using a tart pan with a removable bottom. It makes getting the tart out so much easier. You don’t want to spend all that time making something only for it to fall apart at the last second.
What if I don’t have a tart pan?
A 9″ (23 cm) springform pan with removable sides is a great substitute. It makes it easy to remove the tart and keeps everything intact.
Line the pan with parchment paper so you can lift the tart out easily after it sets. Just press the crust over the bottom as it won’t work to push the crust up the sides.
Can I bake the crust?
No-bake graham cracker crusts typically contain a higher amount of butter compared to baked crusts. When refrigerated, the butter solidifies, creating a barrier that prevents moisture from the filling from seeping into the crust.
No-bake crusts are designed to stay firm without baking so I wouldn’t recommend it for this graham cracker crust.
Tips
- Use cold cream – cold cream whips up faster and holds its shape better.
- Press the crust firmly – this helps it hold together when slicing. When processing the graham crackers, you want a crumbly graham cracker mixture, not a fine powder.
- Add the cheesecake filling immediately – don’t make the filling in advance, chill and spread it later.
- Raspberries – I’ve used both fresh and frozen in the sauce with identical results.
- Cool the sauce completely – if it’s warm, it’ll melt the filling.
- Strain the seeds from the raspberries – use a food mill or fine-mesh sieve. I didn’t do this the first time I made it and thought that the seeds look like little bugs, so definitely strain the seeds. 😆
How to make ahead, store and freeze
- Crust – prepare the crust and freeze it for up to 2 months. Once the crust is frozen, transfer it to a large Ziploc bag for storage. You can also refrigerate the crust for up to 3 days before filling.
- Raspberry sauce – this can be made up to 4 days in advance.
- Filled tart – refrigerate the assembled tart (without the sauce or fresh raspberries) for up to 2 days. It’d be best to cover it with plastic wrap, but I’d let the filling firm up first in the fridge so that the cheesecake filling doesn’t stick too badly to the plastic wrap. Add the sauce and fresh raspberries on the day of serving to ensure the best texture and appearance.
- Fully assembled tart – cover the tart tightly with plastic wrap and refrigerate for up to 2 days. For longer storage, freeze the tart without the fresh raspberries for up to 2 months. Add the fresh raspberries after thawing.
- Freezing tips – wrap the tart tightly in plastic wrap and foil to avoid freezer burn. To thaw, place the frozen tart in the refrigerator for 2-6 hours. The exact time depends on how cold your freezer and fridge are, your tart pan, and so on.
As an Amazon Associate, I earn from qualifying purchases. For more info, see my disclosure.
Gluten-free
To make this raspberry tart gluten-free, you can use Pamela’s Gluten-free Honey Grahams or Simple Mills Honey Cinnamon Seed & Nut Flour Sweet Thins for the crust. Both are delicious but a bit pricey.
I found these gluten-free Schar Honeygrams Graham Style Crackers at Walmart for under $4, but you’d need to buy two packages for the amount needed for the tart crust.
I haven’t tried them, but they have great reviews, and I’ve seen other people use them in graham cracker crusts.
Vegan option
If you’re looking for a vegan option, I have this Vegan Raspberry Coconut Tart that would work well with the raspberry sauce in this recipe.
I also have many other vegan cheesecake recipes that are perfect for the season like this Vegan Caramel Pecan Cheesecake.
But, unfortunately, there’s no way to convert today’s recipe to be vegan, as vegan cream cheese works differently than dairy cream cheese. And then there’s the issue of the cream.
More cheesecake tarts
I hope you’ll enjoy this raspberry tart! If you make it, I’d love to hear your thoughts in the comments below. Thanks! :)
Raspberry Tart

- Prep Time:
- Cook Time:
- Ready in:
- Yield: 8-12
Ingredients
- 2 cups (240 grams) graham cracker crumbs (from about 16 full sheets) or for gluten-free, use 240 grams Pamela’s Gluten-free Honey Grahams or Simple Mills Honey Cinnamon Seed & Nut Flour Sweet Thins
- 1/3 cup (66 grams) brown sugar or coconut sugar
- 1/4 teaspoon salt
- 1/2 cup (113 grams) unsalted butter, melted
- 8 ounces (225 grams) cream cheese, room temp1
- 3/4 cup (90 grams) powdered sugar
- 1 teaspoon freshly squeezed lemon juice
- 1/2 teaspoon vanilla extract
- 1 cup (236 ml) cold heavy cream
- 1 cup (200 grams) granulated sugar
- 3 tablespoons (30 grams) cornstarch
- 3 tablespoons water
- 1 teaspoon vanilla extract
- 1 1/2 cups (7 oz / 200 grams) fresh or frozen raspberries
- 3 cups (14oz / 400 grams) fresh raspberries
For the crust:
For the filling:
For the sauce:
For topping:
Directions
- Pulse the graham cracker
- In a medium mixing bowl, stir together the graham cracker crumbs, brown sugar, and salt until they're well combined.
- Stir in the butter until well combined.
- Press onto the bottom and up the sides of an ungreased 9” tart pan. Pat it as evenly as you can get it. Freeze the crust while you prepare the topping. Once frozen, you can place the tart crust in a large Ziploc bag for up to 2 months.
- Using a hand mixer or a stand mixer with a paddle attachment, beat the cream cheese and powdered sugar until smooth and creamy.
- Beat in the lemon juice and vanilla until combined.
- In a separate medium or large mixing bowl, use a hand mixer or a stand mixer with the whisk attachment to beat the heavy cream. Start on low so it doesn't fly everywhere, and gradually increase the speed to high. Continue beating until you have stiff peaks. But don't overmix, or it'll break down into butter or can turn the filling soggy later on.
- Gradually fold the whipped cream into the cream cheese mixture.
- Transfer the cheesecake filling to the frozen crust. Evenly spread it out.
- Chill for at least 2+ hours before topping it with the sauce, which you should make about 1-2 hours before serving. You can pop the sauce in the freezer, stirring occasionally, to speed things up if you need to.
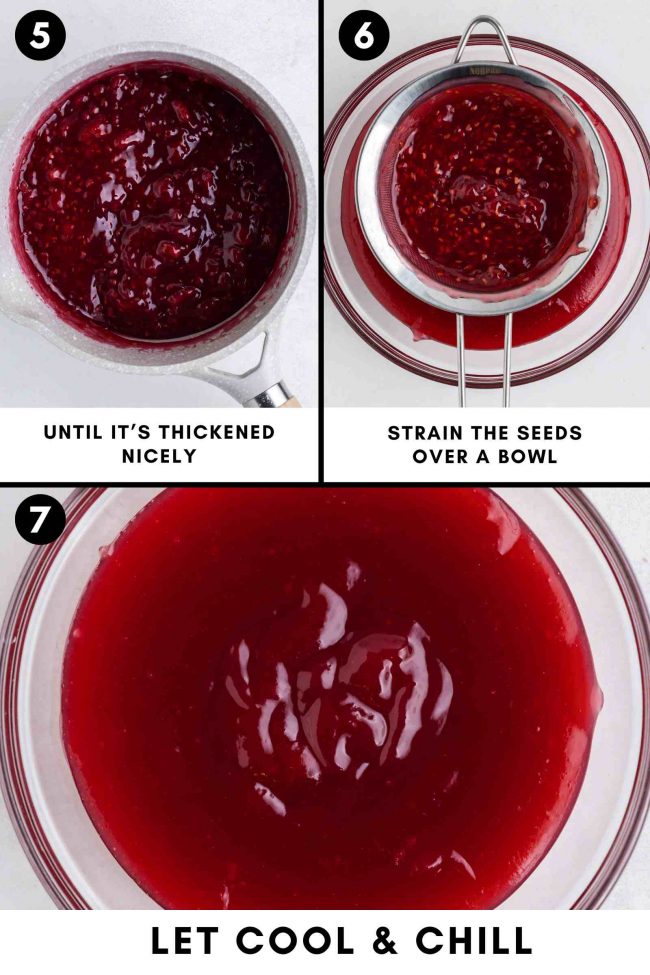
- In a small saucepan over medium heat, mix the sugar and cornstarch. Add the water and 1 1/2 cups of raspberries, stirring to combine. Bring the mixture to a boil, then cook, stirring continuously, for about 2 minutes or until it thickens. Stir in the vanilla.
- Strain the seeds using a food mill or fine-mesh sieve. Pour into a bowl and refrigerate until fully chilled, about 1-2 hours. This can be made up to 4 days in advance.
- On the day of serving, top the tart with the raspberry sauce.
- Rinse and pat the raspberries dry with paper towels. Cover the top with fresh raspberries.
- Cover the tart tightly with plastic wrap and refrigerate leftovers for up to 2 days. For longer storage, freeze the tart without the fresh raspberries for up to 2 months. Add the fresh raspberries after thawing.
Prepare the crust:
Prepare the filling:
Make the sauce and decorate:
Notes
- If you're outside the US or Canada, your cream cheese likely comes in small tubs meant for spreading on toast, rather than the brick-style blocks available in North America. To get the 8 ounces (225 grams) required for this recipe, purchase a 300-gram tub of cream cheese. Store brands like those from Aldi, Lidl, etc. work just as well as Philadelphia. Place the cream cheese in the middle of a clean tea towel or cheesecloth (avoid using paper towels), and gently press out the excess liquid until you’re left with 225 grams of cream cheese.


2 comments on “Raspberry Tart” — Add one!
1 comment is awaiting moderation!
YUM! I made this raspberry tart for a dinner party, and it was a hit. I should have made 2 because it just wasn’t enough! Everyone went home with the recipe. We were OBSESSED! Thank you. 😍
You’re welcome! That’s so great to hear. I’m so happy everyone liked it so much! 2 tarts sounds like a very nice idea. 😅😅 Thanks for your comment. :)