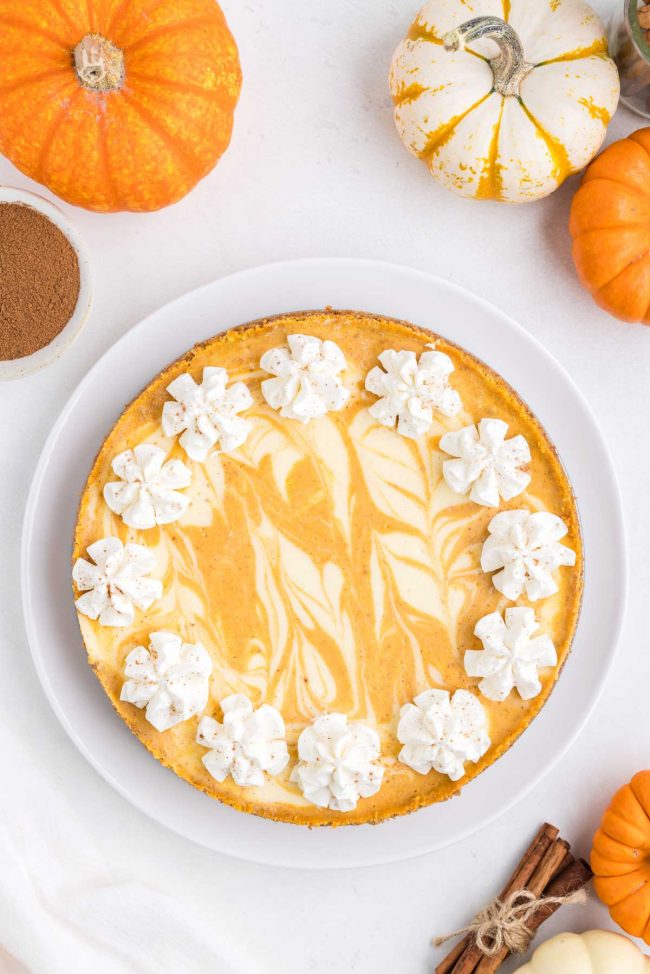
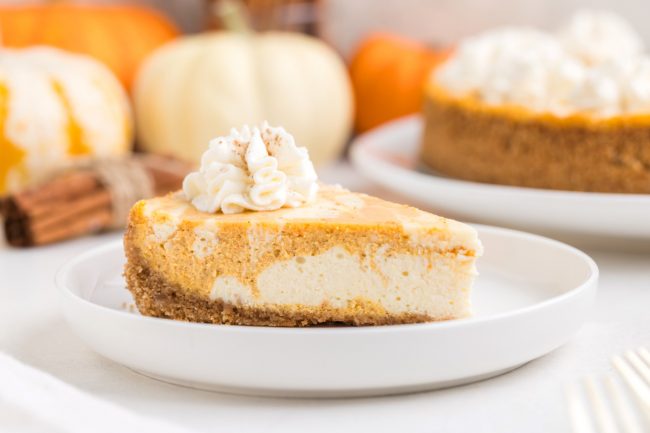
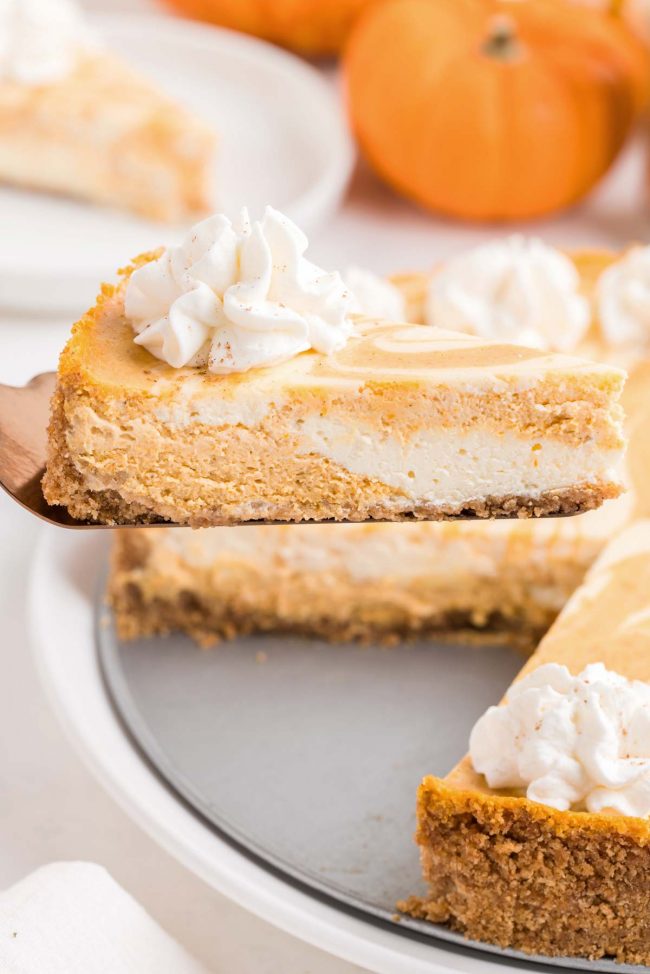
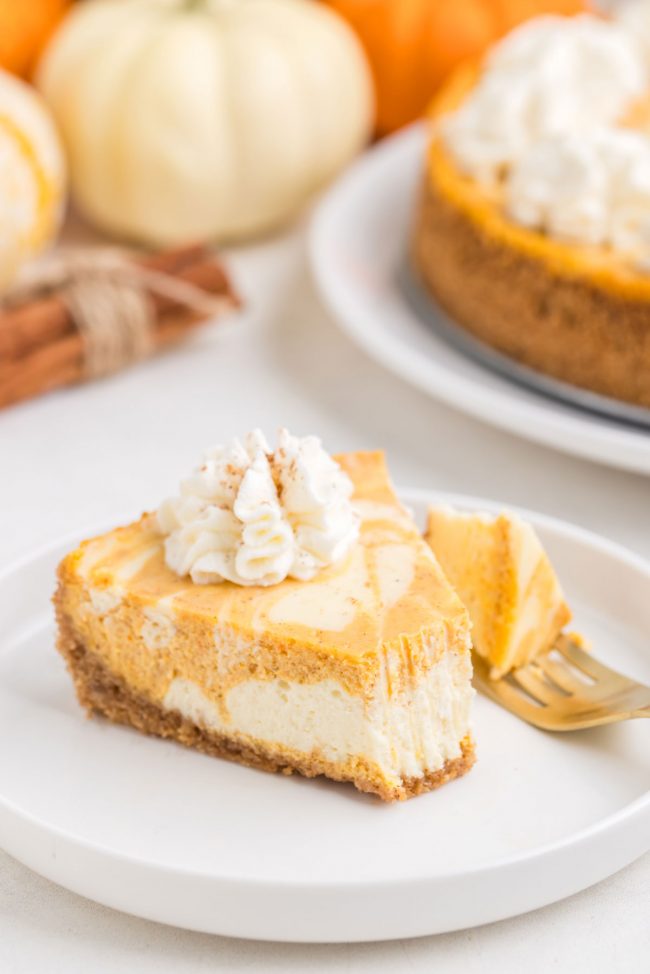
This pumpkin swirl cheesecake has an easy graham cracker crust, and you don’t have to make two separate cheesecake batters. It can be made traditionally or gluten-free.
It’s a great option for Thanksgiving. For a cheesecake, it’s not that fussy, and it looks great.
I took my Gluten-free Pumpkin Cheesecake recipe, gave it a graham cracker crust (you can use regular graham crackers or gluten-free graham crackers), and split up the cheesecake batter into two.
You leave half of the batter plain for the vanilla batter, and add pumpkin puree, brown sugar and pumpkin pie spice to the other half.
Ingredients
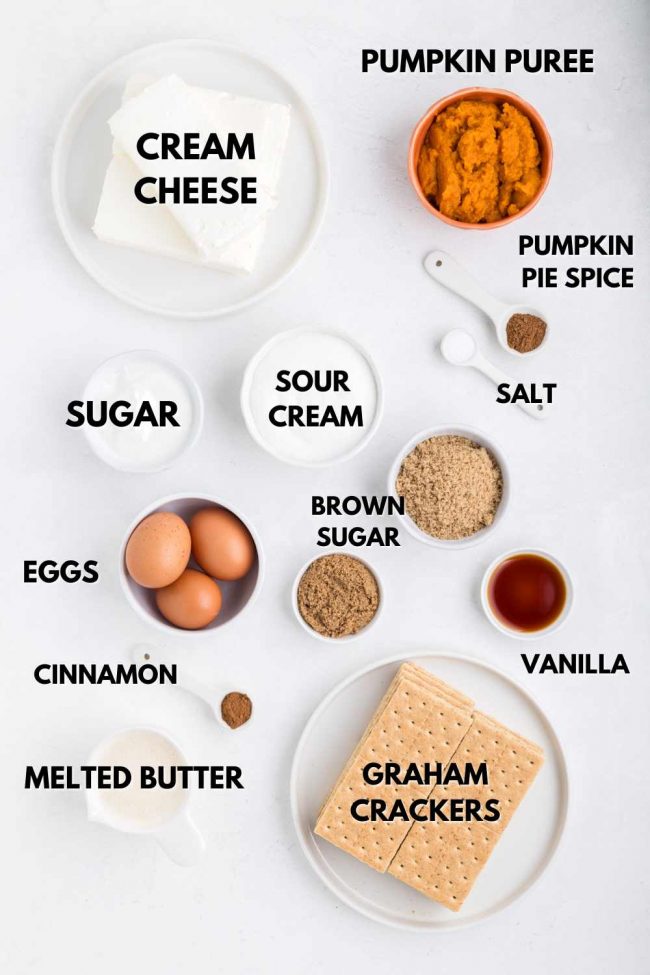
I go into detail about most of the cheesecake filling ingredients below, but here’s an overview of what you’ll need.
Please make sure to use pumpkin puree and not pumpkin pie filling! The filling won’t work in the recipe.
Also, I strongly recommend using canned pumpkin puree. It’s more consistent than homemade puree because homemade varies so much in how thick it is.
But if you have to use homemade – if there’s too much water in your puree, you need to strain it until it resembles canned pumpkin puree. You can see how I did it in my Homemade Pumpkin Puree post.
Can I omit the pumpkin puree? Or use something in its place?
No, the recipe wouldn’t work. Please find a vanilla cheesecake recipe and add pumpkin pie spice if that’s what you want.
Or if you want to make an applesauce or banana cheesecake, then look for recipes already calling for them.
Can I use coconut sugar in the filling?
I can’t really say for sure without having had tried it myself. I do know it’d make the vanilla batter brown. I’m guessing it’d be good tastewise, but I’d be afraid of it cracking.
Can I omit the pumpkin pie spice?
Yes, but then use at least 1 1/2 teaspoons cinnamon in its place. The amount is just a guess, though. You might want more!
To make 1/2 tablespoon of pumpkin pie spice
Don’t have any pumpkin pie spice on hand? You can use the below mix in today’s cheesecake recipe.
- 1 teaspoon1 ground cinnamon
- 1/4 teaspoon ground ginger
- 1/4 teaspoon ground nutmeg
- 1/16 teaspoon ground cloves or allspice
Sour cream sub?
I love using sour cream in my cheesecakes. It makes them extra creamy and tangy.
I’ve seen people say that you can use heavy cream or full-fat Greek yogurt in its place in cheesecakes, but I’ve never tried it, much less in this pumpkin swirl cheesecake.
If you’re up for experimenting, you can try it. But be prepared; it might not work! If it’s important that this cheesecake not have cracks, then I wouldn’t risk it.
Egg sub?
There isn’t a good sub for eggs in baked cheesecakes. If you eat dairy but not eggs, I do have this great Eggless Cheesecake.
It uses cornstarch in place of the eggs, but it’s not a direct sub. For example, you can’t use a tablespoon of cornstarch for each egg.
I made other adjustments to the recipe to get the perfect texture and to get it to hold together properly. So, it’s not something you’d want to try in today’s recipe.
Can I make it dairy-free or vegan?
This recipe consists of mostly dairy – cream cheese, sour cream, and butter – so I don’t recommend trying it with dairy subs. It’s too much.
For my paleo and vegan readers, I have this amazing Vegan Pumpkin Cheesecake, which is still one of my all-time favorites.
How to make it
I’ll let the pictures do the talking! By the way, the full recipe – with measurements and proper directions and all – are at the bottom of this post, before the comment section.It may be obvious to some, but I’ve been getting so many emails saying that the recipe isn’t there. 🤷♀️
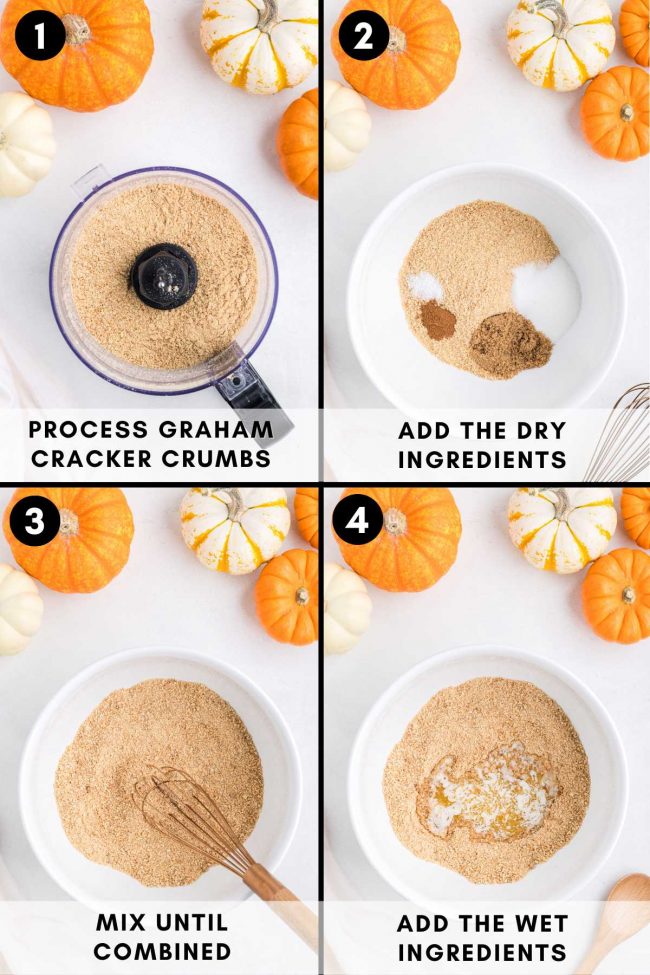
Make and bake the crust.
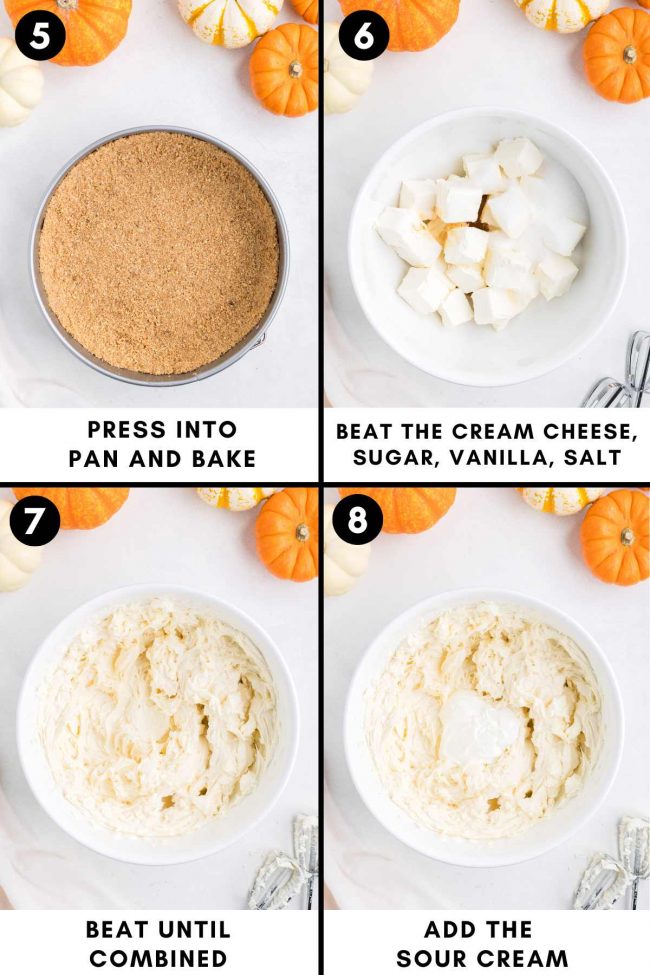
Be careful not to overmix the cheesecake batter! Beating too much can cause cracks.
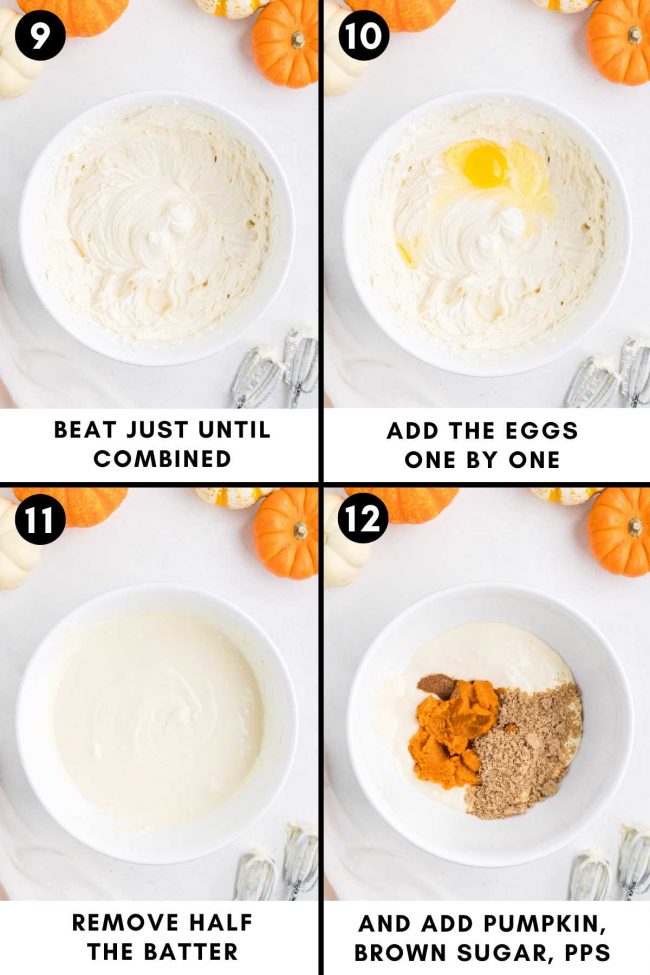
There’s also a water bath involved that you don’t see here. I talk about it below.
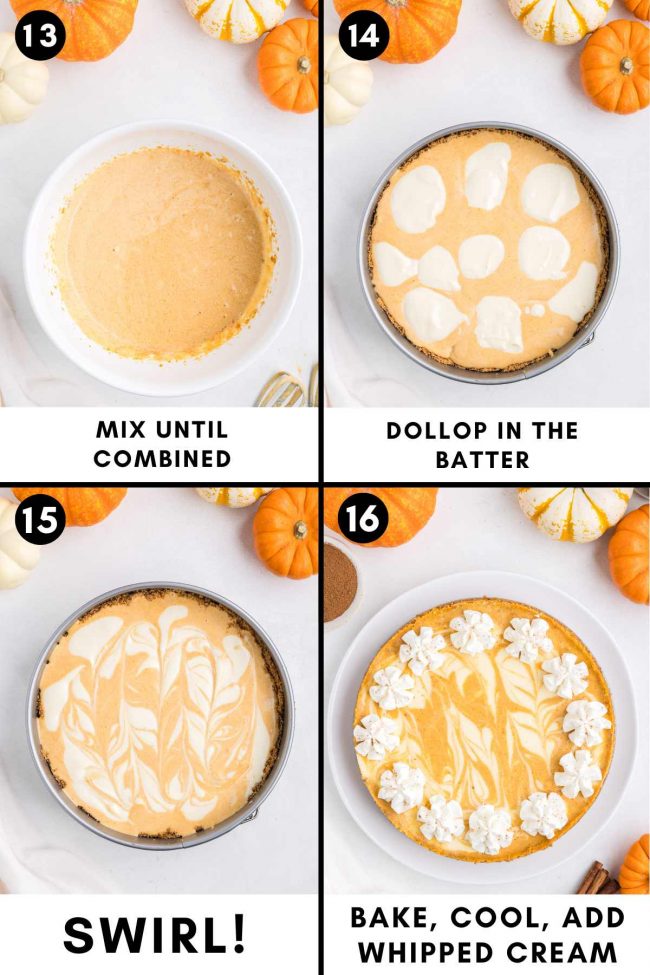
Do I have to use a water bath?
I always groaned and even rolled my eyes at the thought of cheesecake water baths. And I never bothered with them until the pumpkin cheesecake I based this recipe on that I mentioned at the beginning of this post.
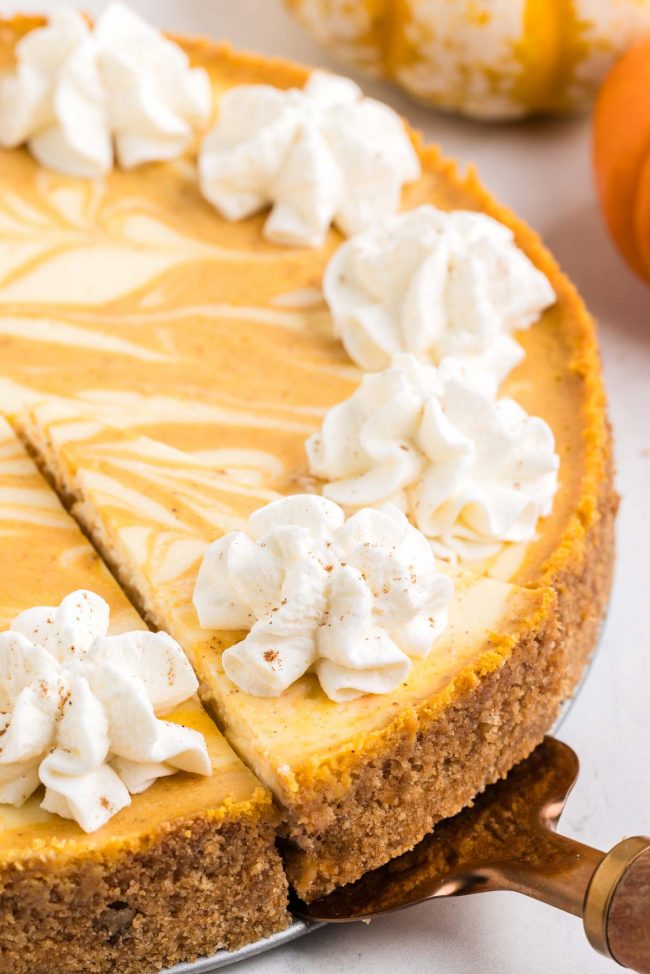
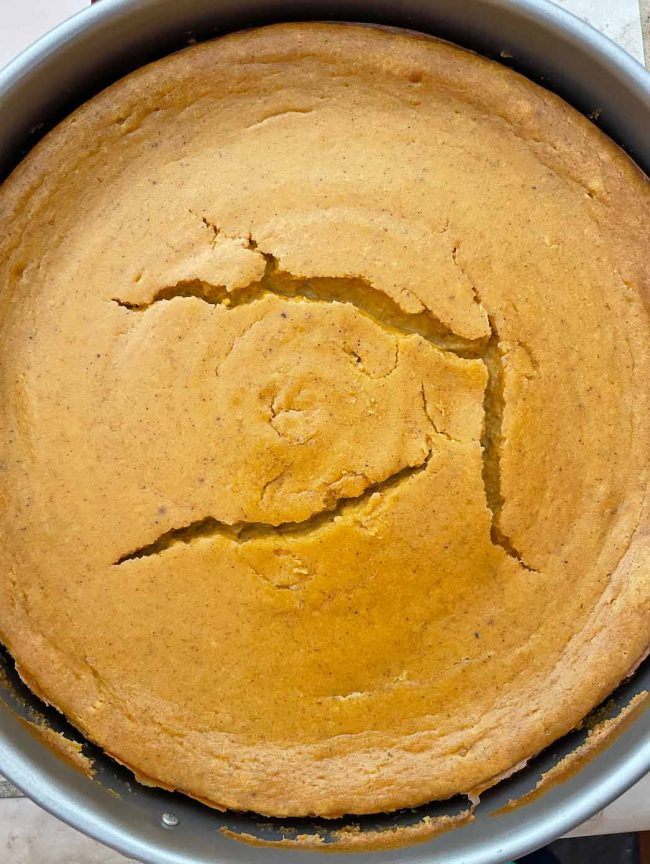
If you don’t mind your cheesecake looking like the photo below, then you don’t need to do the water bath. My cheesecake looked perfect coming out of the oven but cracked while cooling.
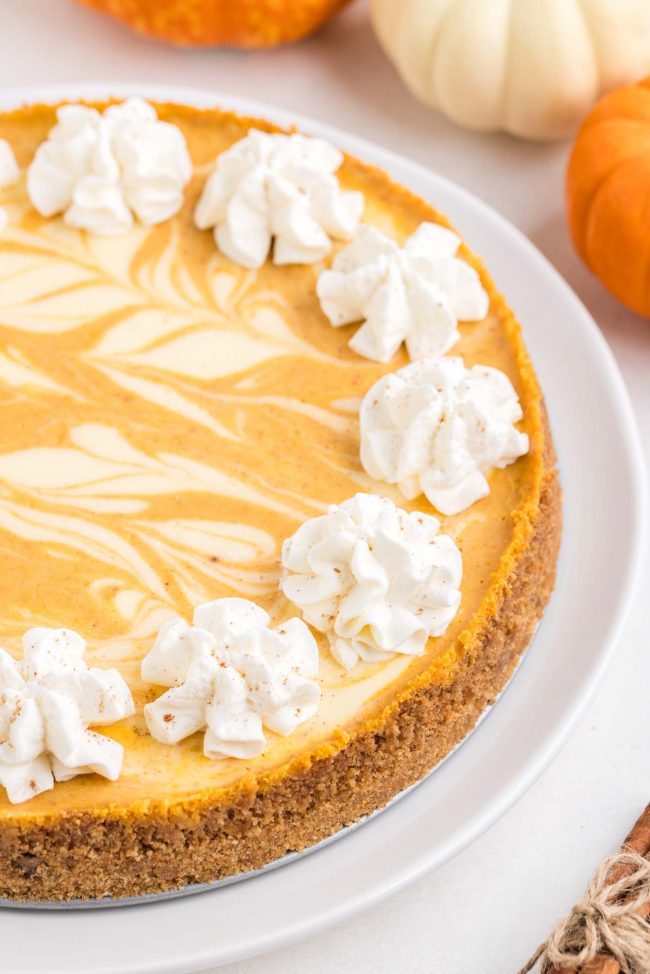
If you’d like your cheesecake to look like the other photos in this post, then you have to use a water bath.
I’ve only posted two other full-sized non-vegan cheesecakes: this Keto Cheesecake and this Keto Pumpkin Cheesecake.
I’m not sure if I just had a ton of luck with them or if the difference is that I used keto sweeteners, but they came out looking perfect without a water bath.
This is a great post all about water baths and lots of comparison photos. Once you see photos of a cheesecake being baked with a water bath and then photos of the same cheesecake baked without one, I think you’ll be convinced that it’s a good idea. :)
After using a water bath for the first time, I learned it’s not scary. It’s one of those things that you do once, and then it’s no big deal and super easy. It only adds 5 minutes of prep time.
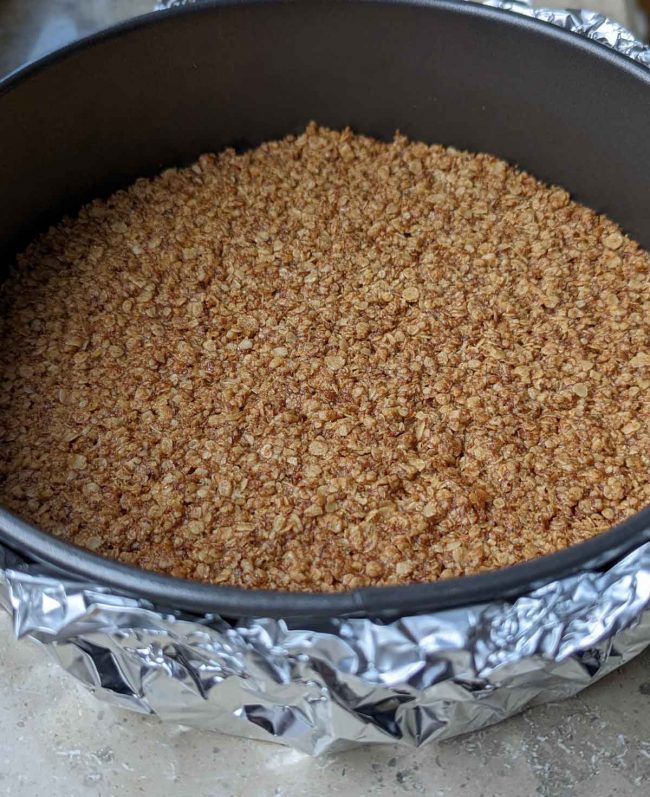
Note that the photo below isn’t of a graham cracker crust but is of the homemade oatmeal cookie crust I used in my gluten-free pumpkin cheesecake recipe.
Why use a water bath
First of all, a water bath is a pan of hot water that surrounds your cheesecake pan. It buffers the heat so that the cheesecake bakes evenly without drying or cracking.
Cheesecake batter is like a custard. Without the extra moisture from the cheesecake bath, a cheesecake can become rubbery in texture. Not always, but sometimes.
The water surrounding the pan won’t get hotter than 212 °F (100 °C), allowing the cheesecake to bake slowly and evenly without burning the top.
Tips for a water bath
- Make sure that the pan is deep and wide enough to hold the cheesecake pan.
- To prevent water from seeping into a springform pan, wrap it in foil to keep it from leaking.
- Always use hot water in the water bath. Using cold water would be very bad, as it’d change the oven temperature and bake time.
- Don’t add too much water. A cheesecake pan will disperse the water, and you don’t want it to overflow.
- Be careful not to splash the water! You really don’t want any water getting into the cheesecake batter, so be careful when filling the pan and placing the cheesecake in the pan inside the bath.
Live outside the US?
If you’re not located in the US, then you probably have a different type of cream cheese than they have in the US. US cream cheese is firm and meant for baking, rather than the kind for toast, like in Europe – and, I believe, the rest of the world.
For 8 ounces (225 grams) of cream cheese, what you do is buy a 300-gram package (if you’re in Europe – the stuff at Aldi, Lidl, etc. works just as well as Philadelphia) and put it in the center of a clean tea towel. Squeeze out the liquid until you have 225 grams of cream cheese.
So for this cheesecake recipe, buy 900 grams of cream cheese and squeeze out the liquid until you have 680 grams of cream cheese left.
If you don’t do this and use the cream cheese as is, then your cheesecake will be too watery and won’t bake through.
You’ll bake it longer, and then it’ll dry out and you’ll have a lousy cheesecake. It’ll also probably crack.
I’ve tried it. Such a waste of time and money. Just drain it!
Don’t like pumpkin?
Then I would recommend that you not make a pumpkin cheesecake. ;)
If you’ve been tasked to make a pumpkin cheesecake, perhaps by some family members, there’s hope you might like this one!
My photographer said about the original pumpkin cheesecake recipe:
That pumpkin cheesecake is AMAZING! I’m not really a pumpkin or pumpkin spice fan, but that cheesecake might have me changing my mind! The texture is super creamy, and not too sweet, just perfect.
It definitely has a nice pumpkin and pumpkin spice flavor, though. So, if you love pumpkin, you can certainly still make this.
If you’d like a pumpkin-free Thanksgiving dessert, check out this beautiful Purple Sweet Potato Pie!
Other pumpkin recipes
- Pumpkin Margarita
- Crustless Pumpkin Pie
- Pumpkin Pancakes
- Vegan Pumpkin Muffins and Gluten-free Pumpkin Muffins
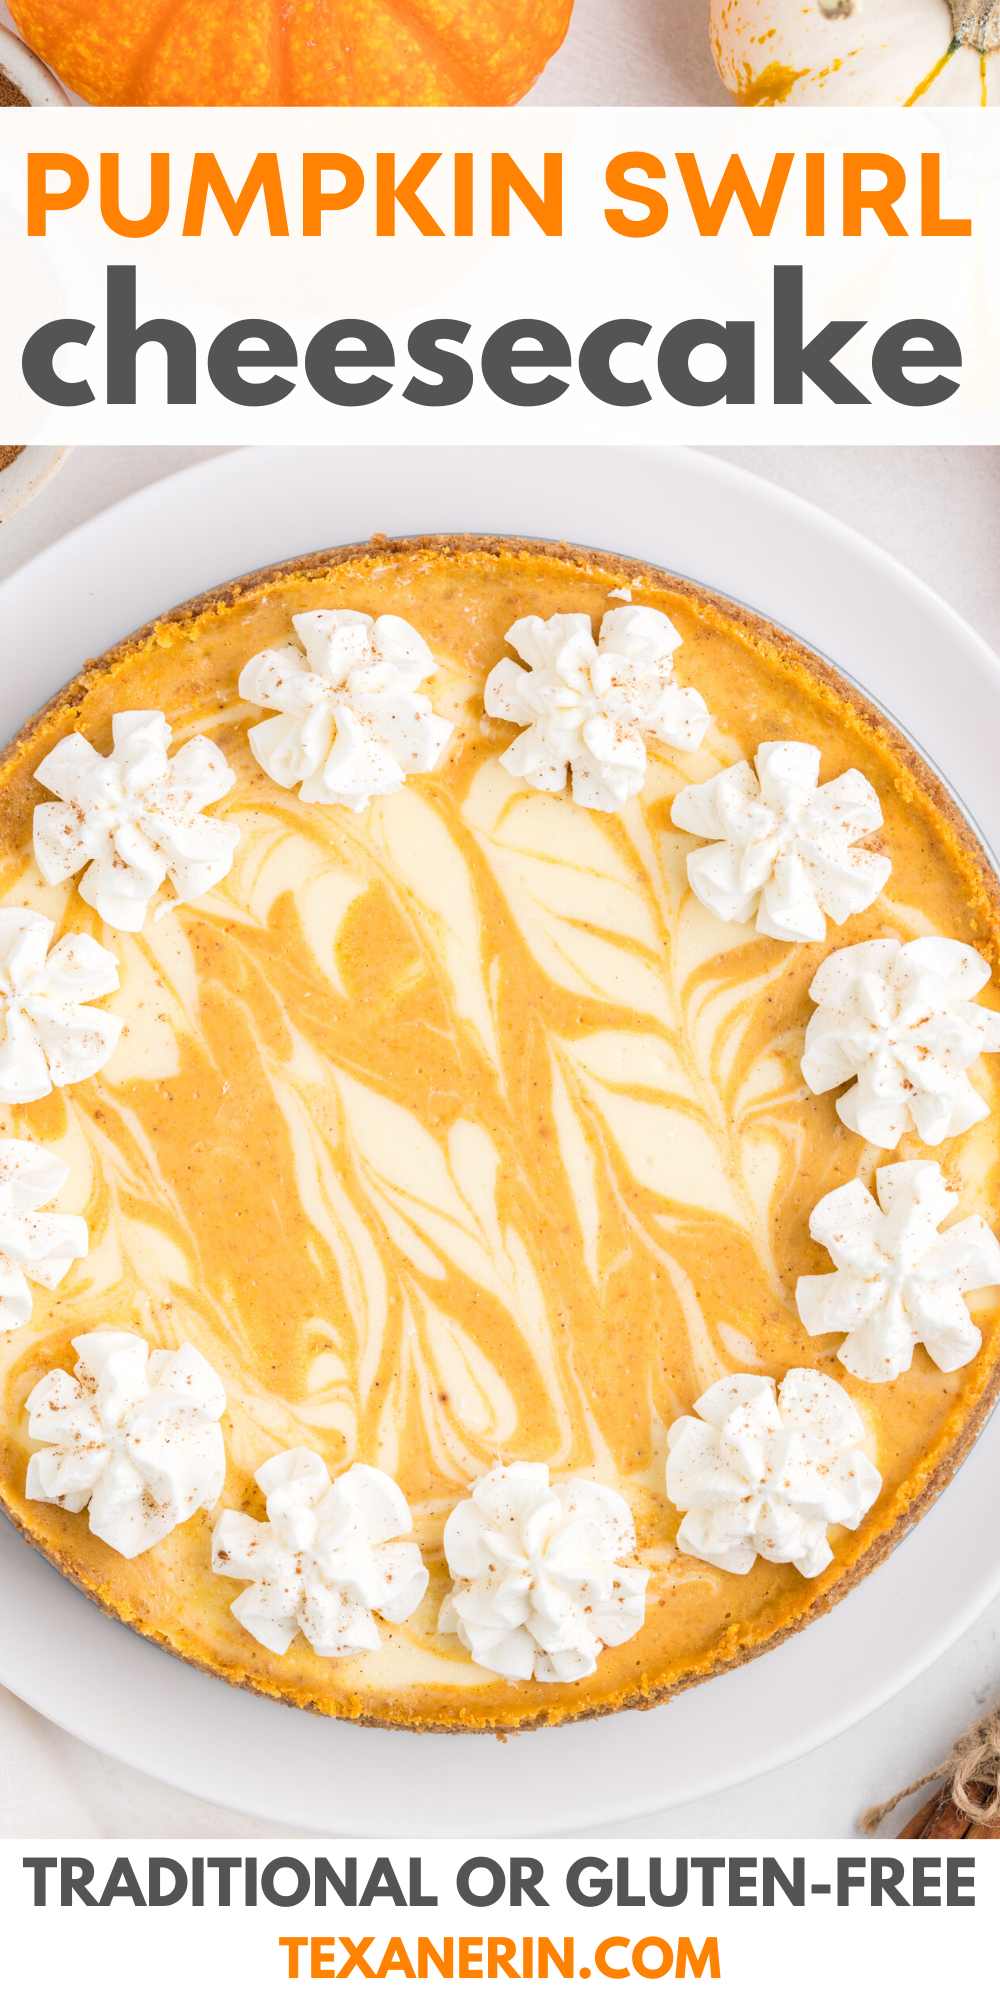
If you try out this pumpkin swirl cheesecake, I’d love to hear in the comments below how it came out! Thanks. :)
Pumpkin Swirl Cheesecake
- Prep Time:
- Cook Time:
- Ready in:
- Yield: 16 slices
Please read all the notes before beginning or buying ingredients!
Ingredients
- 12 full sheets of graham crackers (or 1 1/2 cups graham cracker crumbs - 6.35 oz or 180 grams, use GF graham crackers if you're gluten-free)
- 2 tablespoons dark brown sugar
- 2 tablespoons granulated sugar
- 1/2 teaspoon ground cinnamon
- 1/4 teaspoon salt
- 6 tablespoons (84 grams) unsalted butter, melted
- 3 8-oz packages (680 grams) cream cheese1, room temperature
- 3/4 cup (150 grams) granulated sugar
- 2 teaspoons vanilla extract
- 1/8 teaspoon salt
- 1/3 cup (77 grams) sour cream, room temp
- 3 large (50 grams each, out of shell) eggs, room temperature
- 3/4 cup (181 grams) pumpkin puree
- 1/4 cup (50 grams) light brown sugar
- 1/2 tablespoon pumpkin pie spice2
- piped whipped cream (from about ½ cup heavy cream) + cinnamon
Graham cracker crust:
For the filling:
Topping:
Directions
- Grease a 9" springform pan on the bottom.
- Place the graham crackers in a food processor fitted with an S-blade and process until you have uniform fine crumbs.
- Transfer to a mixing bowl and stir in the brown sugar, granulated sugar, cinnamon and salt until combined.
- Stir in the butter until well combined.
- Pat evenly onto the bottom and halfway up the sides of the prepared pan (the sides should not be greased!).
- Bake for 6-9 minutes or it no longer appears wet and then remove to a wire rack to cool for at least 10 minutes while preparing the filling.
- In a large mixing bowl using an electric hand mixer, beat together the cream cheese, granulated sugar, vanilla and salt at medium speed until well combined. Beat in the sour cream on low.
- Beat in the eggs, one by one, on low until combined, being sure not to overmix.
- Remove half of the batter (534 grams) to a medium mixing bowl.
- To the remaining batter in the large bowl, add the pumpkin puree, brown sugar and pumpkin pie spice and mix in on low just until combined.
- Do this once your cheesecake crust has cooled enough for you to handle the pan (at least about 10 minutes). Using heavy-duty, extra-wide foil, cut three pieces that are at least 14" long for your 9" springform pan.
- Put one piece on a flat surface and put the cheesecake pan in the center of the foil piece.
- Tightly wrap the foil around the sides. If any foil goes above the pan's edges, then fold those down a bit.
- Repeat with the other 2 foil sheets for a total of 3 foil layers.
- Get out a roasting pan large enough for your foiled-wrapped cheesecake pan.
- Bring a kettle or large pot of water to a boil. How much you'll need depends on the size of your roasting pan. It's better to boil too much than boil too little, and then have to boil more. Should you not have a kettle, then bring water to a boil and then pour it into something that has a spout, which allows for easy pouring and will prevent water from splashing into the cheesecake.
- Place the foil-covered pan into the empty roasting pan.
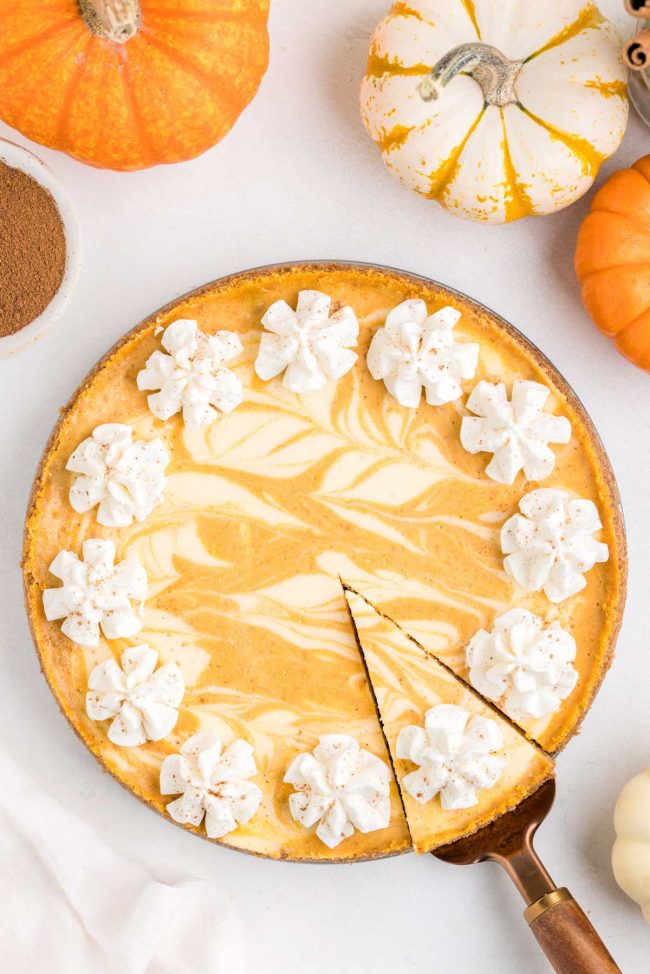
- Use an ice cream scoop or large cookie scoop to add alternating colors of batter (pumpkin and vanilla). If the batter isn’t flat on top after swirling, then shake the pan back and forth to make it level.
- Right as the water starts boiling, move the waterless roasting pan with the cheesecake in it onto the oven rack.
- Very, very carefully pour the just boiled water into the roasting pan, pouring only about halfway up the sides of the cheesecake pan. Be careful that it doesn't splash onto the cheesecake batter.
- Bake at 350 °F (175 °C) for 45-50 minutes. When you tap the pan, it won't be totally set but won't be super jiggly.
- Turn off the oven. Open the oven door halfway, and let the cheesecake sit in there for 45 minutes to prevent cracks from forming (that is the purpose of the water bath, but this is an easy step that will also help).
- Remove from the oven and place on a cooling rack. If the sides of the cheesecake aren’t already separated from the pan, use a thin-bladed knife to run aroud the edges of the cheesecake.
- Let the cheesecake come to room temperature, about 2 hours, before chilling for 4+ hours. Normally you need 8 hours, but mine was chilled in the middle after 2. I’m saying 4+ to be on the safe side. Cover and keep refrigerated for up to 4 days.
- Before serving, decorate by piping on some whipped cream. I used Wilton Tip 6B. You can also sprinkle on some cinnamon.
Prepare the crust:
Prepare the filling:
Prepare the water bath pan:
Prepare the water bath:
Add the filling to the pan:
Bake:
Notes
- If you live outside of the US - you likely have a different type of cream cheese than in the US. US cream cheese is firmer and meant for baking, rather than the kind for toast, like in Europe. For 8 ounces (225 grams) of cream cheese, buy a 300-gram package (the stuff at Aldi, Lidl, etc. works just as well as Philadelphia), put it in the center of a clean tea towel or cheesecloth, and squeeze out the liquid until you have 225 grams of cream cheese. So for this recipe, buy 900 grams of cream cheese and squeeze out the liquid until you have 680 grams of cream cheese left.
- If you don't have pumpkin pie spice, you can use 1 teaspoon ground cinnamon, 1/4 teaspoon ground ginger, 1/4 teaspoon ground nutmeg, and 1/16 teaspoon ground cloves or allspice


6 comments on “Pumpkin Swirl Cheesecake” — Add one!
2 comments are awaiting moderation!
The directions for this recipe were easy to follow and my cheese cake turned out perfectly. The flavor was amazing and it was so pretty. A great addition to our Thanksgiving spread! So many people wanted the recipe! Thank you.
I’m really glad that people liked the cheesecake and that some even wanted the recipe! That’s always a great sign. :) Thanks for your feedback!
I made the GF version and this cheesecake will be on repeat for all my holiday gatherings.
Ooh, I’m so glad to hear that you’ll be making it for future holidays! Thanks for your feedback. :)
I enjoyed making this dessert for Thanksgiving and my entire family loved it! It was super duper creamy and very dreamy. Loved the crust, as well. I’m definitely going to make this again for Christmas. Adding this one up to my regular recipe list. Thank you!
You’re welcome! I’m glad that it was a hit and that you’ll be making it again. :) Thanks so much for your comment!