These paleo chocolate marshmallows are simpler than you’d think! You probably even already have the ingredients in your pantry.
When I was taking the pictures for this paleo vegan hot chocolate, I realized that some marshmallows were really needed.
If you’ve never had homemade marshmallows, you’re in for a treat! They are nothing like store-bought. I actually hated marshmallows until I tried the homemade ones a few years ago.
Even if you like store-bought marshmallows, I’m pretty sure you’ll like these more. And you can feel good about eating them as there’s nothing funky in them! No corn syrup or refined sugar – just honey.
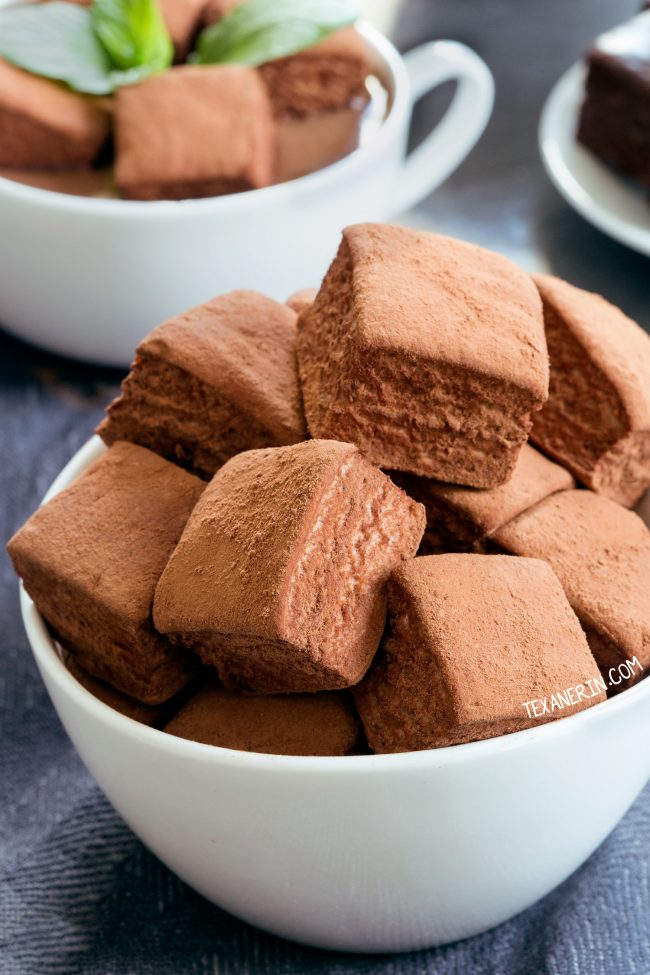
This recipe is adapted from these rustic homemade marshmallows on Urban Poser. I used less honey, more gelatin, and some cocoa powder to turn them into chocolate marshmallows. She has all kinds of tips, troubleshooting advice and a how-to video over there so definitely be sure to check out that post.
If you want regular marshmallows, just omit the final step of the mixing process, which is to add the cocoa powder. You could also do half and half!
Pour half of the marshmallow creme into a prepared pan and then add the cocoa powder to the remaining creme in the mixing bowl. Pour that into another pan.
The original recipe calls for an 8×8 pan, which yields super tall marshmallows. Since I wanted these specifically for hot chocolate, I used a 9×13 and thought that they come out the perfect size.
The hot chocolate recipe I’ll be posting is paleo + vegan and so I wanted these marshmallows to be, too. I bought some agar agar powder thinking I could just use that in this recipe, along with some maple syrup instead of honey.
By the way, if you’re really sensitive to gluten, you might want to check out what on I wrote about it here – Is Honey Gluten-free?
But apparently, that’s not how agar agar powder works! Sorry, folks. I can’t even find a vegan recipe that doesn’t use corn syrup or some other weird kind of syrup. :/ If anyone knows of a healthier vegan marshmallow recipe, please share!
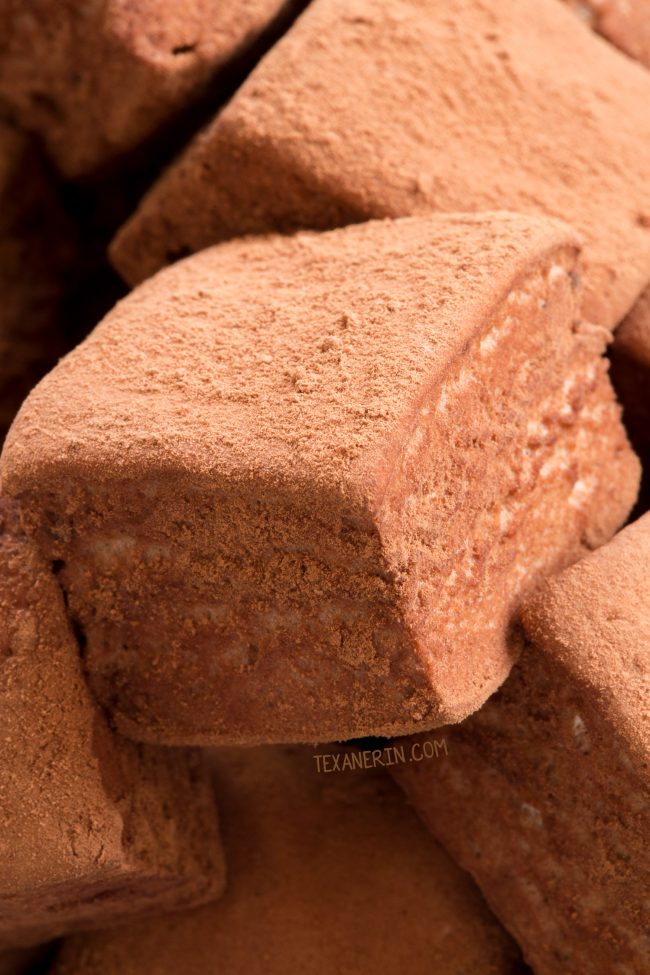
I coated these marshmallows in plain cocoa powder but if you’re okay with powdered sugar, a mix of powdered sugar and cocoa powder may be tasty! But they’re honestly sweet enough without the extra sugar.
By the way, the chocolate taste is pretty dark. You could reduce the amount of cocoa powder if you don’t want them so dark. When you’re mixing in the cocoa paste, you can taste as you go. Just keep in mind that the cocoa flavor is a little stronger after the marshmallows have set.
These chocolate marshmallows are also AIP and GAPS diet-friendly! I’m actually doing both diets right now (which I’ll write more about in my next post) and it’s really hard to find sweet treats that fit both diets. I’m SO happy to now have these marshmallows in my life! Please see the notes below the recipe for which ingredients to use.
Making marshmallows is way easier than it sounds. My recipe is only so long because I tried to include lots of tips to make the process less scary. It’s actually really simple. :) As long as you have a candy thermometer (which is unfortunately totally necessary for this recipe)!
More of my favorite paleo desserts!
Paleo Chocolate Marshmallows (AIP, GAPS)
- Prep Time:
- Cook Time:
- Ready in:
Please see the notes below for the AIP + GAPS options!
Ingredients
- 2 1/2 tablespoons cocoa powder or carob powder, divided
- 1 cup (236ml) filtered water, divided
- 3 tablespoons gelatin (I used this one)
- 1 cup (320 grams) honey (I like Nature Nate's)
- 1 teaspoon vanilla extract or 1/2 teaspoon vanilla powder / bean scrapings + 1/2 teaspoon water
- 1/4 teaspoon salt
- 7 tablespoons cocoa powder (do not use one with any added ingredients!) or carob powder
- 3-4 tablespoons warm water
For dusting the marshmallows:
For the marshmallows:
For the cocoa paste:
Directions
- Line an 9"x13" pan with parchment paper. Using a sifter or tea strainer, sift about 1 1/2 tablespoons of cocoa powder over the parchment paper.
- In the bowl of your stand mixer, add 1/2 cup water to the gelatin. There's no need to mix it. Attach the whisk attachment to the mixer and secure the bowl in place if it isn't already. I recommend using a stainless steel bowl rather than a glass bowl.
- Get out a medium saucepan (if your saucepan is too big, the mixture is more likely to burn!). Pour the remaining 1/2 cup water in this saucepan with the honey, vanilla and salt and bring this to a boil over medium-high heat. For me, I needed 5 minutes to bring it to a boil.
- With a candy thermometer in the saucepan, boil this mixture until the thermometer reads 240 °F (116 °C). It only took me 90 seconds to get to 220 °F but then it took another 10-12 minutes to get to 240 °F. One time, I boiled it for 15 minutes and could only get it to 225 °F and they worked just as well as the versions that reached 240 °F (but you should still aim for 240 °F!). It may take you more or less time depending on the size of your saucepan and burner. It may only take you 7-8 minutes. There's no need to stir the mixture. Once the mixture reaches 240 °F, remove the pan immediately off of the heat.
- At this point, the gelatin will likely be lumpy. Mix it for a few seconds to break it into pieces and then pour the honey mixture (still super hot, as it's just come off of the stove) into the bowl of your stand mixer, in a slow stream. Be sure not to pour too fast as this will cause problems later on! Mix on low for about 20-30 seconds or until thoroughly combined and no lumps of gelatin remain.
- Start beating this mixture on the highest setting and continue until it's thick, kind of like marshmallow creme, and the mixture is completely cool. This took me about 10 minutes but could take as few as 7 minutes.
- While it's mixing, stir together the cocoa powder and just enough water to make a thick paste.
- Once the marshmallow creme is ready, add the cocoa paste and whisk another 30-60 seconds or until it's totally incorporated.
- Immediately spread the creme over the parchment paper as evenly as you can. Sift on the remaining cocoa powder. Don't let the mixture sit before spreading it into the pan. It makes it much more difficult to spread evenly.
- Let this sit for 4 hours and then cut. I've had mine at room temperature now for 10 days in an airtight container and they've held up perfectly. You may want to move them to the refrigerator after 1 week to be on the safe side. They also freeze well.
- I don't recommend putting these in super hot liquids (like so hot you can't drink it) as they'll melt quite quickly.
Notes
- For AIP: Use carob powder. Vanilla powder / bean scrapings are elimination-phase legal (read more here).
- For GAPS: Cocoa powder is GAPS-legal once you're on the full diet and don't have any digestive symptoms. Read here for more info. I also use vanilla bean scrapings but it looks like pure vanilla extract (with just vanilla beans + vodka) is legal.
Adapted from Rustic Homemade Marshmallows on Urban Poser



66 comments on “Paleo Chocolate Marshmallows (GAPS, AIP-friendly)” — Add one!
2 comments are awaiting moderation!
Aww! I feel awful that you had such a tough time with them. You sound like me whenever I used to try making yeasted breads. ;) I wish you lots of luck with your next attempt! I probably wouldn’t recommend 1 1/3 cups of maple syrup, though. You could always try but I’m not too hopeful. Marshmallows (and almost all) candy recipes are kind of finicky. :( Thanks so much for your comment!
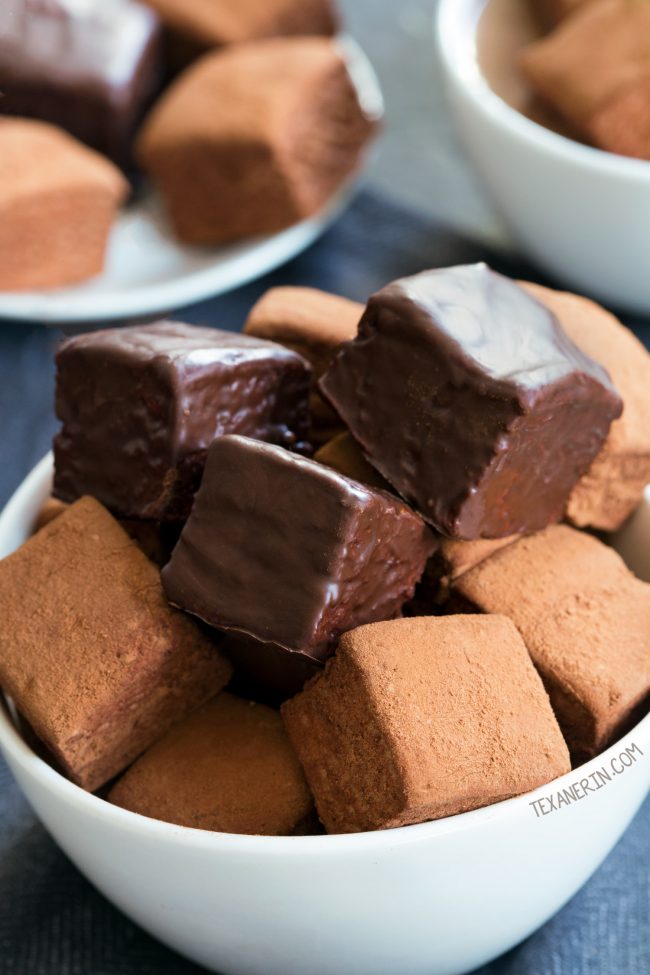
PS: what recipe did you use for the chocolate coating that is shown in some of the photos? Those look amazing! :)
Good question! I unfortunately didn’t take note on that recipe. :/ This carob coating looks like it would work if you’re on AIP! If you’re not, regular melted chocolate would definitely work. :)
I just made these. They came out delish. I used a digital meat thermometer.
I can’t wait to put them on my coffee tomorrow.
Anyone use them in any other recipes? Rice crispy treats, etc?
That’s great! I’m so happy you liked them. :) I haven’t tried them in other recipes. I know that they melt if you try to make s’mores out of them but crispy treats are an interesting idea I’ll have to try! Thanks for your comment.
Hi there! Oh no. That sounds awful! I’m so sorry. I have no idea why that could have happened. I made these several times before posting and never had any issues. Does your cocoa powder maybe have some additives or something like that? And you didn’t use hot chocolate powder, right? You said it was a paste, so I’m guessing you added the right amount of water and that it wasn’t soupy. Did you make any changes or subs at all to the recipe? Sometimes a small change could have a huge effect on a recipe like this but other than that, I’m not sure what could have caused it. I hope that the mixture will firm up enough so that you can at least use it as a cake filling or something like that!
Do you think it has to do with the type of cocoa powder? I used Fry’s instead of my usual Rodelle from Costco. The Fry’s has sodium carbonate as an ingredient. When I added my paste, it too, deflated.
Oh no. I’m sorry to hear that! But thank you for letting me know. I’ve made these several times and never had an issue but using cocoa powder with added ingredients could explain it. I’ve updated the recipe to say not to use a cocoa powder with any added ingredients! Thanks so much for the feedback and sorry for the slow reply! I’m in the process of moving and haven’t had internet since Sunday.
I just tried these and the exact same thing happened to me. As soon as I added the cocoa paste (100% cocoa powder) the whole batch deflated. I am crushed. I was wondering if you think it might be the water? Have you tried just adding the 7 tbsp cocoa powder without turning it into a paste? Does that not work and thus the recipe says paste? I would like to try this again but would like some feedback before I turn all cocoa-mad-scientist and experiment if it has already been done.
I’m sorry about that! I would have been devastated, too. I haven’t tried it with just adding cocoa powder as I assumed the result would be clumpy (and making the paste always works for me!). Maybe it’d work if you sift it into the marshmallow creme? I wish I knew what it could be. I unfortunately don’t have any other ideas other than what I wrote in my response to Lisa. As for the water, I just used regular warm tap water! I’m guessing yours was warm and not hot? Not that would explain it, either. The most recent commenter, Chloe, didn’t have any issues making them so I’m really not sure where the issue could be. Sorry again!
so can you use maple syrup instead of honey in the marshmallows ?
I haven’t tried it so I can’t guarantee it but I think it would work. It may take a little longer to get it to the right temperature. I’d love to hear how they come out!
So am I to assume that they could not be made plain and toasted later over a fire? ‘Sounds like they wouldn’t brown like traditional marshmallows but instead would simply melt. Was hoping to be able to join my family in toasting marshmallows in the fireplace. Any ideas of how to do this yet remain true to paleo?
To make them plain, check out the second paragraph after the first picture. But they’d definitely melt in the fireplace. I’ve never come across a healthier homemade marshmallow recipe that can be roasted and I’m not sure what would need to change in the recipe for that to work. Sorry about that!
I am making these today and was actually just looking up whether or not homemade marshmallows can be “roast-friendly.” I came across a post that said to leave them out for several days to dry out. This will (allegedly) keep them from melting into a pile of goo the second you put them over the fire. I plan to try that with a portion of my batch and see if it works for a New Year’s Eve get together!
That’s interesting! I wish I had known about this the other day when I finished my last marshmallows. I guess I’ll just have to make them again. ;) Or wait for you to try it! I’d love to hear what happens. Thanks a bunch for your tip and merry Christmas!
Hi Erin! I want to officially welcome you to the Paleo AIP Recipe Roundtable. Thanks so much for joining us and linking up your delicious recipes. Happy Holidays!
Hi Eileen! Thanks so much. I hope to post more AIP-friendly recipes soon. :) AIP + GAPS is a hard combination for a baking blog! Happy holidays to you, too. :)
Does the vanilla gets mixed into the honey mixture on the stovetop?
It does! Thanks for pointing that out. Fixed. :) Hope you’ll enjoy the marshmallows!
Thank you! I hope they turn out great – I’m making them right now, and am so glad you responded so quickly!
I figured you might need an answer ASAP. :) Happy marshmallow making! I’d love to hear how they come out.
These look delish! I cannot wait to make them with my daughter for our hot cocoa.
Thanks! I hope you’ll both enjoy them. :)
These would be so good in homemade hot chocolate! Yum!
They really are!
I’ve never made them… but I WANT TO!!! These look fabulous. And I love that you can customize the flavors!
You have to give them a try!
Loving these! Definitely going to add these to my gift baggies this year for my Paleo friends!
Aww, yay! I’d love to hear how they come out!
Is there something I could use instead of the cocoa for dusting
Some people use powdered sugar, or a mix of powdered sugar and cornstarch or arrowroot powder, or just arrowroot powder, or cinnamon mixed with powdered sugar / cornstarch / arrowroot, or toasted coconut or nuts. :)
I’m all about hot chocolate and homemade marshmallows! Love that these marshmallows use honey in them to sweeten them!
I definitely feel better about eating them!
Yum! Homemade marshmallows are the best, I’ve never tried adding cocoa to them – I definitely will now! Looking forward to trying this!
And for vegan, yeah – that’d be hard. It would probably require corn syrup (yuck) and some sort of plant-based gelatin, which I haven’t had success at sourcing a good one that works well (I have health issue that flairs occasionally and animal-based gelatin makes it worse).
I hope you’ll enjoy them! And thanks for the tip on the vegan version. :)
Oh my goodness! These marshmallows look incredible! :) I have never made homemade marshmallows before, but now I want to give it a go after seeing these.
You should totally try them!
These look delightful! Love that I can find healthier options for the things I love!!
Thanks so much!
If I wanted to make these chocolate peppermint how much peppermint extract do you think I should add?
Oh my. That sounds so delicious! But I have no idea. Once it’s all mixed up, I’d add 1/4 teaspoon, taste and then add more until you’re happy with it. But keep in mind the mint flavor may be a little stronger once the marshmallows have set. :) I’d love to hear how they come out!
These look so so good!!
Thanks!
These look amazing! Love that they are paleo!
Thanks a bunch!
These look so pillowy soft and delicious!
They really are! :)
I too have always felt intimidated to make marshmallows. I love them from the store but have heard homemade is so much better.
These sure look good.
You should try these for your grandson! :D
Homemade marshmallows are the way to go! I love knowing what is in my food!
Same here!
Can you tell what kind of gelatin you use? Thanks. My son has never had a s’more.
I used the red can of Great Lakes. I hope he’ll enjoy them! :)
I have always be intimidated by making my own marshmallows but I need to try these! And they are chocolate!!
I hope you’ll try them out one day! :)
I love chocolate marshmallows! I sometimes add some nuts, Choc chops and coconut to mine and make it a rocky road flavour!
Oh, yum! That sounds absolutely incredible. :)
Clearly, I need to make these! They look awesome!
Yeah, you do! ;)
Whoa…I stopped in my tracks at your photos! I want that right now!
Aww, thanks! :)
Homemade marshmallows are the best – love this chocolate version (and the ones dipped)!
Thanks so much!
What a fun idea. I need to make these soon.
I think you do, too! :)