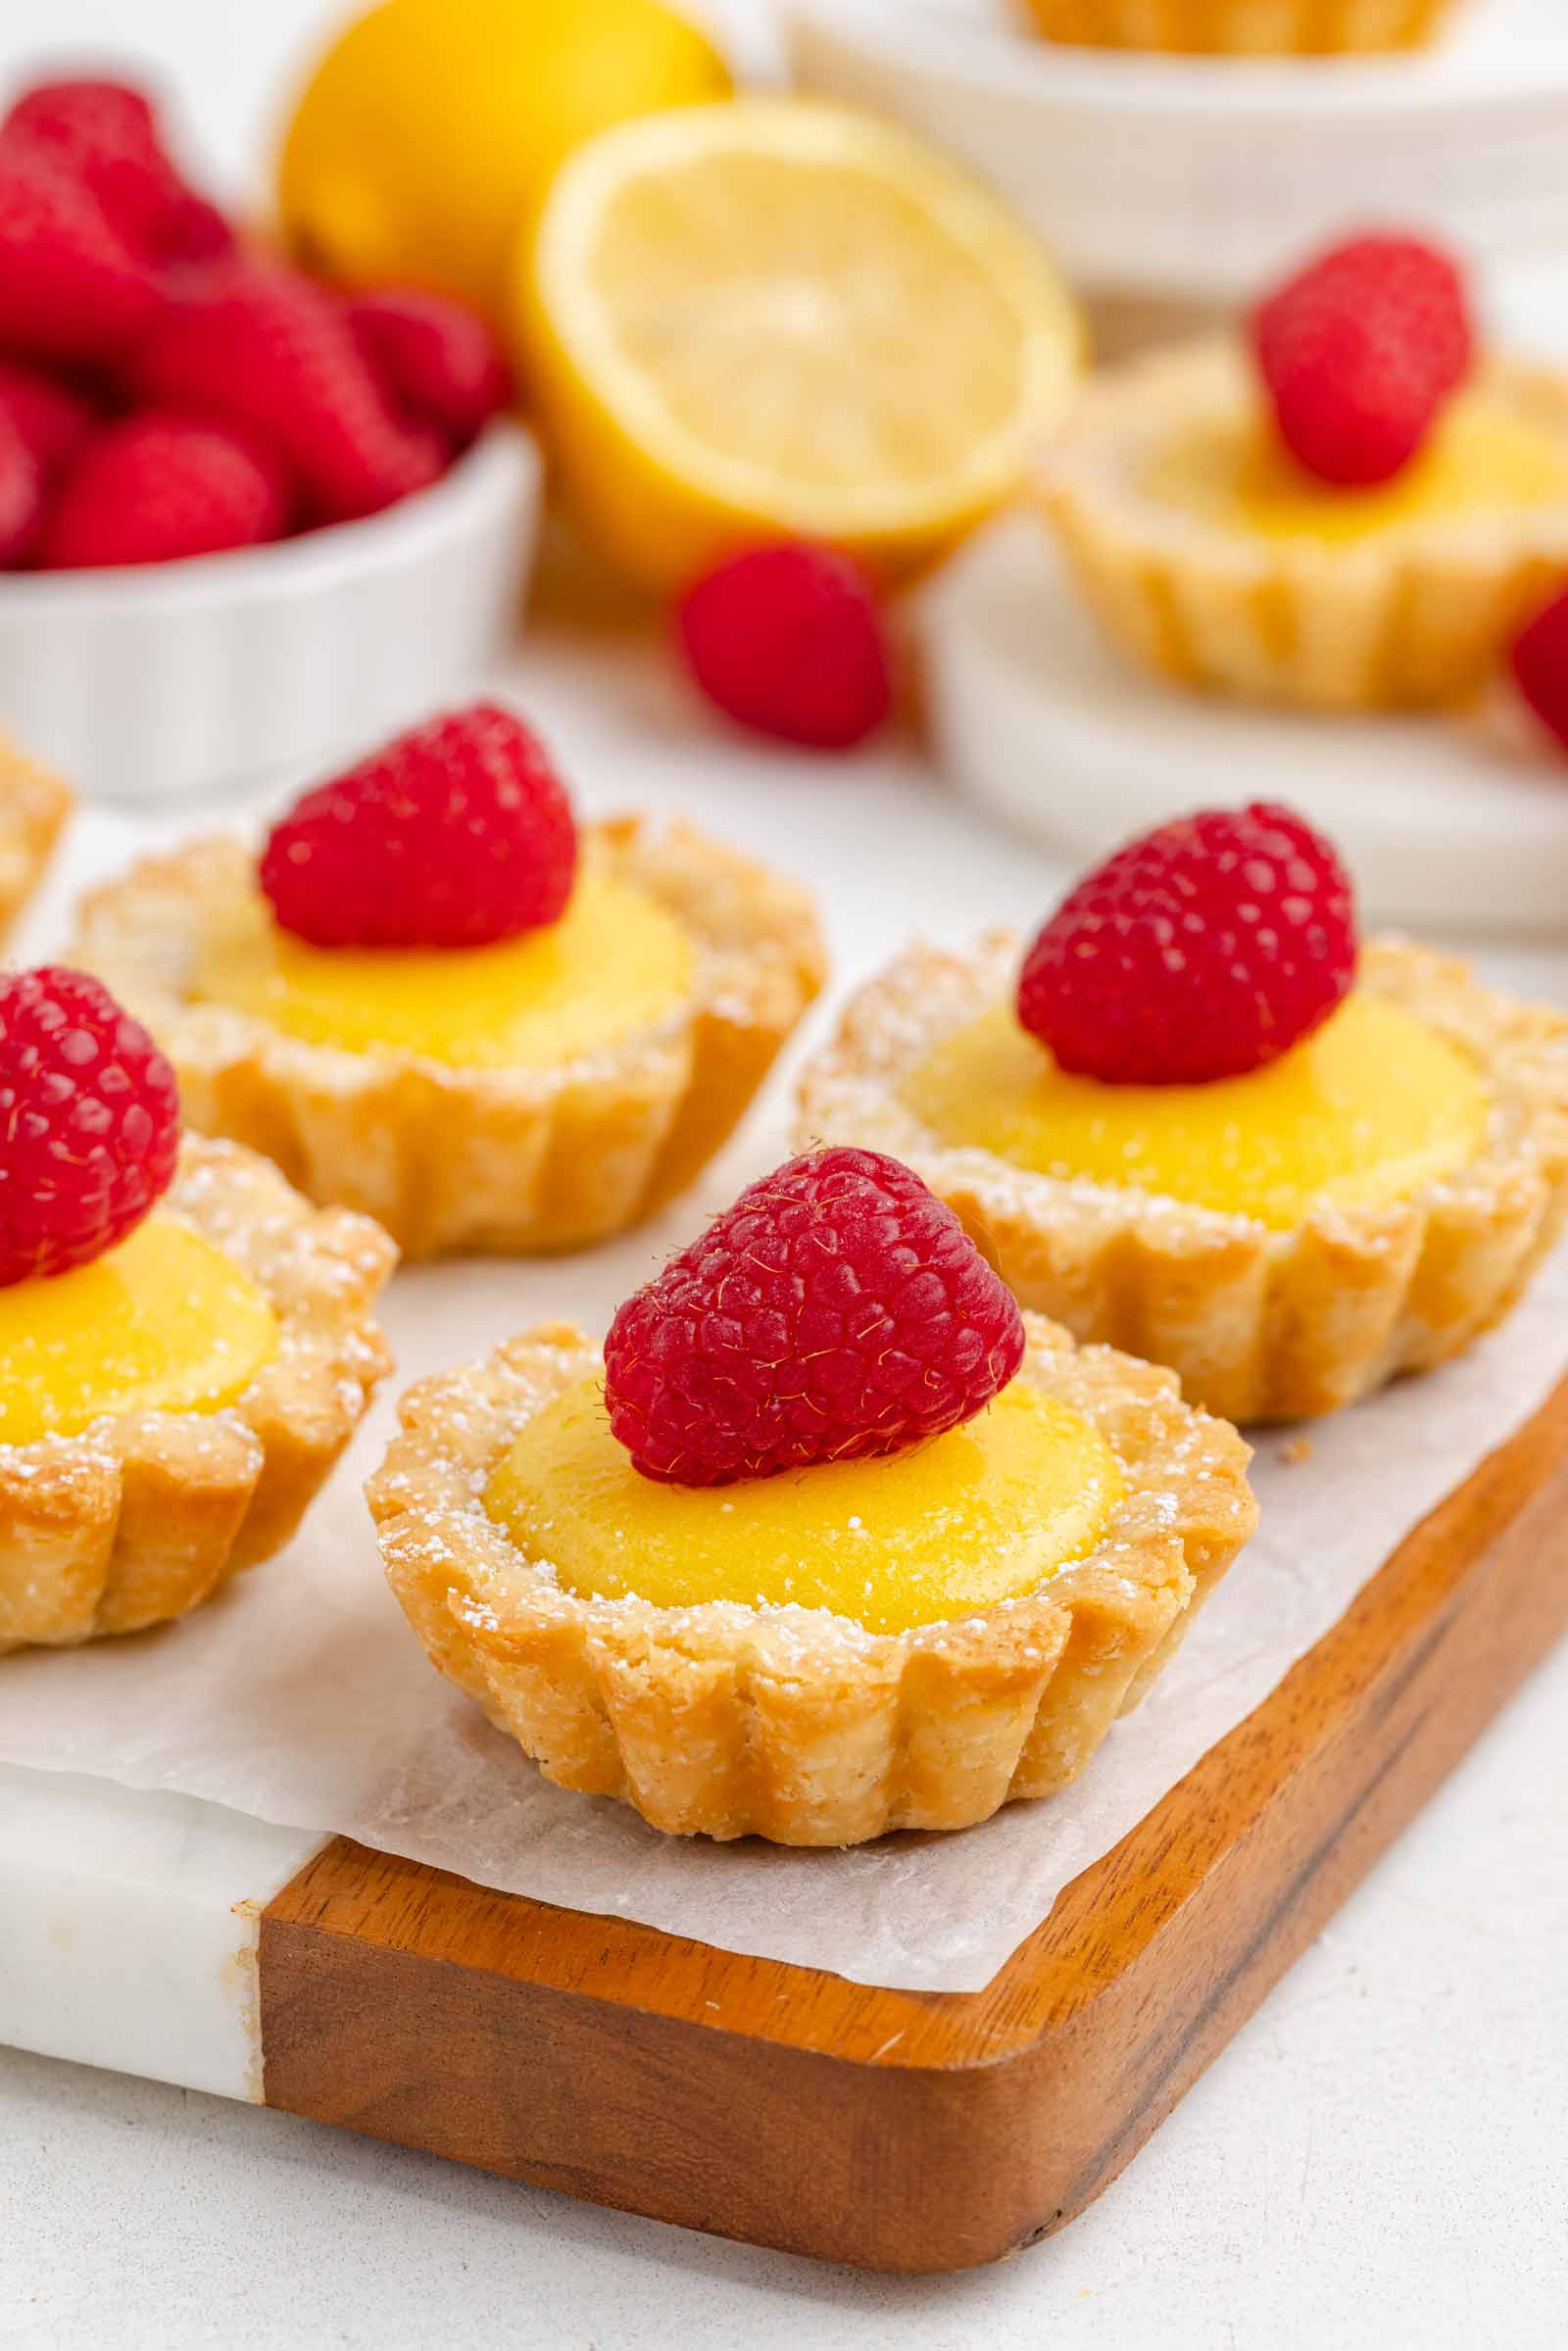
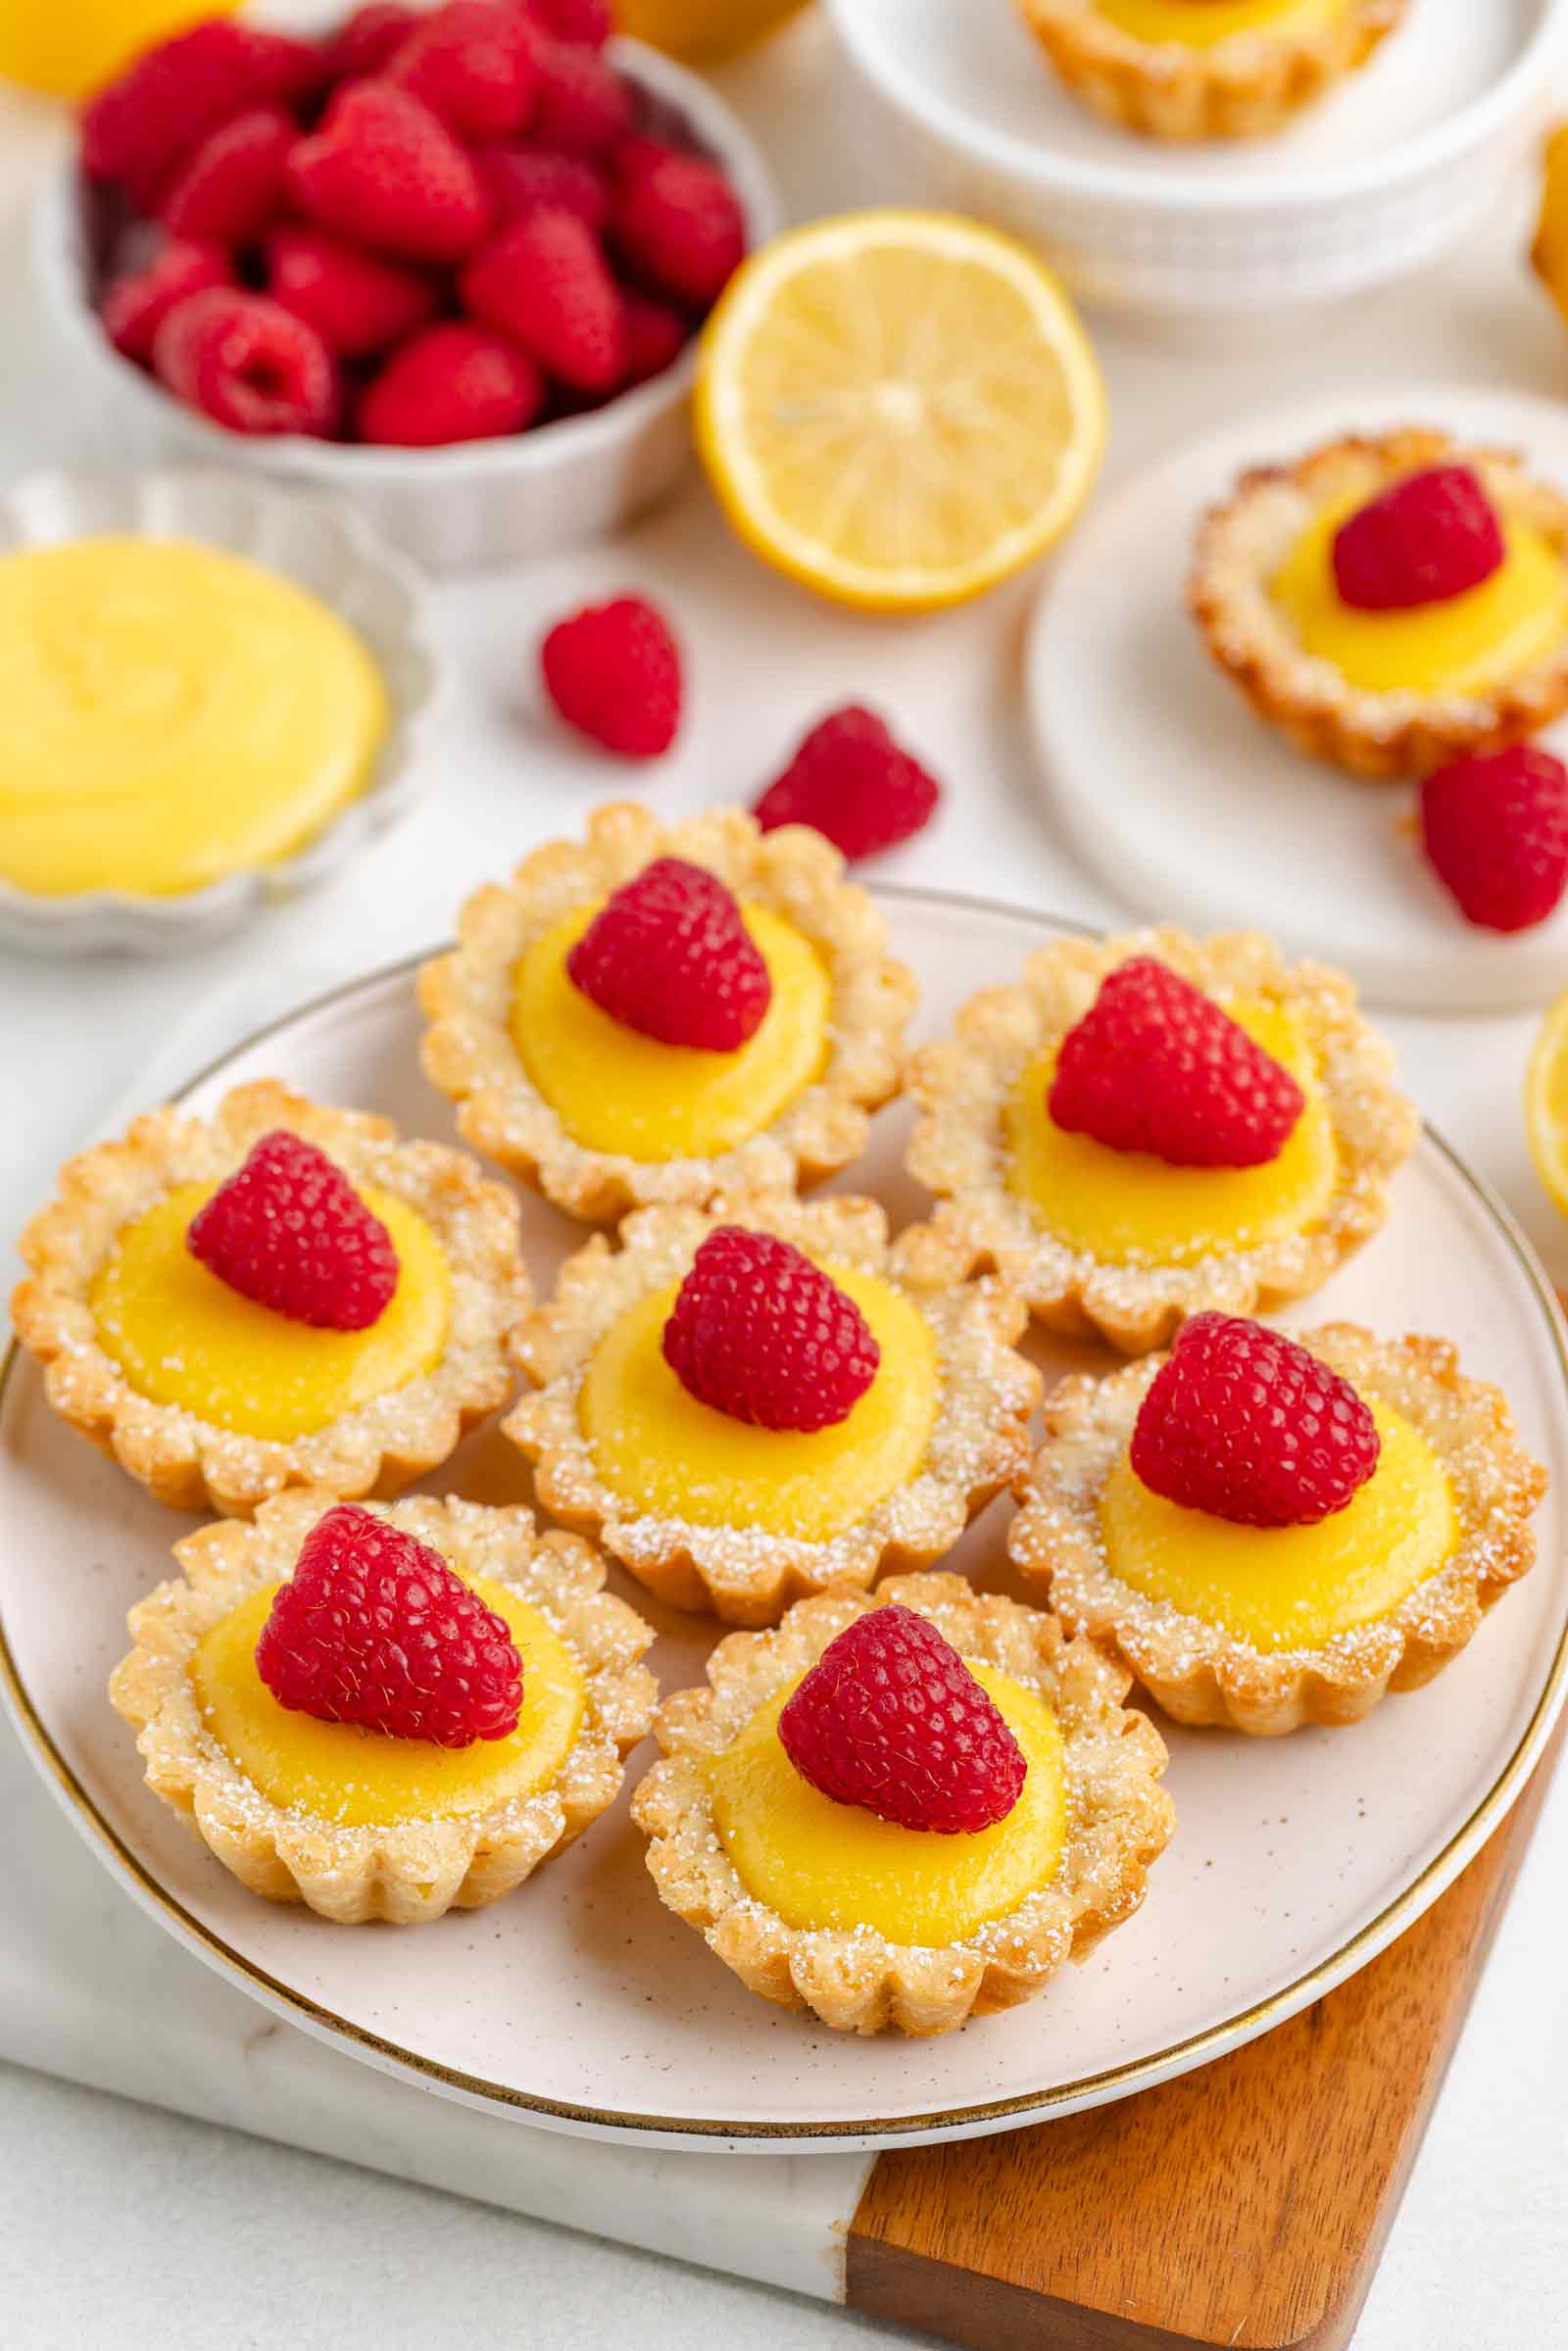
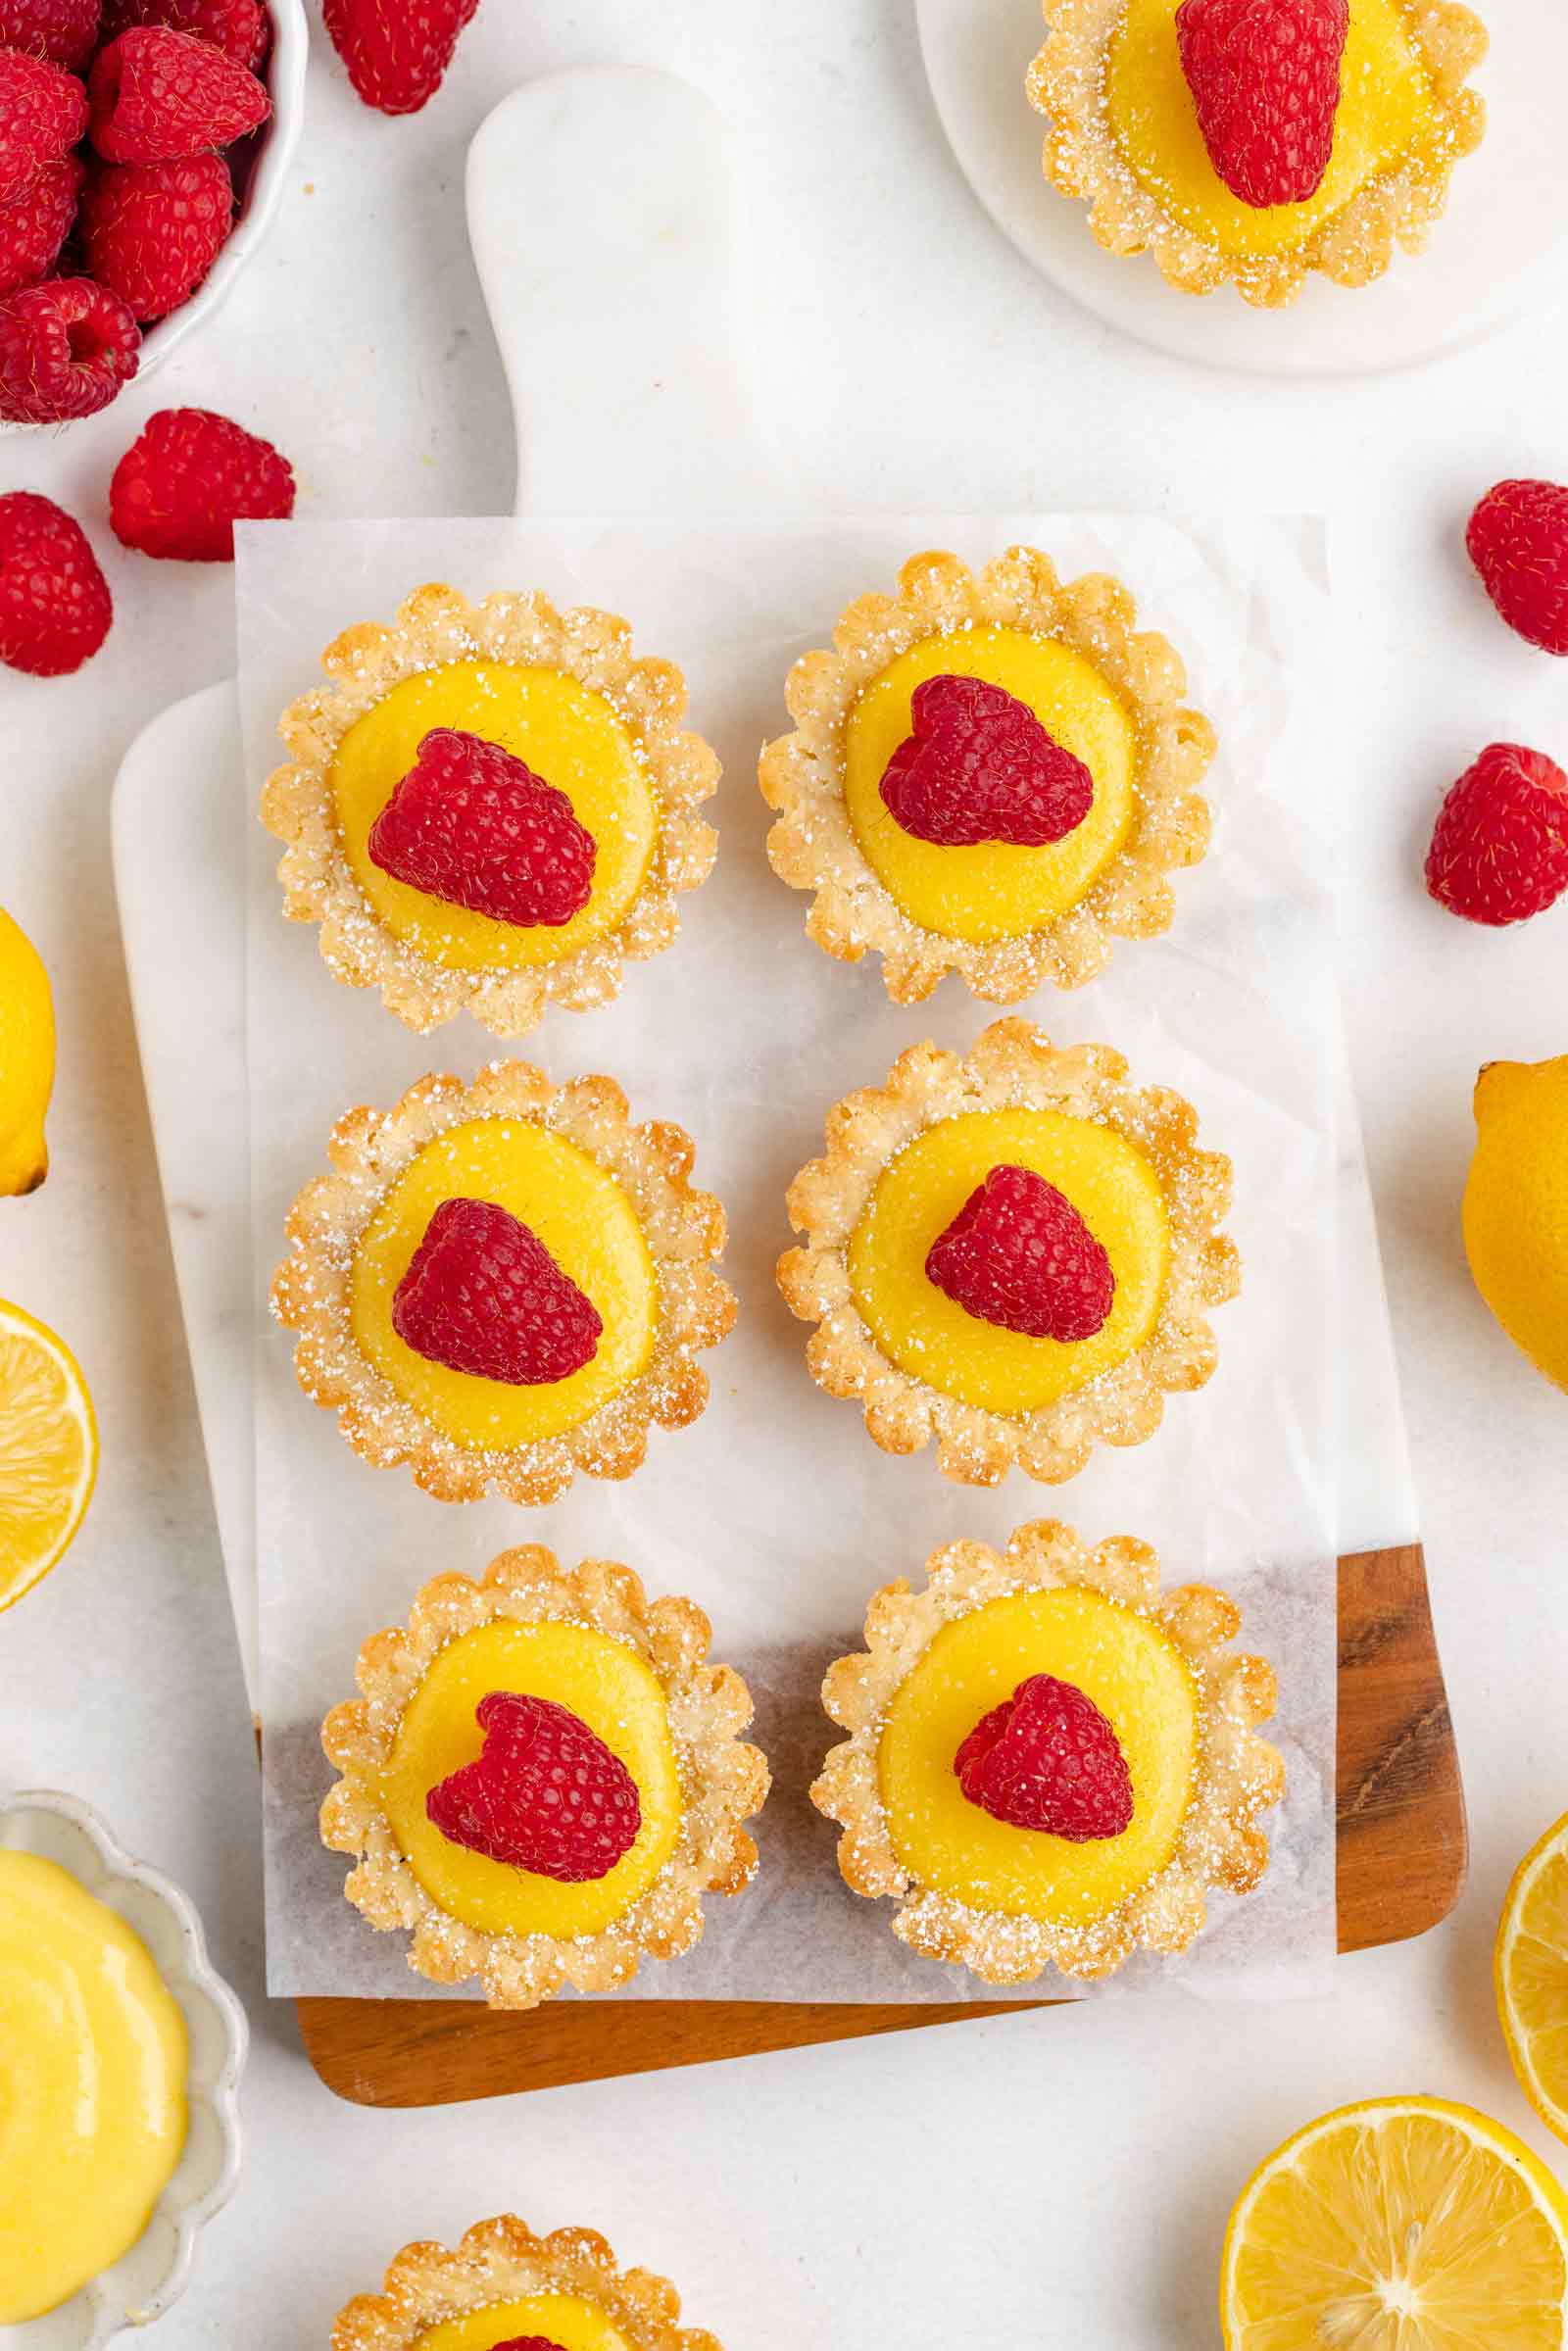
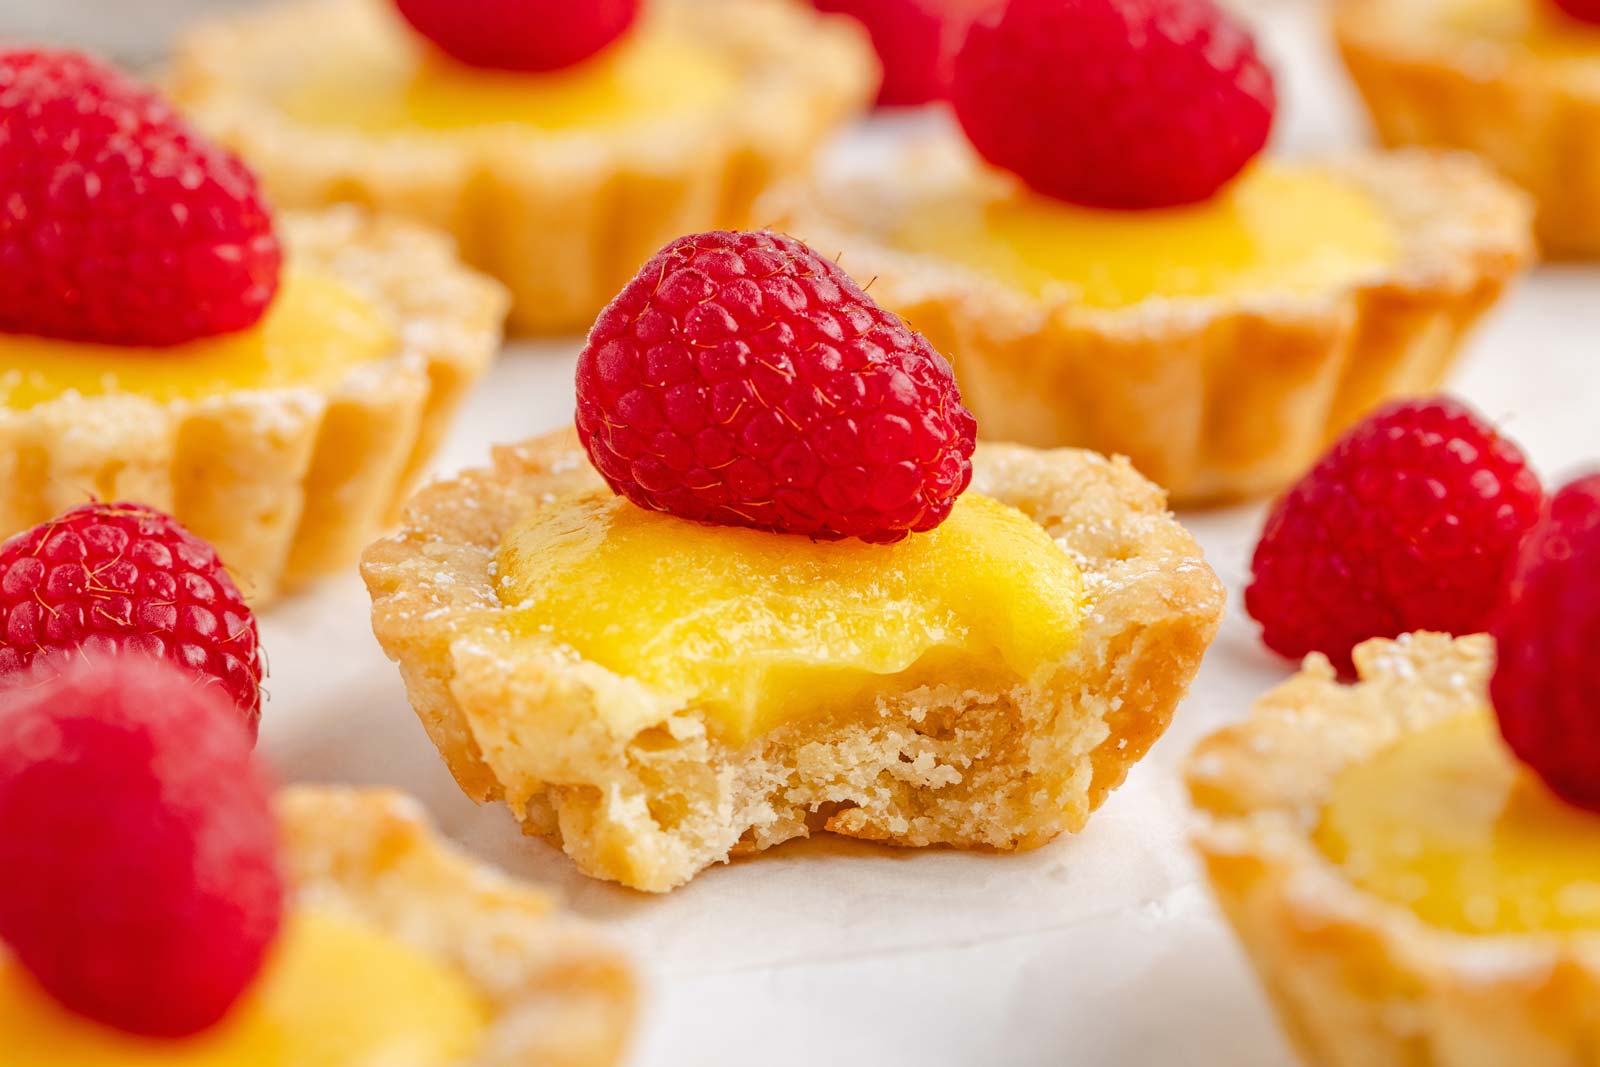
These lemon tartlets combine a buttery tart shell with tangy lemon curd, creating the ultimate bite-sized treat. Whether you’re serving them for Mother’s Day, Easter, or a baby shower, these tartlets bring a bright, refreshing flavor to any occasion. They can be made traditionally or gluten-free.
Apologies if you’re tired of tartlets – I’m not done with them just yet! As I mentioned in my Fruit Tartlets recipe, I absolutely love the tartlet pans I got. They make everything look so cute, and I can’t get enough of them.
If you’ve already read that post or the Chocolate Tartlets one, feel free to skip the sections below on the crust and how to make it. I love this crust so much, and after spending so much time searching for the perfect recipe, I have no desire to try another!
To my US readers – sorry that this recipe is a bit heavy on the eggs. I created this recipe ages ago before there was an egg shortage. I still wanted to share in time for Easter for the people who do have decently-priced eggs.
I’ve been posting some more egg-free recipes lately, with more to come, so if these tartlets aren’t for you, you might want to check these out → Eggless Desserts.
What’s to love
There are so many reasons to love these tartlets.
- Perfect balance of flavors – the crisp, buttery crust pairs beautifully with the tangy lemon curd.
- Easy to make ahead – both the crust and curd can be prepared in advance for a stress-free dessert.
- Elegant and impressive – their beautiful appearance makes them ideal for special occasions.
Ingredients
Here’s what you’ll need to make these tartlets. The full recipe can be found below in the recipe card.
For the crust
- Flour – you can use either all-purpose flour or the gluten-free alternative mentioned below.
- Granulated sugar – please don’t reduce or omit it, as the 1/4 cup (50 grams) of sugar is essential to the structure.
- Unsalted butter – creates a tender, flaky crust. Be sure to use it cold and cut into cubes.
- Large egg yolk – egg subs won’t work here.
- Milk – helps bring the dough together. If you’ve made my Pumpkin Tartlets or Apple Tartlets, you’ll recognize this crust recipe. The main difference here is using slightly more milk for the tartlet crust, making it easier to roll out. Using the original amount made it quite difficult to roll and cut.
- Vanilla and salt
For the lemon curd
Today’s recipe uses sugar, but if you prefer a honey-sweetened version, you could use my Paleo Lemon Curd recipe. It yields 1 cup, so you’ll be able to add just a tiny bit less than 1 tablespoon to each crust.
- Freshly squeezed lemon juice – fresh lemon juice is essential for the best flavor. Bottled juice won’t give you the same tangy, bright taste.
- Eggs – ensure they’re at room temperature so that they’re easier to combine.
- Egg yolks – extra yolks add richness and help the curd thicken.
- Lemon zest – zest adds an aromatic citrus kick that intensifies the lemon flavor in the curd.
- Granulated sugar – it’s not easily substituted without altering the taste and texture.
- Cold unsalted butter – butter adds a smooth, velvety texture and rich flavor. Make sure it’s cold and cut into pieces to incorporate easily.
Why use whole eggs and yolks?
Using both egg yolks and whole eggs in lemon curd creates a balance of texture, richness, and stability.
Egg yolks add richness, creaminess, and that velvety texture that makes lemon curd so luscious. Yolks also contribute to the vibrant yellow color.
Whole eggs add structure and firmness to the curd, making it less likely to become overly runny. The egg whites in whole eggs help with thickening while slightly lightening the density provided by yolks alone.
Together, they produce a curd that’s smooth, rich, and holds its shape well, perfect for filling tart shells or spreading on toast.
Using prebaked tart shells
If you’re short on time or just want a more convenient option, you might consider using the prebaked tart shells from World Market. These ready-to-use shells save you the effort of making and baking the crust from scratch, allowing you to focus on the filling and toppings.
The shells come in a pack of 16 for $5.99. While the recipe makes enough filling for 18 tartlets, you can easily divide it among the 16 shells without any issues.
Their tart shells may be slightly larger than mine. I haven’t personally tried them (since I live in Germany and we don’t have World Market), but I’ve consistently heard great things about them from others.
How to make the tart shells
I mention this below, but these tart shells are perfect for making ahead. If making both the crusts and the filling in one day feels like too much, you can prepare them separately and assemble everything on the day you plan to serve.
Here’s how to make the crust!
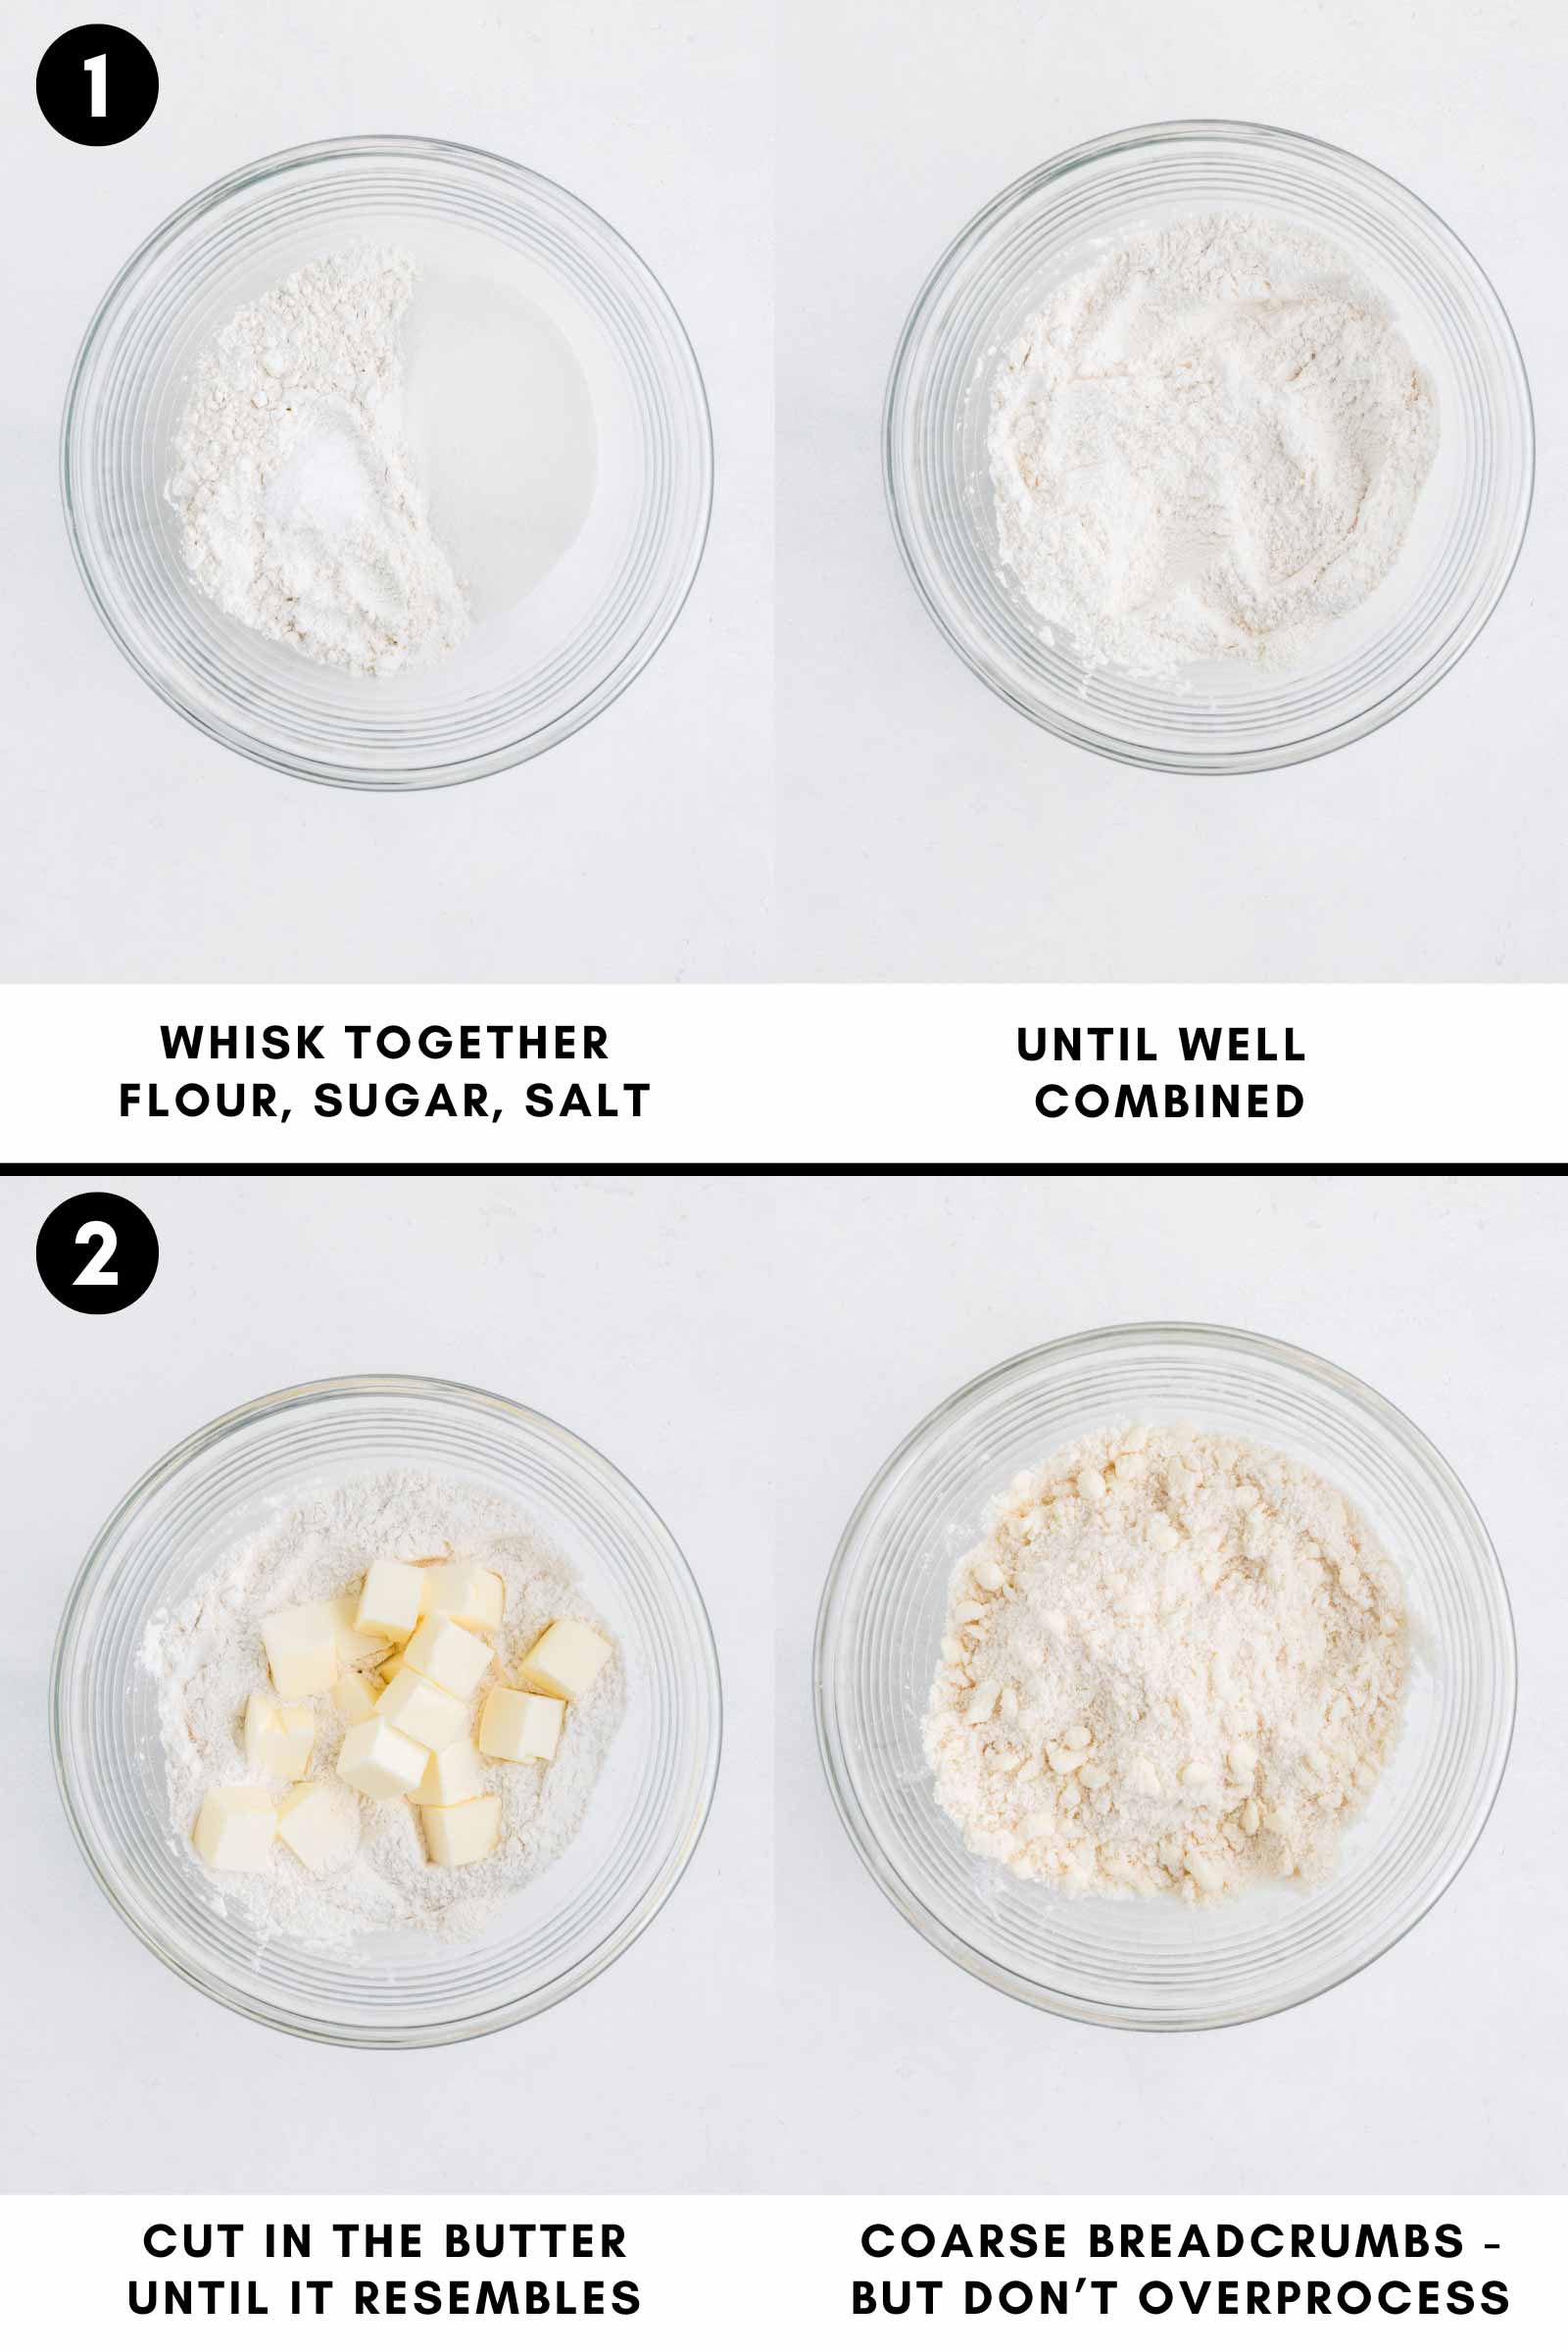
- In a bowl, whisk together the flour, sugar, and salt.
- Cut in the cold butter until the mixture resembles coarse breadcrumbs.
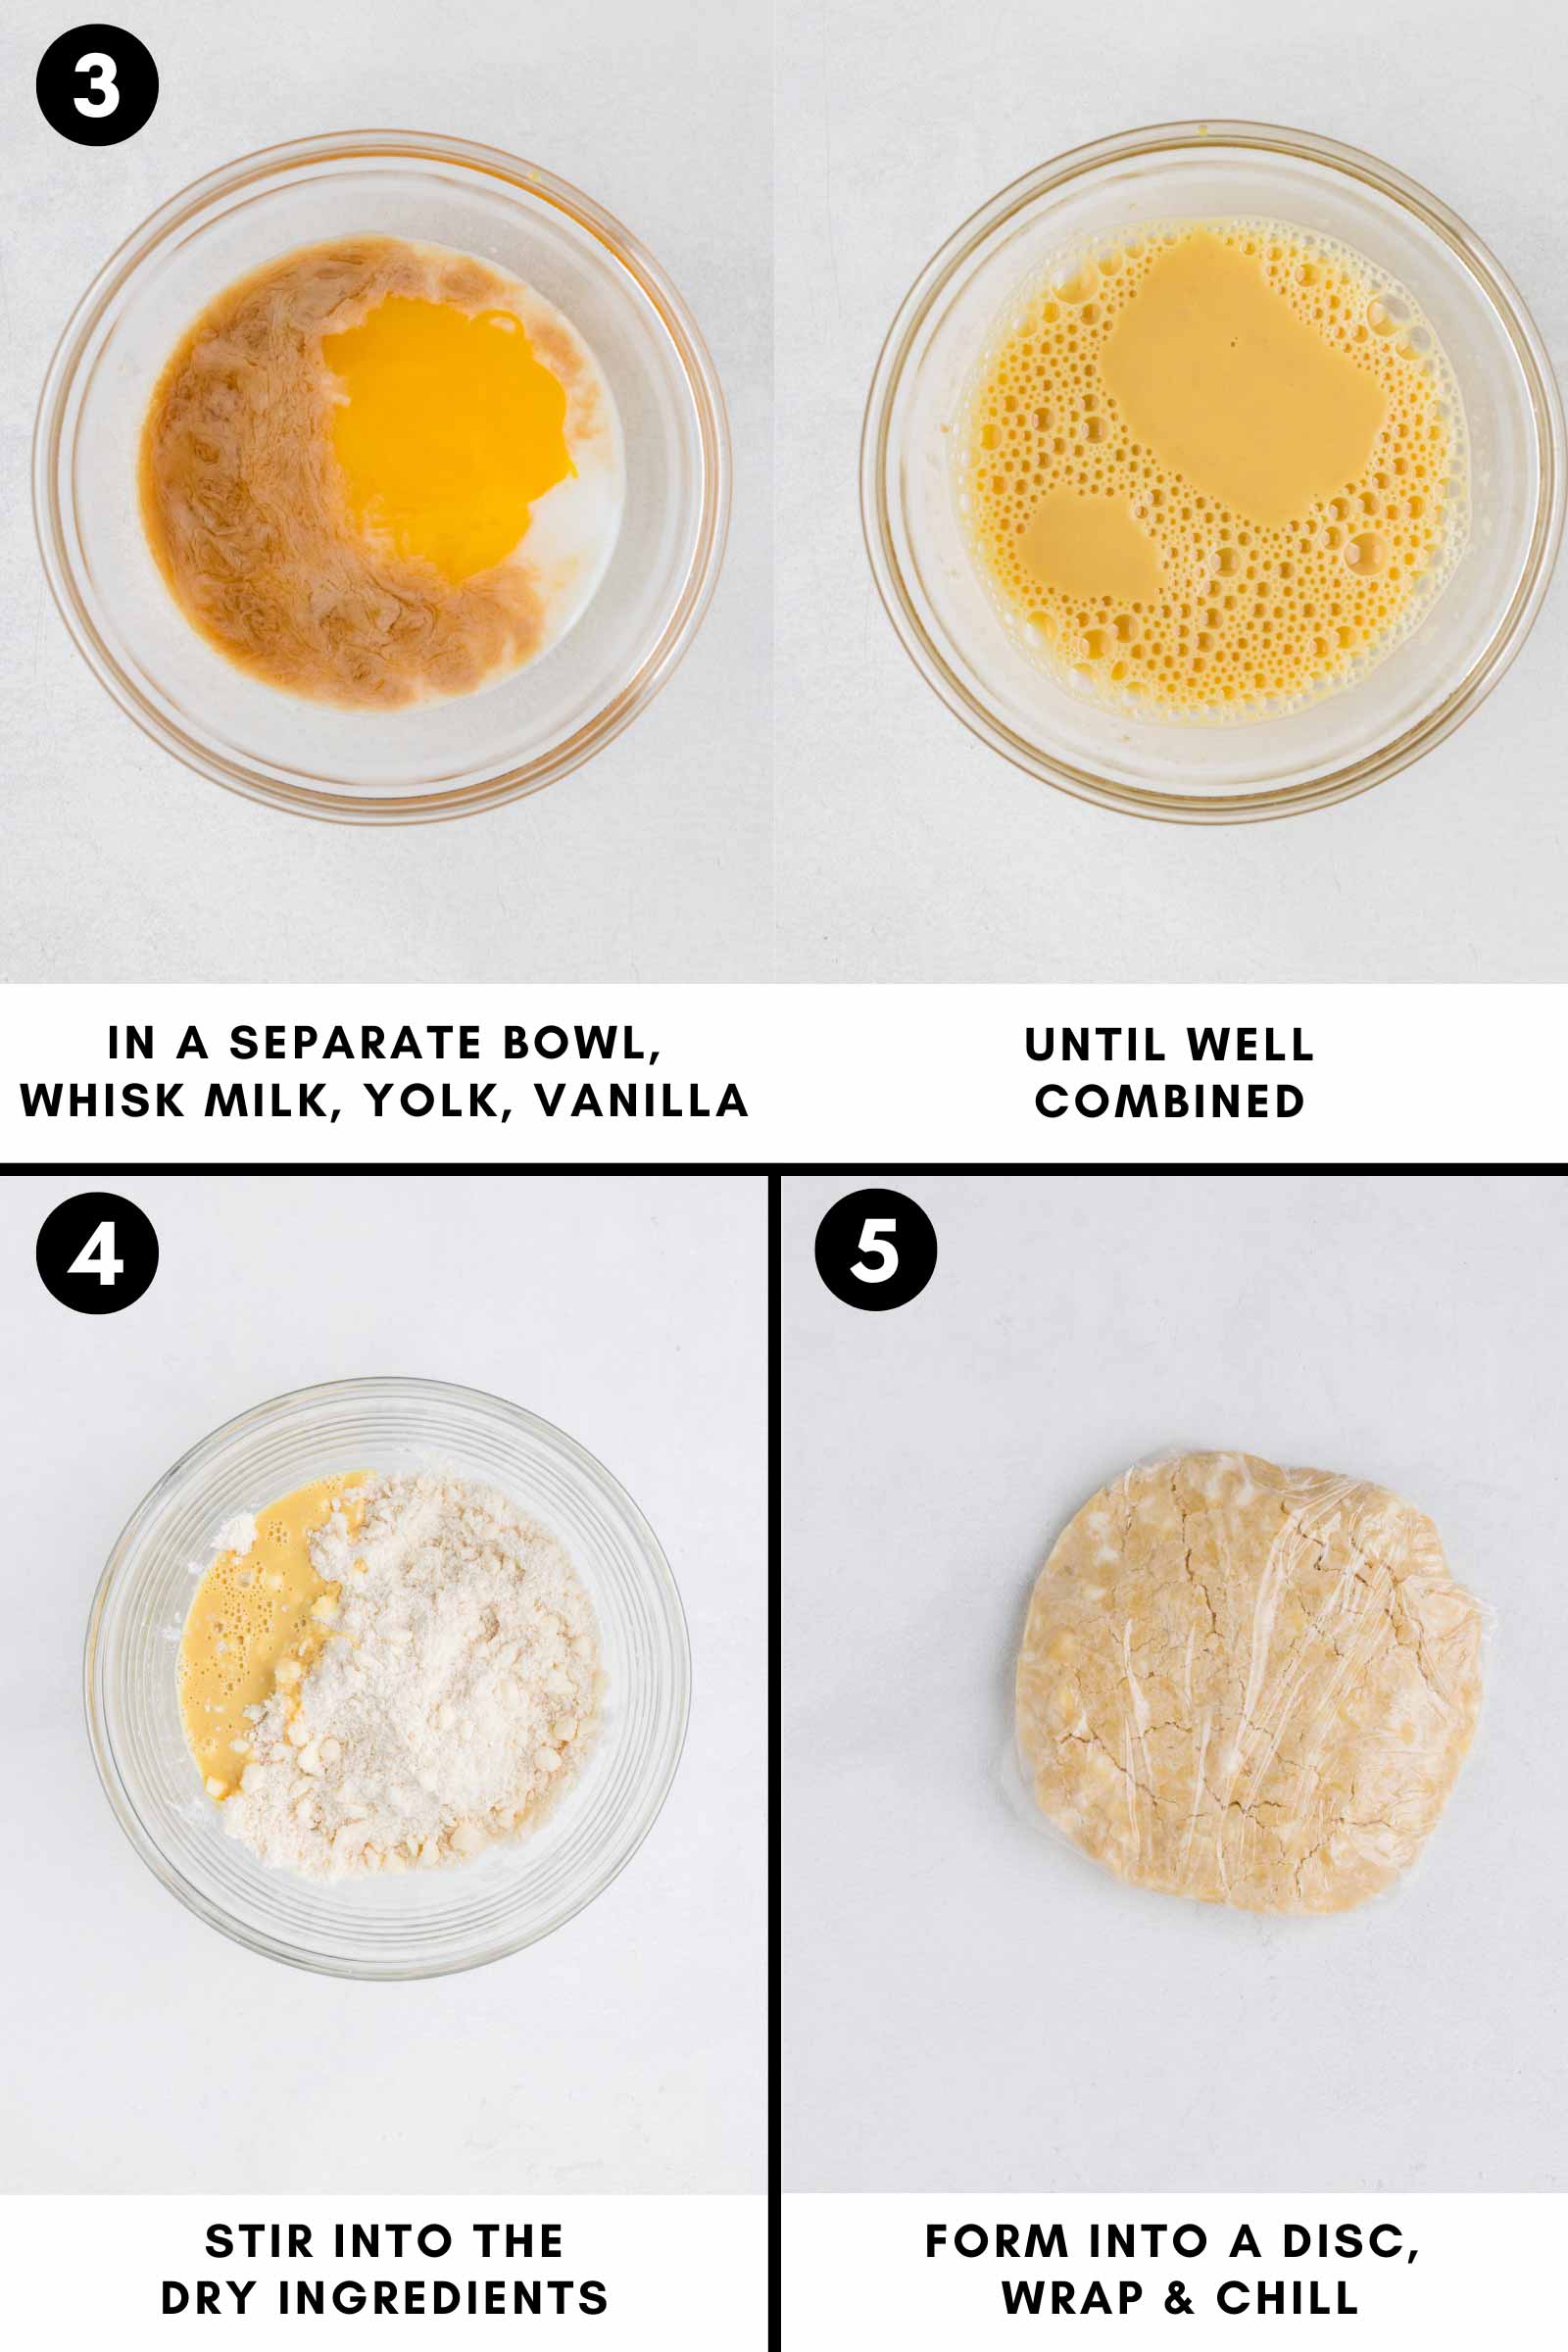
- Whisk the egg yolks, vanilla and milk together.
- Stir them into the dry ingredients.
- Work dough until it comes together, form into a disc, wrap in plastic, and chill for 1 hour.
As an Amazon Associate, I earn from qualifying purchases. For more info, see my disclosure.
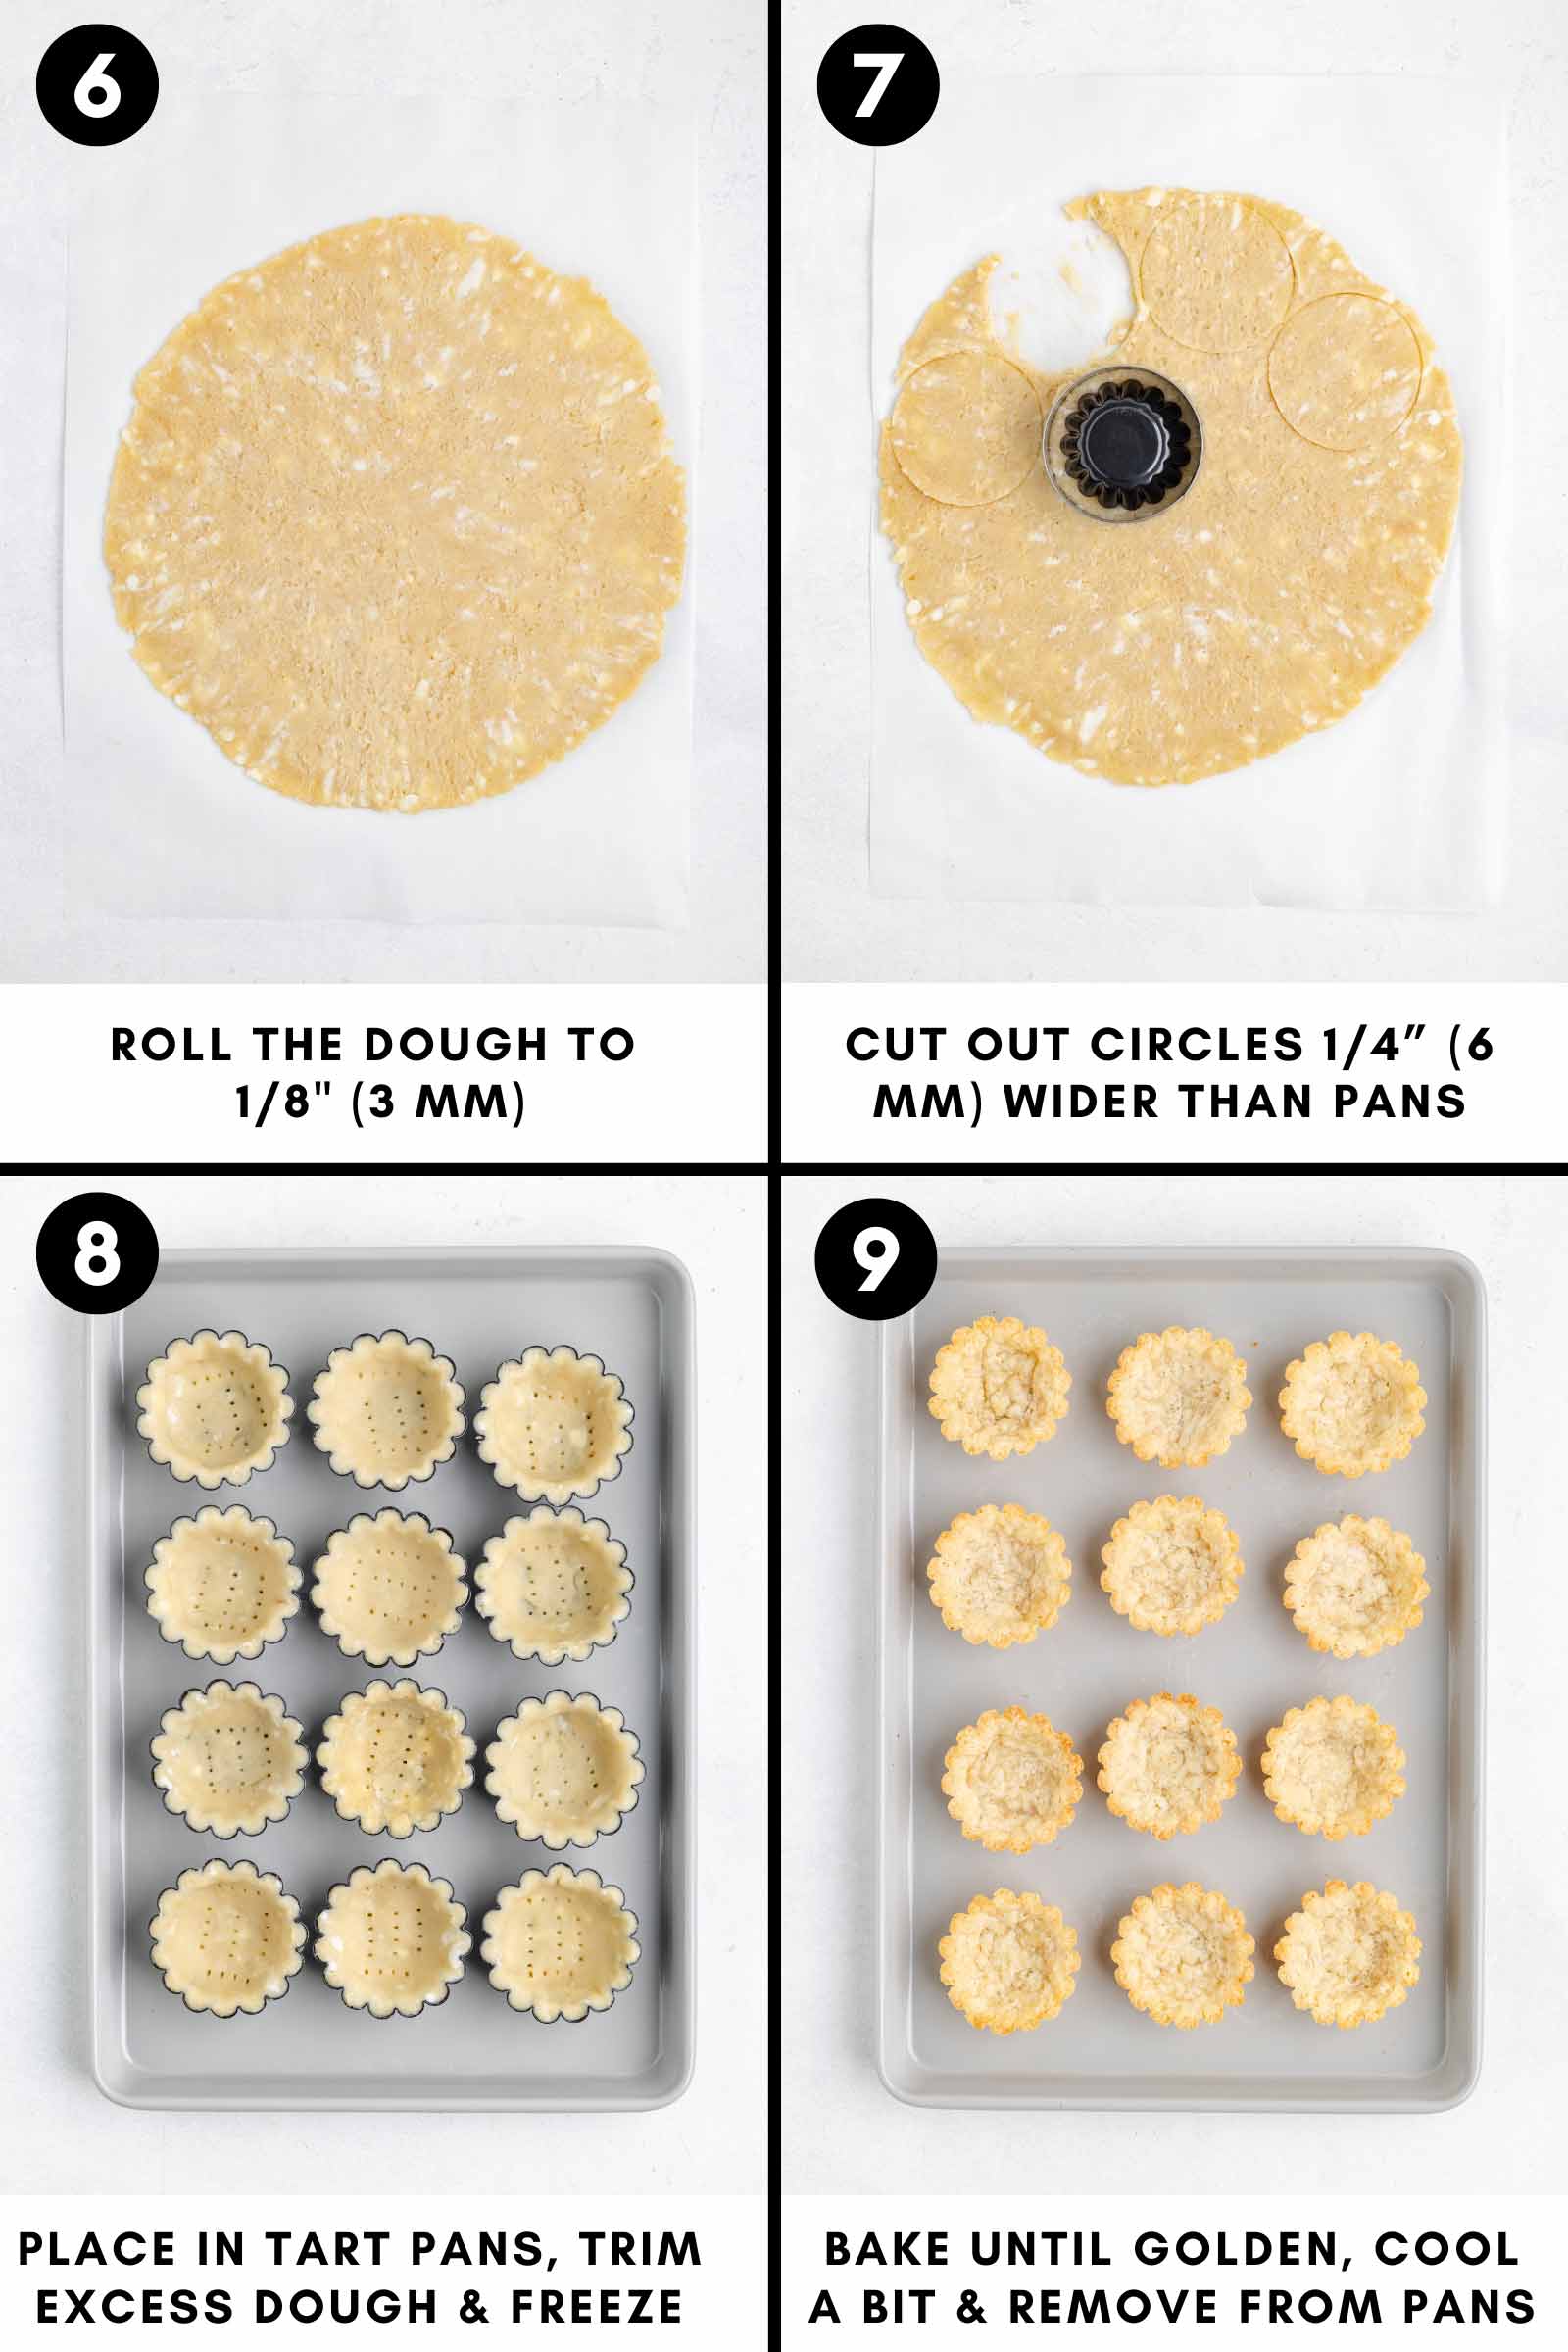
- Grease the tart pans (my photographer used these fluted 2.6″ (6.5 cm) tartlet pans). Roll out the dough.
- Cut circles to fit the pans.
- Press them into place, and prick the bottoms with a fork.
- Freeze for 20-30 minutes. Bake until golden brown. Let them cool before removing them from the pans.
How to make the lemon curd
If you’ve never made lemon curd before, don’t be worried! It’s really easy. You just have to pay attention and not walk away while the curd is cooking.
Here’s how to do it.
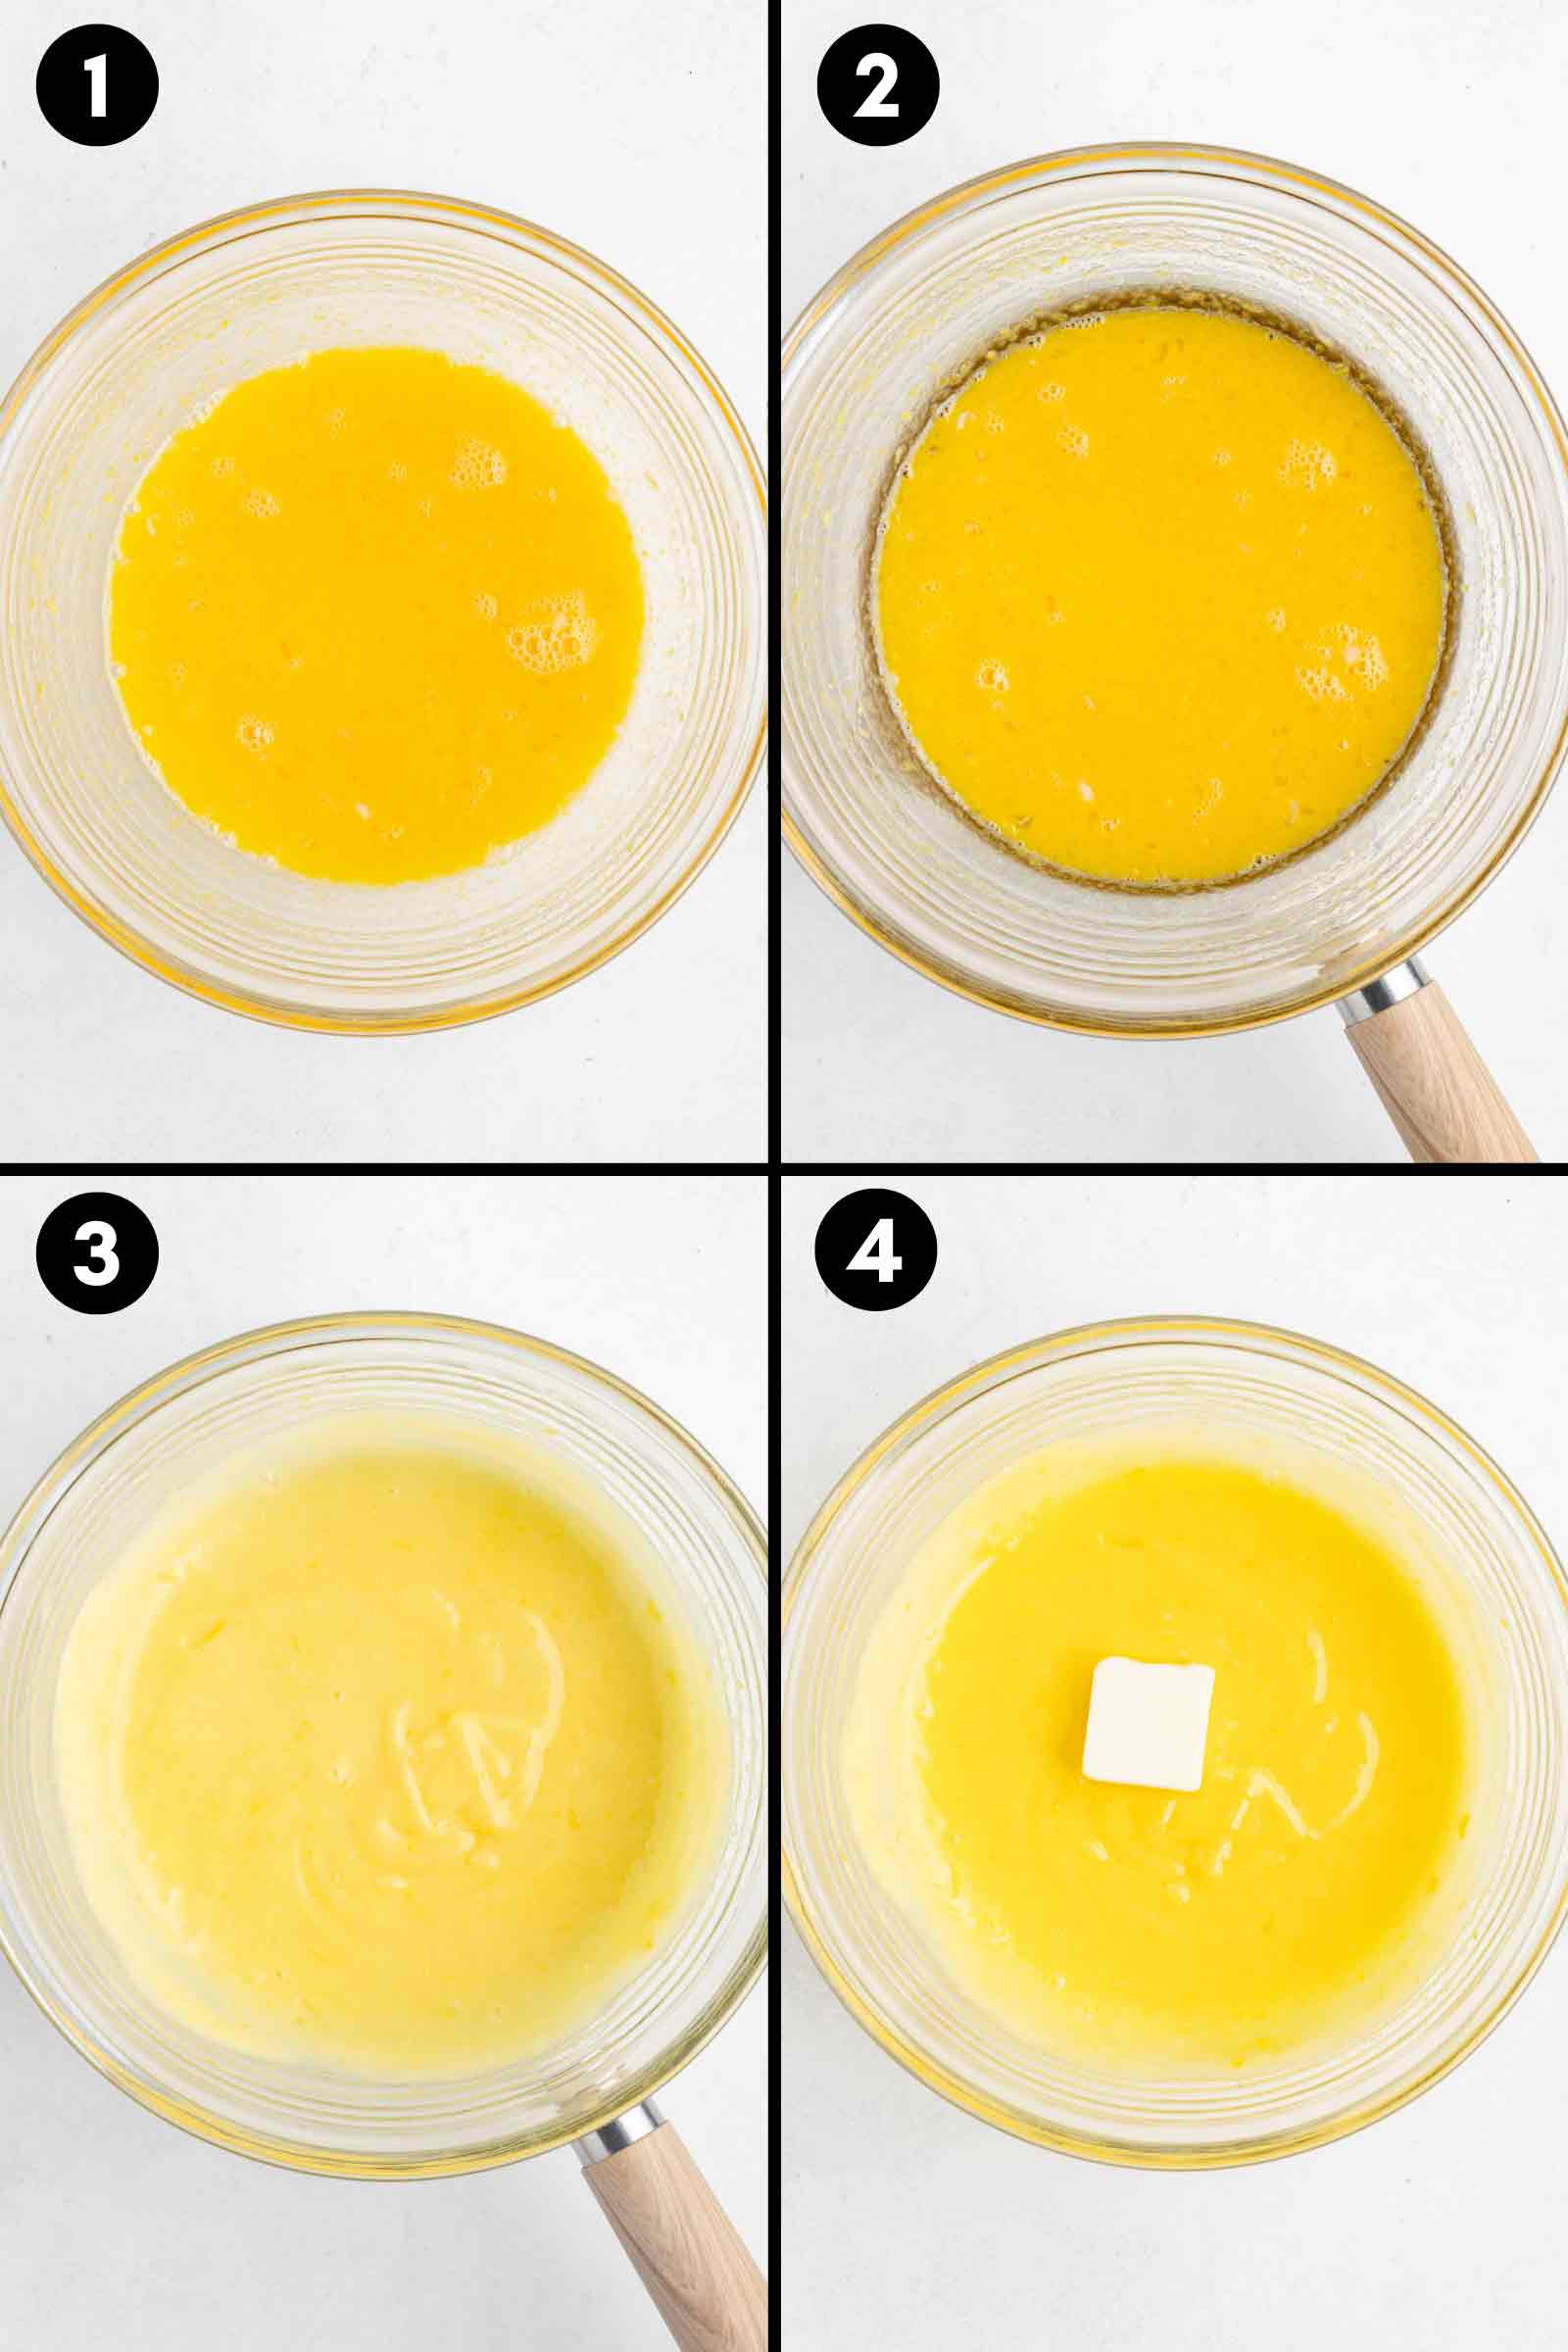
- In a nonreactive bowl, such as glass or stainless steel, whisk together the lemon juice, eggs, egg yolks, and sugar until the mixture is smooth and well combined.
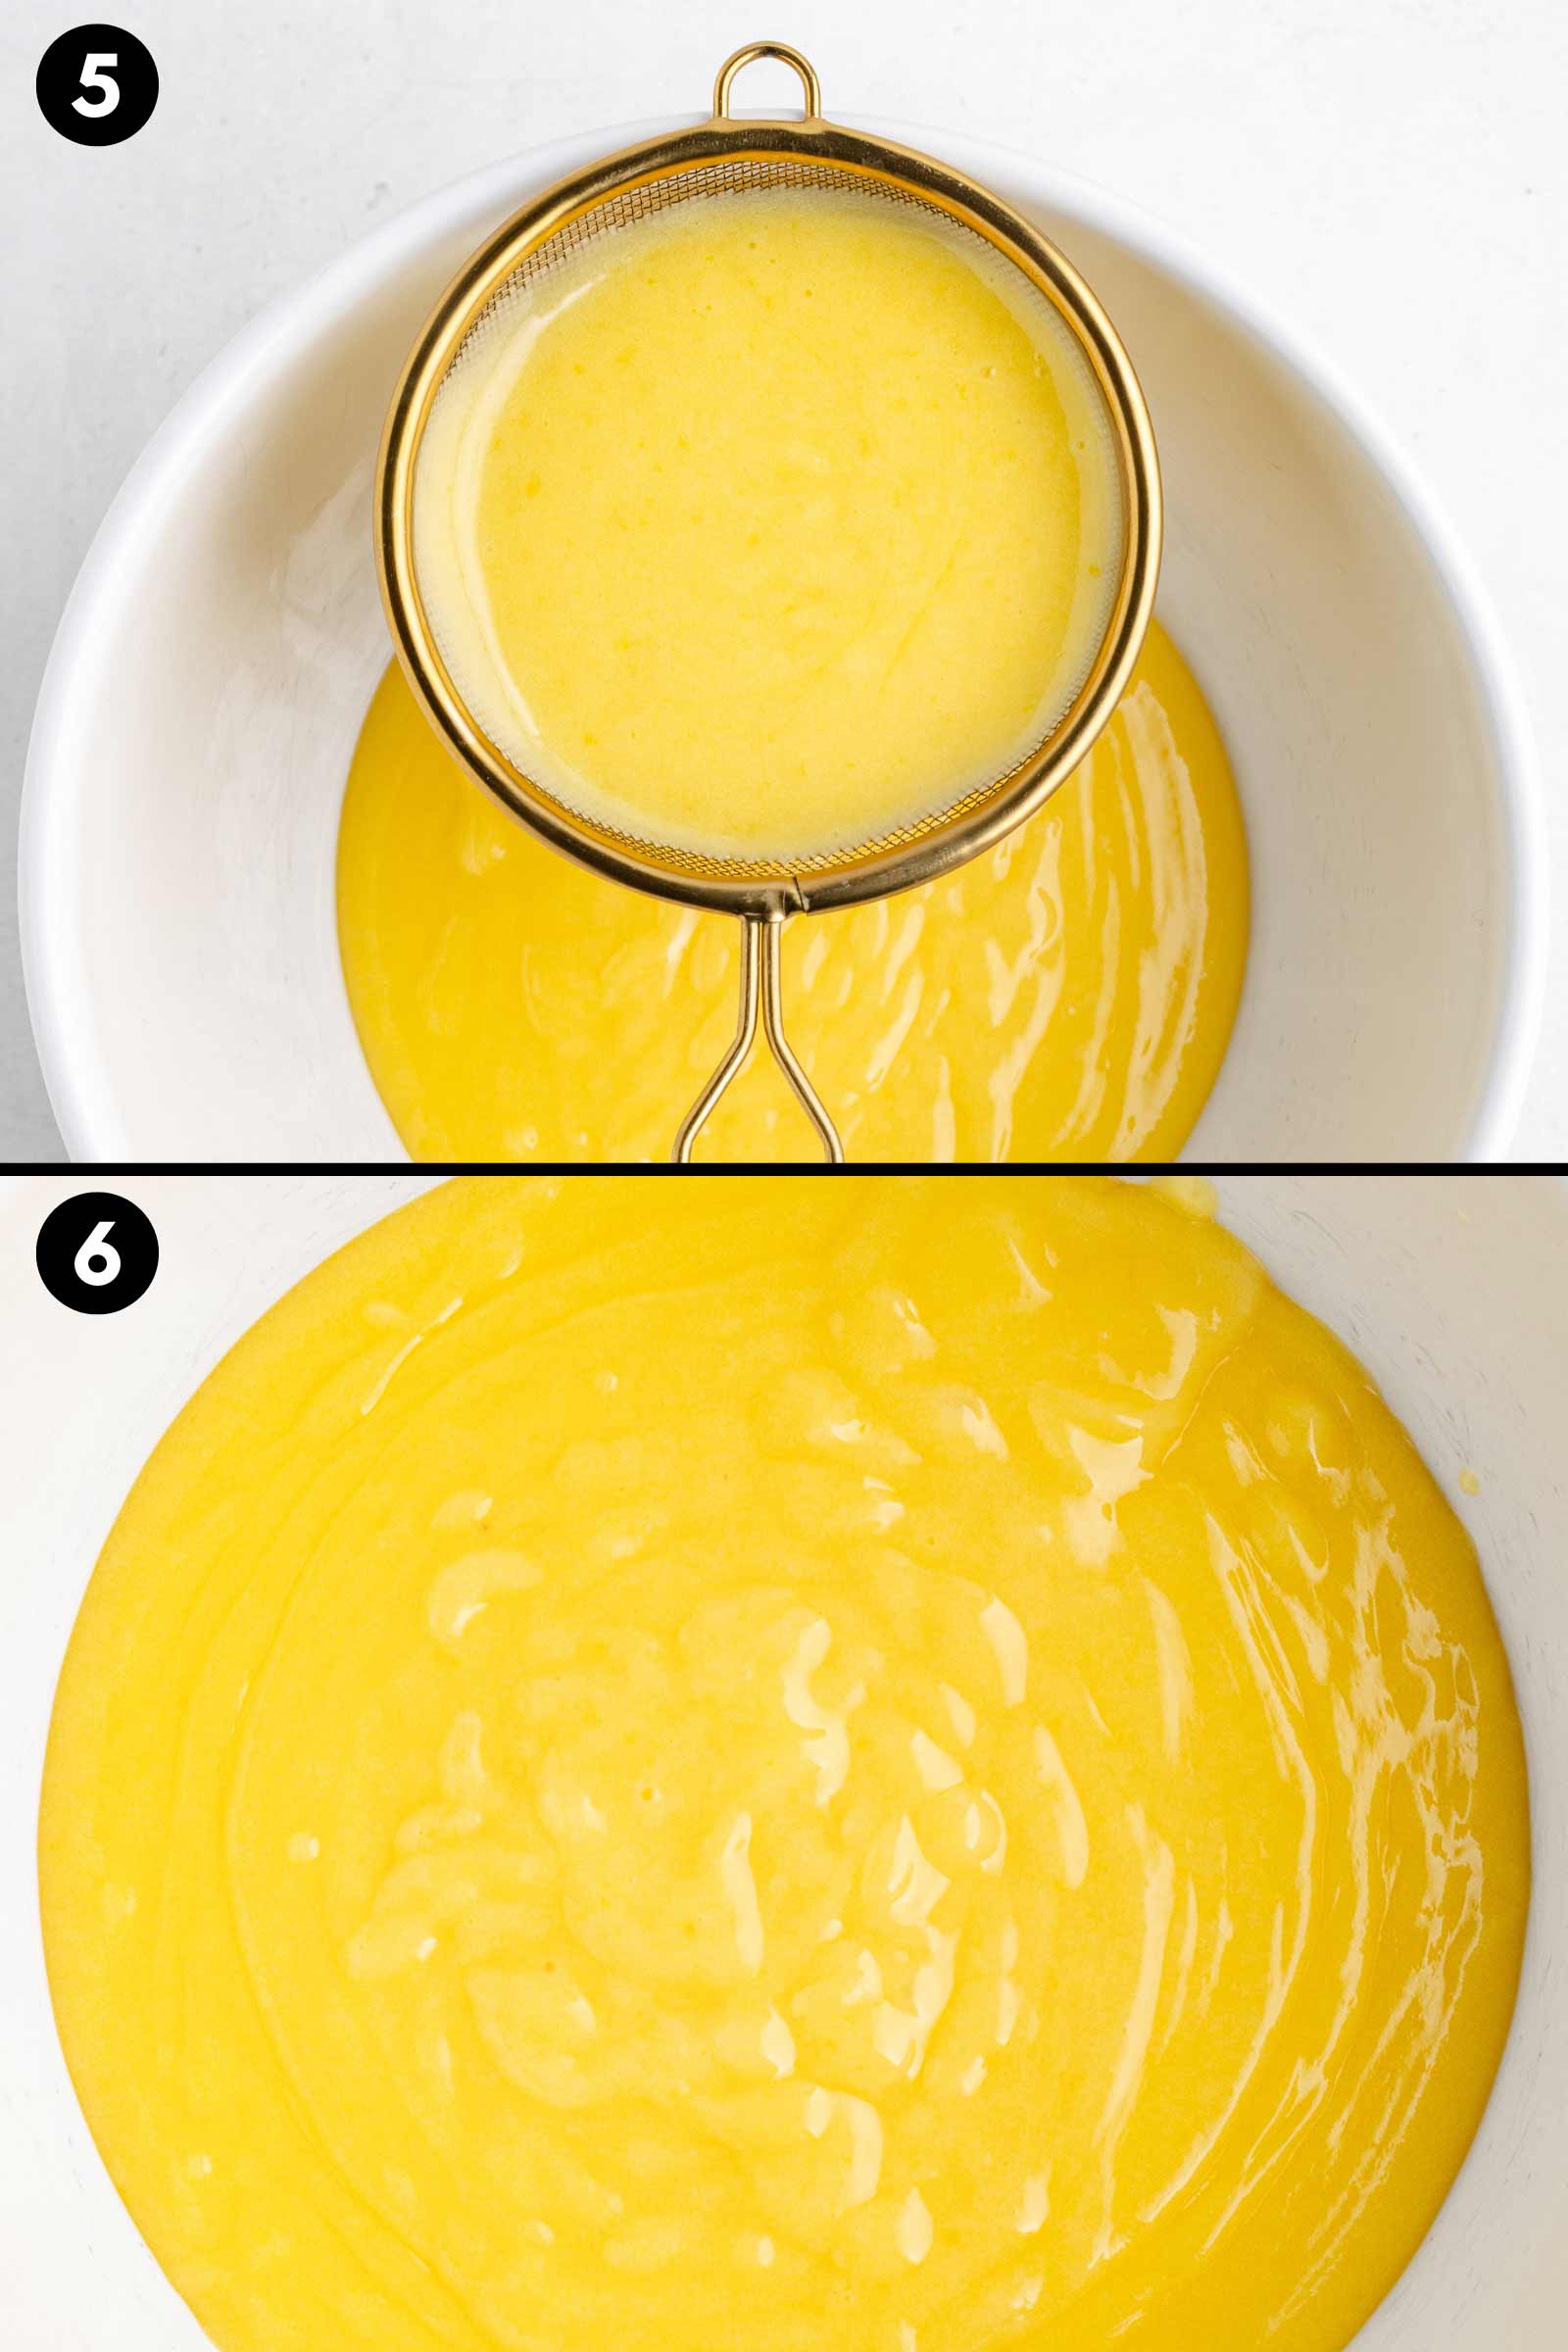
- Place the bowl over simmering water, ensuring it doesn’t touch the water.
- Whisk continuously until the mixture thickens and reaches 175 °F (79 °C), then remove from heat. Some suggest 160 °F (71 °C), but mine was still too runny at that point.
- Whisk in the butter, one tablespoon at a time, until fully incorporated.
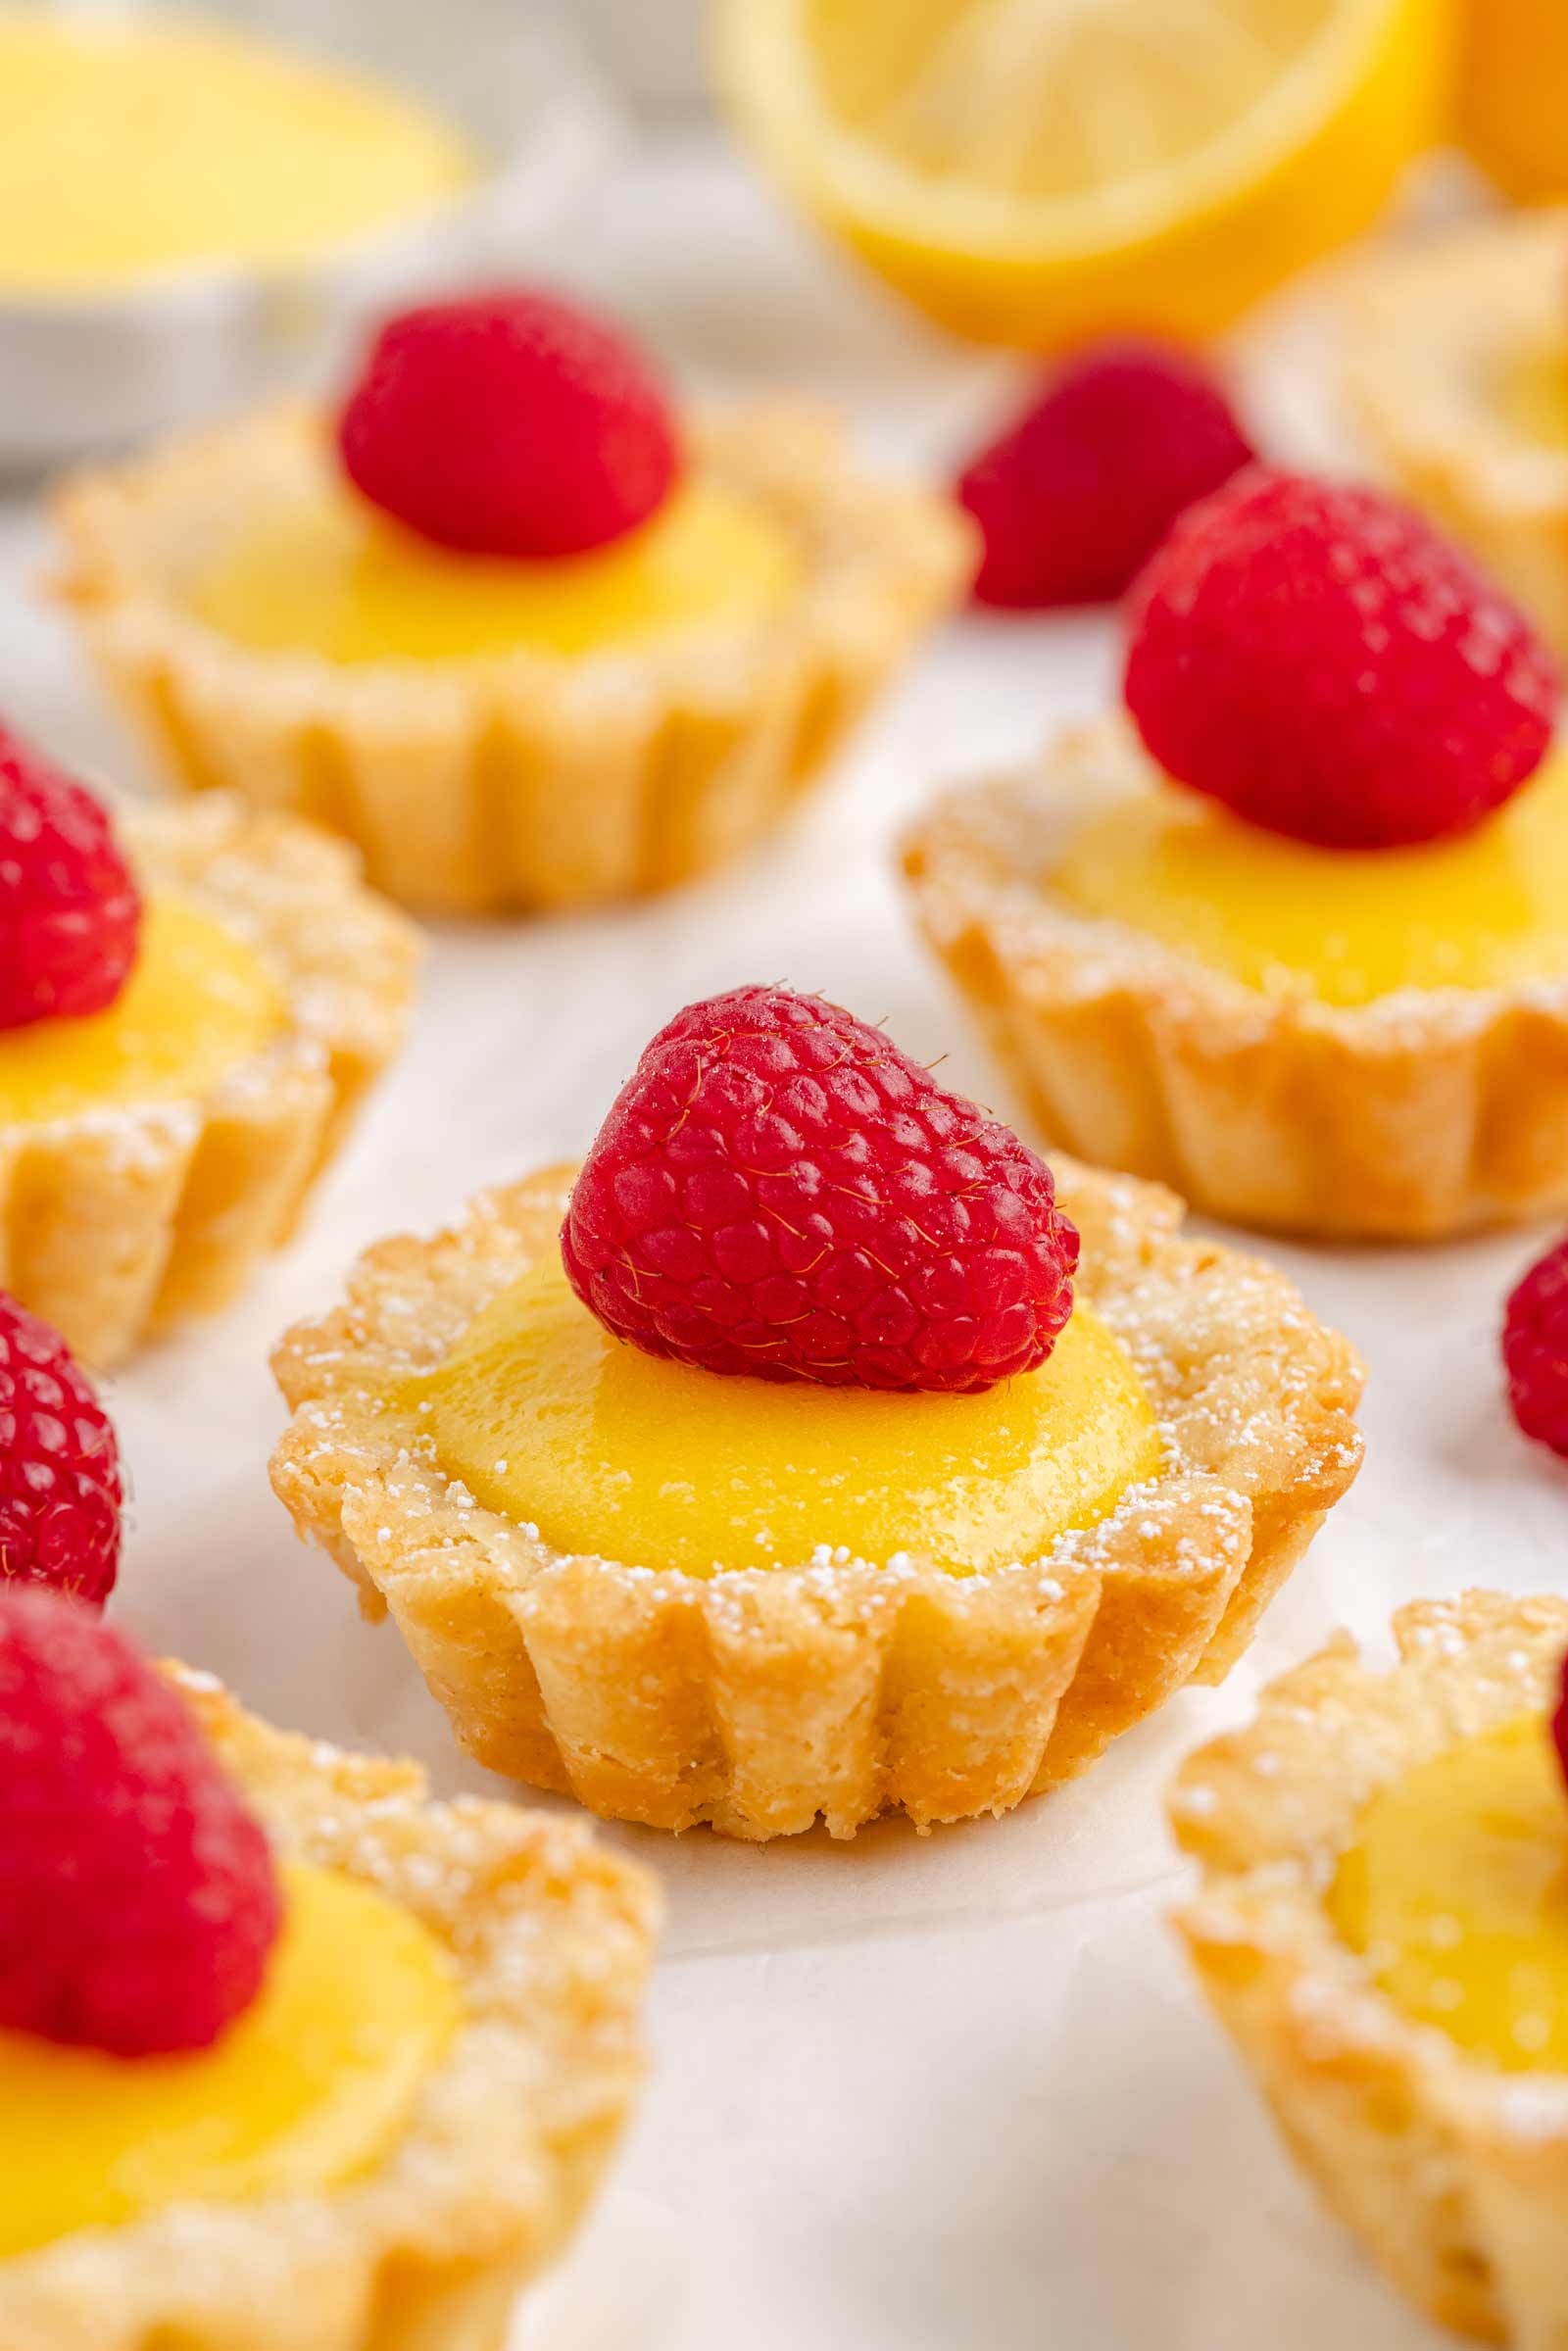
- Strain the lemon curd through a fine mesh sieve into a clean, nonreactive bowl.
- Cover the surface with plastic wrap, pressing it directly onto the curd to prevent a skin from forming (I skipped this step and had no issues). Let it cool to room temperature, about 1 hour.
Tips
These steps are all in the recipe, and I know people like to take shortcuts (as do I!), so I wanted to point these out as they are important.
- Chill the dough – cold dough is less sticky and easier to roll out or press into a tart pan, ensuring a smooth, even crust.
- Use a nonreactive bowl – when making the curd, use a glass or stainless steel bowl to avoid a metallic taste.
- Strain the curd – this removes any bits of cooked egg and ensures a smooth texture.
- Let the curd chill – cooling and chilling allows the flavors to develop and the curd to fully set.
Troubleshooting
If you run into any issues while making lemon tartlets, here’s how to fix them.
- Crust shrinking or cracking – make sure to chill the dough properly before baking and avoid overworking it. If cracks appear, you can patch them with extra dough or use a thin layer of melted white chocolate to seal any gaps.
- Crust cracks when removed from the pan – take the crusts out of the pan while they’re still slightly warm, as they’ll be more pliable. If they have cooled completely, gently tap the pan to help release them.
- Lemon curd is too runny – make sure to cook the curd to at least 175 °F (79 °C). If it’s still too thin, return it to the heat and cook for a bit longer while whisking constantly.
- Lemon curd is grainy – this can happen if the eggs cook too quickly. To avoid this, use low heat and constantly whisk the mixture. If it’s already grainy, strain the curd through a fine mesh sieve to remove any cooked egg bits (which you’re supposed to do, anyway!).
- Lemon curd is too tart – if the curd is too tangy for your liking, try adding a bit more sugar next time or use sweetened whipped cream to top off the tarts.
- Lemon curd has a metallic taste – avoid using reactive cookware like aluminum or unlined copper, as they can react with the acidity in the lemon juice and create an unpleasant metallic taste.
How to make ahead, store and freeze
These lemon tartlets are perfect for making in advance!
The dough
You can prepare the tart dough up to 3 days ahead or freeze it for up to 3 months. Wrap the dough disc tightly in plastic wrap, then place it in a Ziploc bag.
When ready to use, thaw it overnight in the fridge. Avoid using the microwave to thaw, but if necessary, use 30% power in short bursts.
Unbaked tart shells
You can press the dough into the tart pans and store them in an airtight container in the refrigerator for up to 3 days or freeze them for up to 3 months.
Baked tart shells
Once baked, store the tart shells in an airtight container at room temperature for up to 3 days or refrigerate them for up to 5 days. They can also be frozen for up to 3 months.
The lemon curd
You can make the lemon curd up to 3 days in advance and store it in an airtight container in the refrigerator. If it thickens too much, let it sit at room temperature for 15-20 minutes before using, stirring occasionally to soften.
If you want to freeze the curd, pour it into an airtight container and freeze for up to 3 months. Thaw it overnight in the refrigerator and stir well before using.
Assembled tartlets
Once assembled, refrigerate the tartlets in an airtight container for up to 3 days. But I really recommend filling and baking the tartlets on the day of serving.
This is to assure that the crusts are at their best. They can get soft over time. To avoid that, use the least amount of milk possible when making the crust.
Gluten-free option
So far, I’ve only tested this tart crust using King Arthur Flour Gluten-free Measure for Measure Flour.
It always turns out just as delicious as the version made with all-purpose flour. I haven’t tried it with Bob’s Red Mill Gluten-free 1-to-1 Baking Flour yet, but based on similar recipes I’ve made, the crusts may have a slightly grittier texture compared to the crusts made with King Arthur.
If you try another brand and aren’t happy with the results, I highly recommend giving it another shot with King Arthur.
Lemon curd is naturally gluten-free, so no need to worry about making any changes there.
And that’s it! I hope you’ll enjoy them. :)

✨🍋Did you try these lemon tartlets? 🍋✨
Please share your feedback by leaving a ✍️review and 🌟 rating – it helps me and others! I so appreciate it. 💖
Lemon Tartlets

- Prep Time:
- Cook Time:
- Ready in:
- Yield: 18
Ingredients
- 1 1/4 cups (150 grams) all-purpose flour or King Arthur Flour Gluten-free Measure for Measure Flour for a gluten-free version
- 1/4 cup (50 grams) granulated sugar
- 1/2 teaspoon salt
- 8 tablespoons (113 grams) unsalted butter, cold, cut into 1/2" cubes
- 1 large egg yolk
- 1 teaspoon vanilla extract
- 1 1/2 to 2 tablespoons milk
- 1/3 cup (80 ml) freshly squeezed lemon juice
- 2 large (50 grams each, out of shell) eggs
- 2 large egg yolks
- 1 tablespoon lemon zest
- 1/2 cup (100 grams) granulated sugar
- pinch of salt
- 1/4 cup (56 grams) cold unsalted butter
- 18 fresh raspberries, blackberries or strawberries
For the crust:
For the curd:
Optional topping:
Directions
- In a medium bowl, whisk together the flour, sugar, and salt.
- Cut in the cold butter until the mixture resembles coarse breadcrumbs.
- In a separate small bowl, whisk the egg yolks, vanilla, and 1 1/2 tablespoons of milk. Stir this into the dry ingredients.
- Use your hands to work the dough and bring it together. The dough shouldn’t be crumbly, as you're going to roll it out. If necessary, add more milk, but don't add too much, as it'll make the baked crusts soft.
- Form into a disc and wrap with plastic wrap.
- Chill for 1 hour. You can also freeze it for up to 3 months. While it’s chilling, you can make the filling (below).
- Grease eighteen 2.6” (6.5 cm) fluted non-stick mini tart pans
- Roll out the dough between 2 pieces of parchment paper to about 1/8 inch (3 mm). I used the bottom of a glass (a cookie cutter would give you better, cleaner-cut edges) to make circles that were about 1/4” (6 mm) wider than the widest part of the tart pans, and I still had to trim some away. Do a test to make sure your circles are the right size for your pans. If the dough becomes hard to work with, stick it in the freezer for a few minutes. Then you’ll be able to very easily remove the circle cut-outs. If the circles don’t come off the parchment paper perfectly, it doesn’t really matter since you’ll be pressing them down into the pans and will likely have to trim some off anyway.
- Place a circle cut-out over the top of the greased mini tart pan and press it firmly into place. Be sure to press down around the bottom edge to remove any air pockets.
- Prick holes over the bottom (not going all the way through the crust, but almost) with a fork. Repeat with the remaining tartlet pans.
- Place in the freezer for 20-30 minutes.
- Towards the end of the chill time, preheat the oven to 375 °F (190 °C) and place a baking sheet large enough to fit the tartlet pans in the lower third of your oven.
- Place the tartlets directly onto the hot baking sheet and bake for 14-17 minutes, rotating the pan halfway through if you notice them browning too quickly in certain areas, until the sides are nicely browned and the bottom has browned.
- Remove the baking sheet and tartlets from the oven and place them on a wire rack to cool for about 15-20 minutes before removing the crusts from the pans. To do that, just turn the pan over and let the crust fall into your hand. It’s important to do this while they’re still a bit warm. They came out super easily.
- If making ahead of time, you can put the cooled crusts in an airtight container and store them at room temp for up to 3 days.
- In a nonreactive bowl, whisk together the lemon juice, eggs, egg yolks, lemon zest, sugar and salt until smooth.
- Place the bowl over a pan of simmering water, ensuring it doesn’t touch the water.
- Continuously whisk the mixture until it thickens and reaches a temperature of 175 °F (79 °C), and then immediately remove from the heat. Some sites say 160 °F (71 °C), but mine was still much too runny at this point. The first time I made it, I cooked it to 160 °F, added the butter, realized it wasn’t going to get much thicker, put it back on the heat, and thickened it up more. And it was fine (just saying in case you have the same issue).
- Whisk in the butter, one tablespoon at a time, until fully incorporated.
- Strain the lemon curd through a fine mesh sieve into a clean, nonreactive bowl.
- Cover the surface of the curd with plastic wrap, pressing it directly onto the surface to prevent a skin from forming, or simply stir ocassionally as it cools.
- Let cool until room temp, about 1 hour. You can place it in the fridge or freezer and stir occasionally if in a hurry. You can also make this 3 days in advance and keep it refrigerated. I had no issue with scooping it straight from the fridge into the crusts.
- I recommend filling the tartlets the day of serving. This is to assure that the crusts are at their very best! They get softer over time.
- Preheat the oven to 325 °F (163 °C).
- Add 1 tbsp (15 grams) of curd to 18 cooled tartlet shells. Place the filled tartlet shells (out of their pans) directly on a baking sheet.
- Place the baking sheet in the oven and bake for 10 minutes. This just helps the curd set.
- Let them cool for 10 minutes in their pans on the baking sheet which has been placed on a cooling rack.
- Remove the tartlets from their pans, place on a cooling rack, let cool for about 20-30 minutes and then chill for an hour.
- Top with a raspberry or other fruit before serving.
- Refrigerate the tartlets in an airtight container for up to 3 days.
Make the crusts:
Make the lemon curd:
Bake the tartlets:
Join over 12,400 readers and sweeten up
your inbox with new posts for free!
This subscription is free of charge and can be canceled at any time.


There are no responses on “Lemon Tartlets” — Be the first one!