If you’re wanting to learn how to make peanut butter at home, it couldn’t be any easier to make! You only need one ingredient and a food processor or high-powered blender to make peanut butter. Once you try it, you’ll never want to buy store-bought again.
Making your own peanut butter is so much cheaper and tastier than store-bought brands. It’s super easy and takes about 5 minutes! Just dump peanuts into a food processor and let it go. If you don’t believe me, try it and see!
I first posted this peanut butter recipe because when I first moved to Germany, I had a student who was excited about her peanut butter recipe. She said, “I put a stick of butter in the food processor and add some peanuts!”
I loved her enthusiasm, but… nope. That’s not peanut butter.
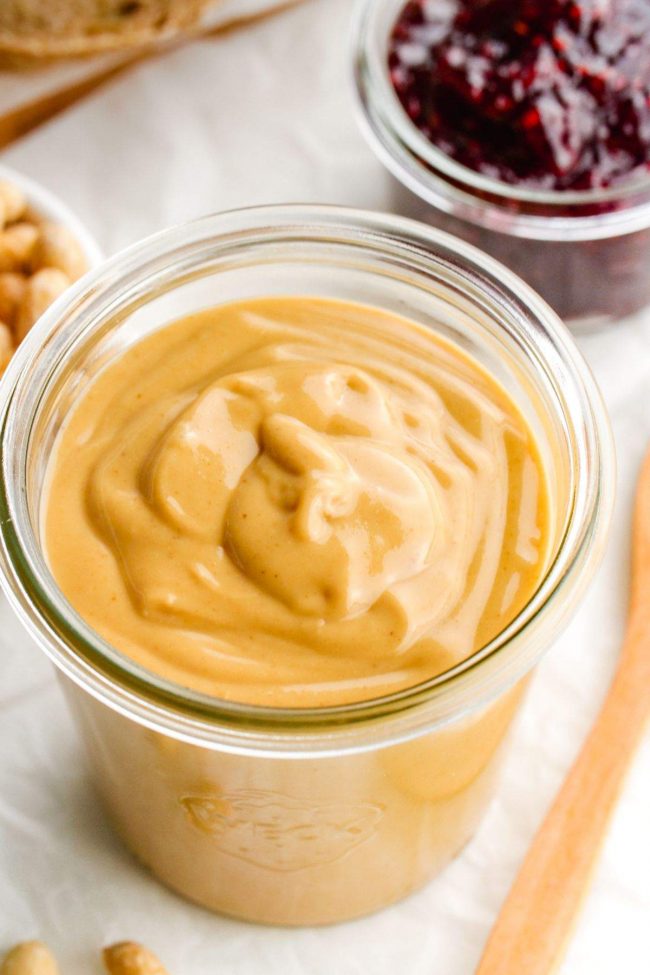
So this fresh ground peanut butter recipe is for her and anyone else wanting to make their own creamy peanut butter.
Some of the natural peanut butter I find here in Germany just isn’t the same as in the States. Some of it is so bad that I can’t eat it.
I thought peanut butter was peanut butter, but – apparently not! I should say that I’ve been here for 13 years and haven’t bought store-bought for about 7 years, so it could be that things have improved.
By making my own, all I’m buying are peanuts and letting the food processor do all the work. Super easy!
How to make peanut butter at home
You need a food processor or a high-speed blender like a Blendtec or a Vitamix. A normal mixer will not work!
Add enough peanuts that the blade of your food processor bowl is well covered. I’d say by an inch or two. If you don’t add enough, then it won’t blend properly.
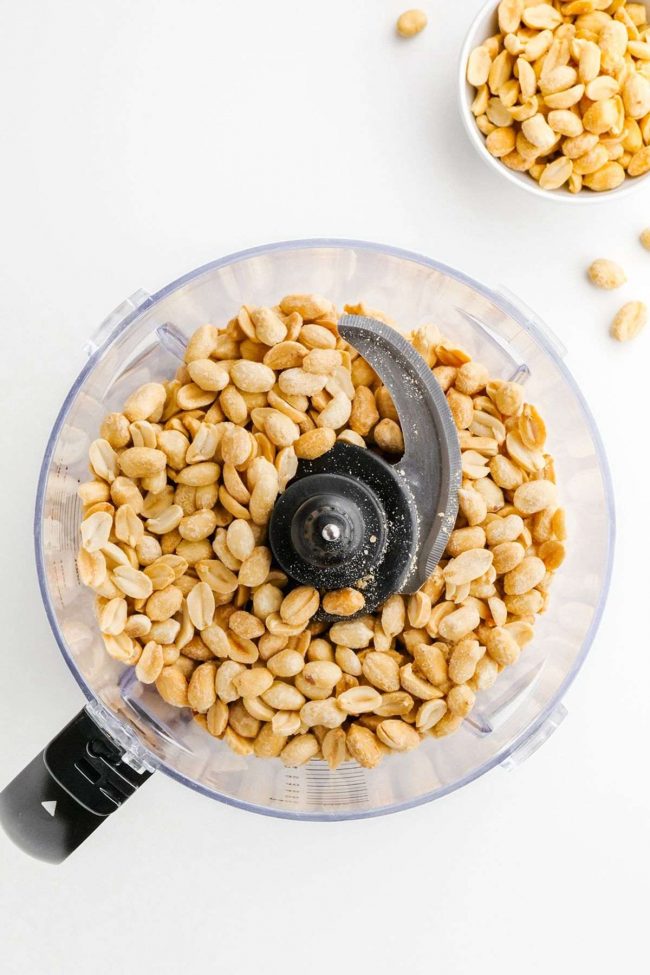
The exact minimum amount will depend on the size of your food processor. I always use at least 2 cups of peanuts.
If you don’t need that much peanut butter, then see the questions in the storage section below. Surely within 6 months, you’ll use it up. You could start by making these Gluten-free No-bake Cookies. They’re definitely a favorite of ours!
If you use a high-speed processor, then I highly recommend using the smaller jar that’s intended for making nut butter. Using the large one is a pain when making nut butter because you often need to stop and stir.
Now start processing. At first, you’ll get something like this that looks like chopped peanuts.
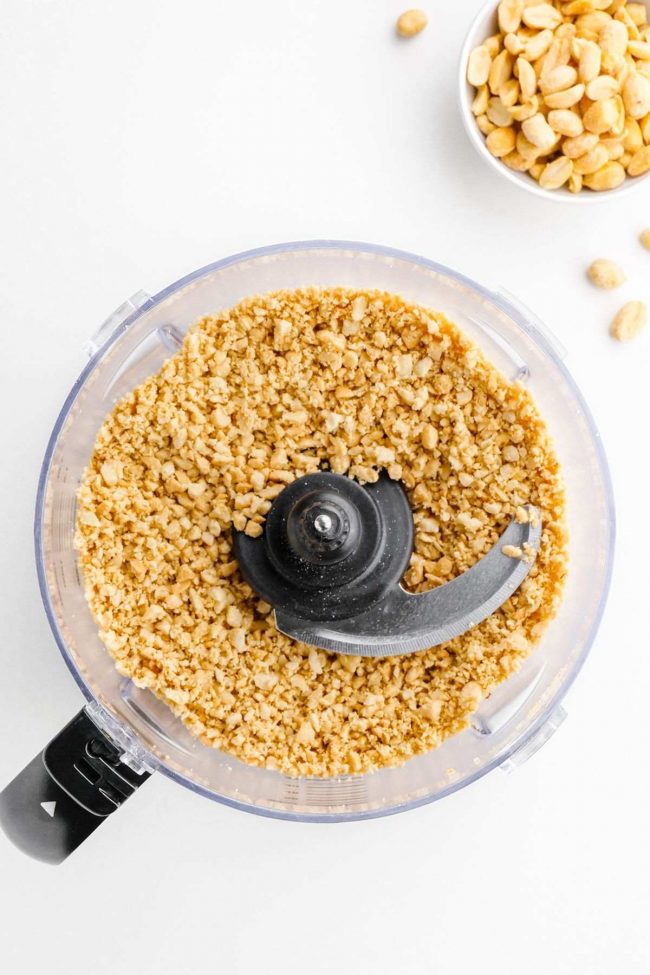
After a few more seconds, you’ll have this. Perhaps some people like their peanut butter this thick. I can see how it’d be practical for spreading on bread.
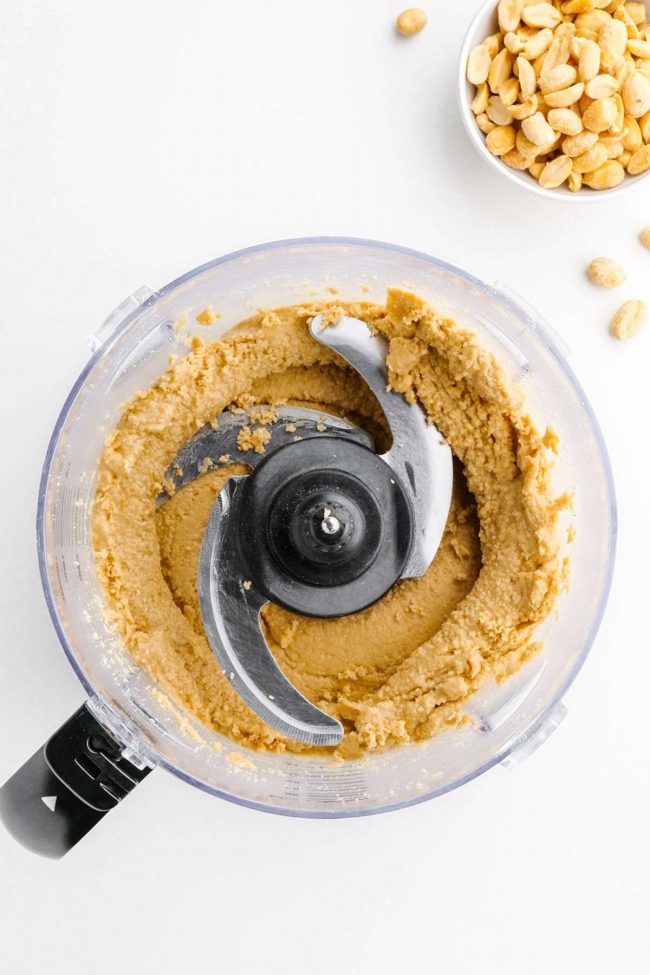
But keep going because once you chill it, it’ll be crumbly and not spreadable.
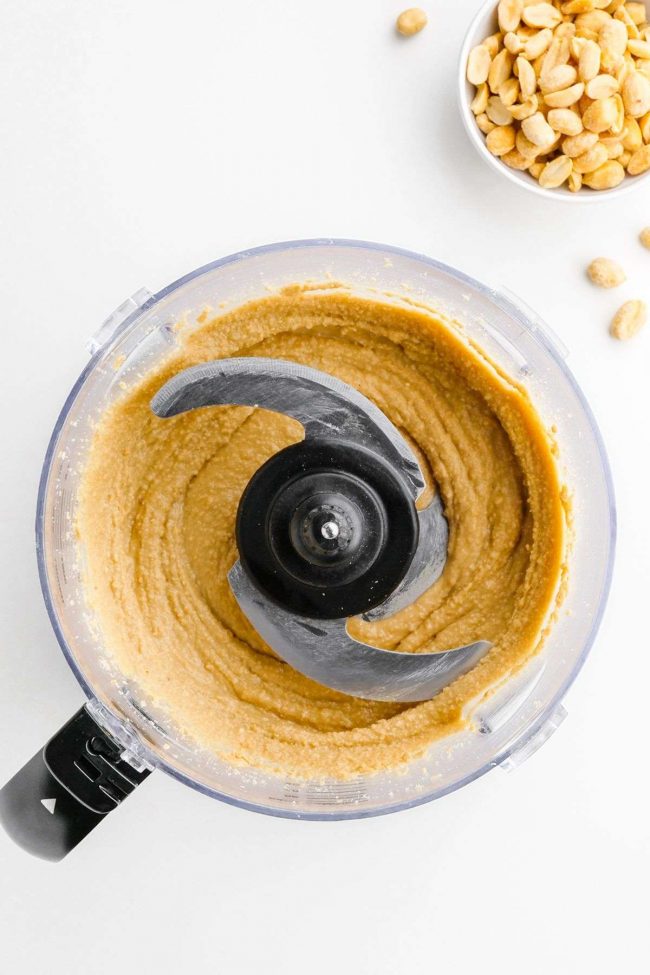
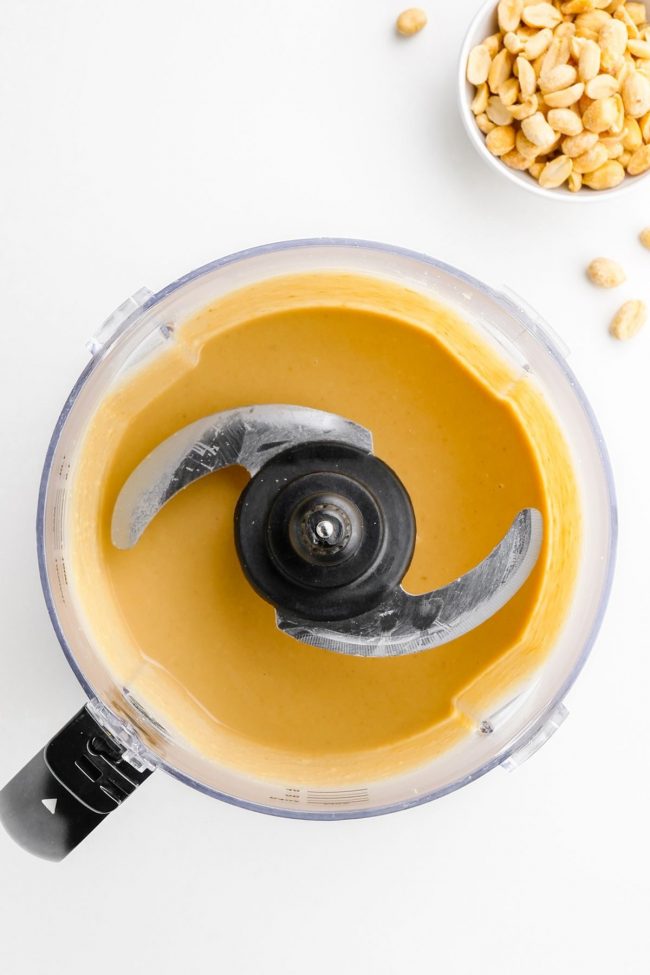
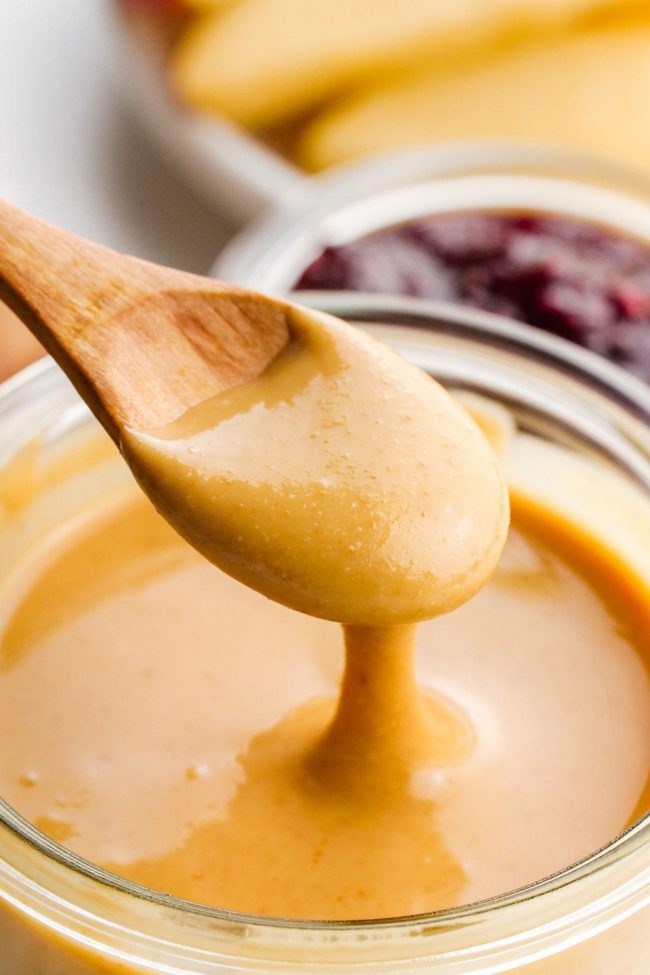
I continue processing until it’s 100% runny. Although it’s super runny at room temperature, once you refrigerate it, it’ll thicken quite a bit.
Note that if you process your peanut butter so that it’s not so runny, your recipes using peanut butter might not come out as intended.
I’ve had a few commenters on my peanut butter cookie recipes tell me that their cookies didn’t flatten like mine. And only now that I write this out, I’m now realizing that it’s because they must be using thicker, less processed peanut butter.
Store-bought natural peanut butter, at least the ones I’ve bought, have always been runny at room temperature, so I think you should process until runny if you want to bake with your peanut butter.
Is this natural peanut butter?
Yes, it is! The most natural way to have peanut butter is to make it yourself. You know exactly what is going into it and it’s super simple.
Some peanut butter says “natural” – but they have added fat and sugar. I guess those ingredients are “natural”, so they went with it, but I don’t consider that natural.
Plus, if you’re using the peanut butter in baked goods or in healthy energy treats like these Bliss Balls or these Chocolate Peanut Butter Protein Balls, you don’t really want added sugar and fat!
What kind of peanuts should I use?
Make sure to use roasted peanuts to get the most flavorful peanut butter.
I always use roasted and salted peanuts, but if yours are unsalted, just add a tad of salt during the processing.
If you have raw peanuts, I strongly suggest roasting them before making peanut butter with them. I personally don’t think raw peanut butter is very tasty, but if you do, then you can certainly give it a try. But it will take much, much longer to process.
If you want to roast your own:
If you have raw, shelled peanuts, this is what to do:
- Preheat your oven to 350 °F (175 °C).
- Spread the peanuts in an even layer on a rimmed baking tray.
- Toast for 15-25 minutes, stirring them after every 8 minutes, or until golden brown.
- Let cool for 10 minutes before pouring into the food processor bowl. It’s best to process them now while still warm, as processing will be quicker and easier.
You can use unblanched raw peanuts if that’s all you’ve got. But when you make your peanut butter, those little bits of papery skin might be noticeable (I haven’t tried it, so I’m not totally sure).
But there’s a way to avoid that! Once the peanuts have cooled for a few minutes, place them in the center of a clean tea towel, and bring together the sides of the towel together to form a bag. Rub and rub until the skins have come off.
That’ll get rid of most of the skin! Now you have to pick out the peanuts from the skin bits.
Roasting and then getting rid of the skin and then making peanut butter sounds like quite a hassle. I’d definitely just buy it rather than go to all that trouble. But to each their own!
How long does peanut butter last?
According to this, homemade peanut butter should last for 3–6 months in the refrigerator. You can tell if it’s gone bad by a rancid smell.
I’ve been making peanut butter for years and have never had that happen nor have I ever had the oil separate like in the store-bought kind!
Equipment:
You need a food processor or a high-speed blender, like a Blendtex or Vitamix..
Blender — please don’t try making nut butter with a regular blender. It won’t work, and you’ll almost certainly destroy your blender.
Food processor — a 1,000-watt processor will do a great job. But before buying one, I highly recommend reading the reviews and searching for comments about making peanut butter. You can also search the questions section on an Amazon product page for “butter.” Usually, someone has asked if nut butter can be made successfully with the food processor.
And if someone mentions that they made almond butter with it, then you know peanut butter will work as peanut butter is much easier to make for a food processor than almond butter.
I love using the Twister jar of my Blendtec to make homemade peanut butter, so that’s what I usually use. I wanted my photographer to do an almond butter butter recipe for me, and I knew her current food processor, a Kitchenaid, couldn’t handle it.
A few years ago, when I looked at food processors, most people were recommending this Cuisinart for making peanut butter.
That one came out in 2015 and is currently unavailable. So I needed to find a newer one.
Now when you search for something like “best food processors for peanut butter,” you almost only find AI-written articles. On websites that are full of nothing but AI-written articles. Yikes.
So I recently spent a full day trying to find the best affordable food processor for making nut butter. So that excludes Vitamix and Blendtec.
I found this test where they (actual people! no robots) have tested loads of blenders and tested many different aspects, including almond butter making performance.
There are a few small personal blenders that have single serving-sized jars that are slightly better (I can’t imagine how that’s even possible) at making nut butter, but the Ninja Foodi Power Pitcher System [CO351B, SS351] is your best choice if you want a full-sized blender jar in addition to the smaller one meant for making nut butter. Right now, it’s $159.99 but it was as low as $119 in April.
If you’re in Europe, I believe this is the EU version.
You can see how this Ninja blender fared in their other tests found here. It got a 9.5 out of 10 in the nut butter-making test. I can’t imagine what a 10 out of 10 would be like, because it worked flawless and quickly, in my opinion.
I bought the Ninja for my photographer and one for me to replace my current food processor that’s starting to fall apart. But it’s actually not useful as a food processor replacement if you mainly use it for slicing potatoes and grating carrots, as it doesn’t have those special blade attachments.
You can see my photographer’s results in the photos of my blanched almond butter post. It only took about 5 minutes to blend. She used the large blender jar because it’s not really possible to get proper photos using the small jar.
But in the small jar with the turning blade, which is what you’re supposed to use for making nut butter, 1 1/2 cups of almonds or peanuts fit perfectly. It only took 2 minutes!
I was amazed. The result was just as creamy as the nut butter I make with my Blendtec!
If you use the large pitcher that you see in the photos, you need to use 3 cups of peanuts or else it’ll take a long time, with lots of breaks to push the peanuts down the sides of the pitcher.
How much does X cups of peanuts yield?
1 cup of peanuts = about 150 grams.
1 cup of homemade peanut butter = 256 grams.
So you need about 1 3/4 cups of peanuts for 1 cup of peanut butter.
Which is easier than counting out 540 peanuts to make a 12-ounce jar of peanut butter!
Adding things to the peanut butter:
Can I add liquid stuff like honey, vanilla, etc.?
If you add anything liquid other than oil (which you do not need), then the peanut butter will seize. It’ll be clumpy and pretty much ruined. So please don’t try that!
I’ve seen lots of people say you can add honey to the peanut butter once it’s been blended. You can indeed do that, but it will really thicken your peanut butter. I don’t like it, but maybe others do.
I think 1.5-3 tablespoons of honey would be a good amount to add, but it’s just a guess. Add a tablespoon, taste and add more, if desired. And definitely be sure to use runny honey and not creamed honey or honey that has crystallized.
I think using honey-roasted peanuts is a much better idea. Then your peanut butter will have the right texture, and I think the result would be tastier.
If you insist on adding something, try this Homemade Chocolate Peanut Butter. It’s smooth and chocolaty, and the kids should love it.
Can I add spices?
You can! If you want vanilla, use the seeds of a vanilla bean. A little cinnamon is also nice.
My recommendation is to make your peanut butter, and once it’s your desired runniness, pour some peanut butter in a little bowl, add a little of whatever you want to add, and see if it works.
This is a much better way than adding something to your peanut butter than ruining your whole batch!
Don’t I need to add oil?
Lots of other peanut butter recipes say to add oil! But…
I have no idea why some recipes call for oil. Just keep processing, take breaks if necessary, and don’t give up!
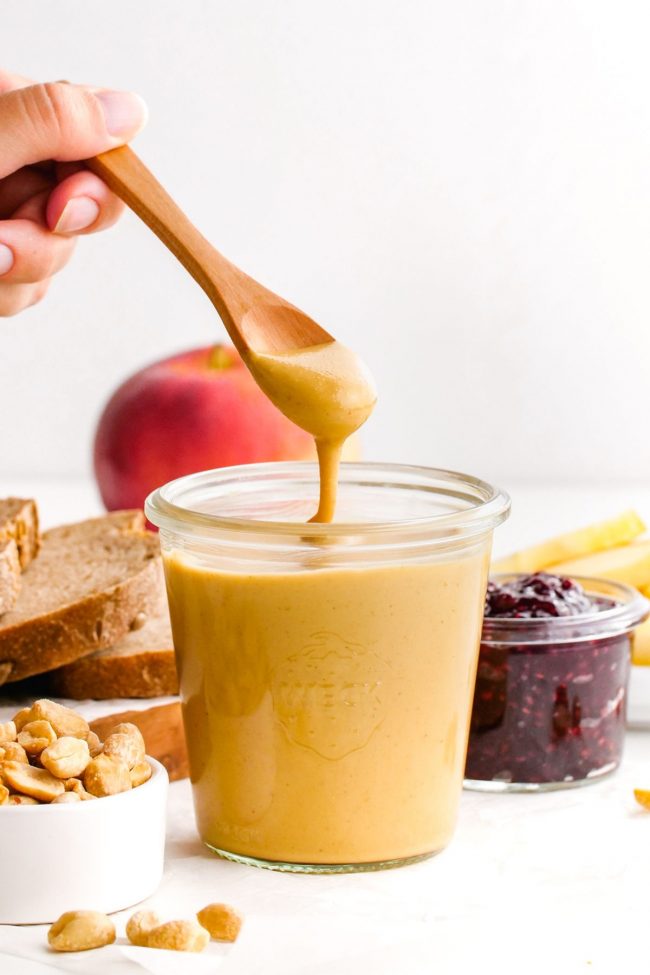
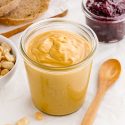
Do you see how runny my peanut butter is? I’ve never needed oil to get to this consistency!
If you want to add oil, you certainly can.
How will I know if it’s gone bad?
You’ll definitely be able to smell it. It’ll smell like oil paint, paint thinner, or something along those lines. You’ll know! Throw it away immediately.
And if you didn’t notice a smell but it tastes bitter, that also means it’s rancid and it’s time to throw it out.
My peanut butter isn’t coming together! What can I do and what did I do wrong?
Are you sure your food processor can handle making nut butters? If you are, you just need to be patient. Some food processors take longer than others.
If your processor is hot, take a break. Remove the bowl from the base, open the lid, and let it chill for 10-20 minutes or until it’s cooled quite a bit.
We certainly don’t want you to kill your food processor!
Is it cheaper to make your own peanut butter?
It is! According to this, using organic roasted peanuts, you’re saving 30 cents for every 100 grams. It’s not much, but it isn’t peanuts either. ;)
A little known fact about peanuts is you can actually make them into diamonds under the right pressure!
You are what you eat, so let’s get to it! ;)
Is peanut butter healthy?
Making your own peanut butter ensures there aren’t any weird fillers or too much salt or other ingredients that are hard to pronounce, so we’re already off to a good start.
Peanut butter is high in protein, full of fiber and fats which help stabilize insulin levels and gives you a constant supply of energy for hours. It’s perfect at breakfast, giving you a boost of energy throughout your day.
Peanut butter is also loaded with antioxidants. It has a high concentration of folate, niacin, riboflavin and thiamin. This helps control cancers, heart and chronic diseases and fungal infections.
Plus, it has so much protein it’s great for repairing and building muscle mass.
It’s high in vitamin E and B6, manganese and magnesium and a good source of copper, too.
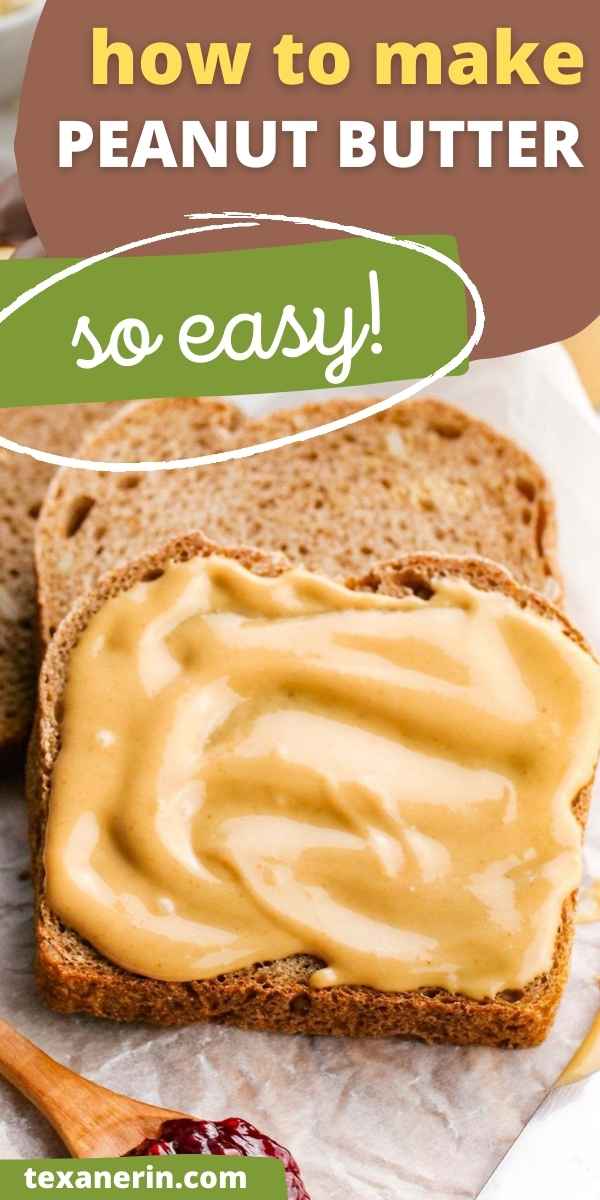
It’s super easy to add to your diet. Peanut butter is versatile and can be added to coffee, smoothies, noodles, as a peanut spread or added in baked goods or using it as a base for those healthy energy balls, and the list goes on.
Whatever you use it in, just know that by making your own, you’re making healthier decisions, saving some money and adding nutrition into your diet!
What to do with peanut butter
This might seem like a silly question for a lot of you, but peanut butter isn’t a common ingredient everywhere in the world.
I feel like it’s becoming more common in Europe, but it still remains a somewhat mysterious ingredient to some people (especially the older generation).
It’s fantastic in savory recipes, like Asian recipes such as Thai or Vietnamese peanut sauce or peanut noodles. But I use it mostly in sweets.
I have tons of recipes that use peanut butter, like these flourless Gluten-free Peanut Butter Cookies or these Healthy Peanut Butter Balls or these Vegan Peanut Butter Chocolate Chip Cookies.
I’ve got this wonderful easy 4 Ingredient Maple Peanut Butter Fudge or maybe you’d like a Healthy Peanut Butter Chocolate Fudge.
There’s just so much you can make using peanut butter! I use homemade peanut butter in all my peanut butter recipes. I just can’t justify spending $5 to $15 for a jar of natural peanut butter when I can make it cheaper myself!
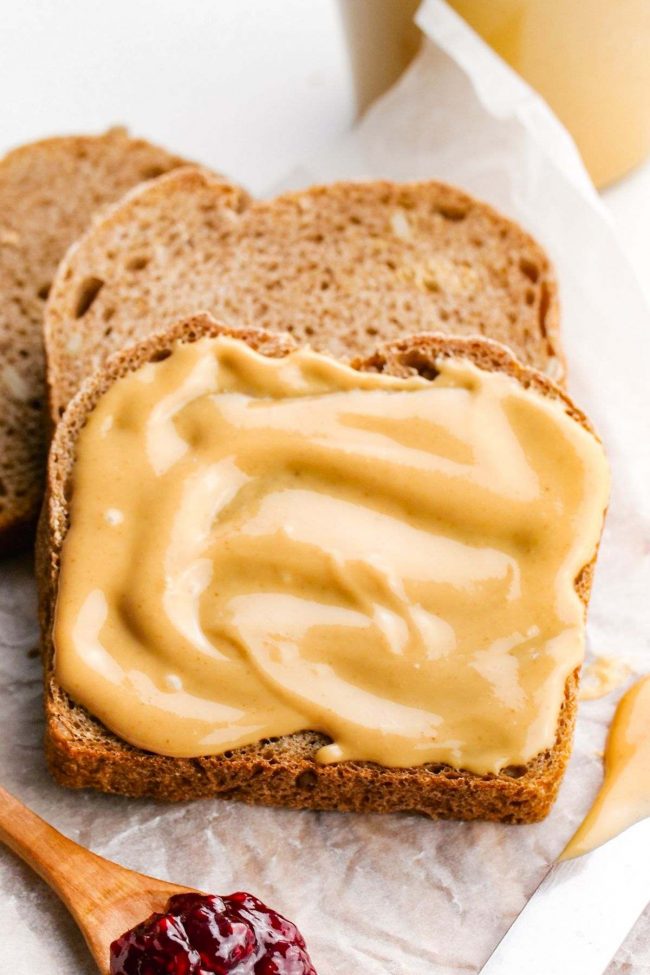
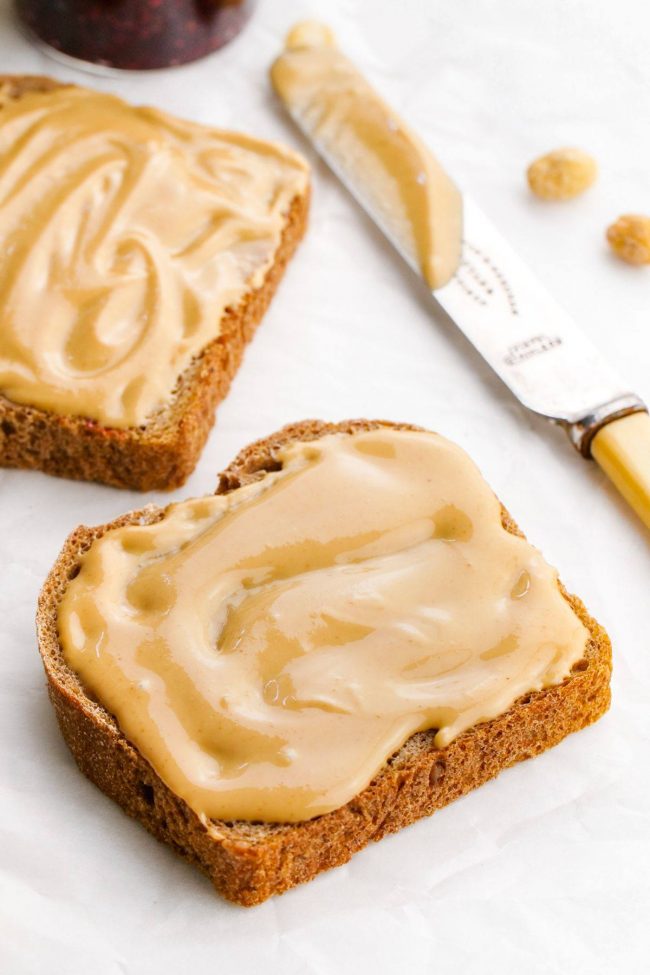
And, of course, it’s great on toasted bread or my favorite – toasted English muffins!
Other Nut Butters:
- If you love making this creamy peanut butter, you should also try some other spreads to see which you like best. I also think these make great gift ideas!
- If you’re looking for a rich nutty taste, this Macadamia Butter is truly amazing. It’s incredibly satisfying and has a creamy, buttery smooth texture. It’s vegan, paleo and keto.
- This Pistachio Butter Recipe has a wonderful color and amazing taste! It’s easy and you can even add a little honey or maple syrup to add a bit of sweetness. Paleo and vegan.
- You don’t usually see Walnut Butter in stores, but it’s superb! It’s rich and creamy and nutritious!
- Almond butter is another type of butter that is too expensive for my taste! So why not learn How to Make Almond Butter?! It’s easy! You just add almonds and let the food processor do the work with a fraction of the cost of storebought!
- If you like it sweetened a bit, try this Maple Cinnamon Almond Butter, it tastes amazing!
That’s it! I hope you enjoy making your own. If you try it, drop a comment below and let me know how it turned out!
How to Make Peanut Butter
- Prep Time:
- Cook Time:
- Ready in:
- Yield: 1 3/4 cups peanut butter
Ingredients
- 3 cups (450 grams) roasted or dry-roasted peanuts
- salt to taste if using unsalted peanuts
Directions
- Dump peanuts in the food processor fitted with an S-blade and process on high until creamy. For me, it takes about 4 minutes. In my old food processor, it took about 8. First, there’ll be ground peanuts, then it’ll start to clump together, and then the clump will break down. Then process it a little more until you’re sure it’s nice and creamy.
- Add 1 1/2 cups peanuts to the Twister Jar, and process on high, while turning the blade counterclockwise. This usually takes about 40 seconds. Take breaks if your blender starts to get too warm.
- If you used unsalted peanuts, taste and add salt if desired. You might need more than expected! Store-bought peanuts are very, very salty.
- Store in the fridge for up to three months.
Using a food processor:
Using a Blendtec:
For either version:
Notes
- You need to use enough peanuts to go over your food processor blade by about an inch or two.


137 comments on “How to Make Peanut Butter in Only 5 Minutes (1 ingredient!)” — Add one!
20 comments are awaiting moderation!
I’ve been making this recipe for years and I totally agree that it is definitely better than store bought. Healthier and better tasting. I learned a few tips from you too. Thanks for sharing.
You’re welcome! I’m glad that you’ve found it useful. :) Thanks for your comment!
Our whole family loves Peanut Butter so much, especially kids and our cockapoo Lady. When I saw your recipe, I had to try it, because homemade always tastes best. My high-speed ninja blender did a great job. The flavor was awesome, from now on I will make definitely peanut butter only by myself. Thanks for the recipe!
Ok, I don’t eat peanut butter, but I do love peanuts, so I never buy peanut butter but the hubby wanted some and your instructions were perfect for making this for him.
I cannot believe how EASY it is to make homemade peanut butter. It tastes so much better than anything I’ve gotten in a jar!
Love the idea of making homemade peanut butter, especially since we go through so much peanut butter! Thanks for sharing step by step directions with pictures, very helpful!
This was easier than I thought, and a lot better than store-brought peanut butter. Making homemade PB and storing it is definitely something I need to do!
Thank you so much for sharing this amazing peanut butter recipe! Will surely have this again! It’s really easy to make and it tasted so delicious! Highly recommended!
Thank you so much! I will like to try this
I hope you’ll enjoy it! :)
Am using a blender for the processing of my peanut butter,but it’s still crumpy after 30 minutes.pls what’s the cause?
What kind of blender? Like I said in the post, you can’t use a regular blender. :( If you use a high-speed blender, that sounds very strange.
Even though I have a vitamix I still prefer to use my less powerful blender, it just takes a little more time but the results are the same, delicious homemade peanut butter. Your photos make it look very inviting!
Thanks so much! :)
Hi, I’m first timer and Fresh into making healthy foods.. coz I have a batch of gym friends who eating healthy too.. I try this peanut butter recipe.. it turn out very nice and smooth even I’m using normal blander.. it’s smell good and smooth texture. I use it to make protein bar too.. it’s amazing I manage use this. Which is cheaper and healthier then commercial peanut butter. Love it.. kee it up with more good recipe ❤️❤️
Thanks so much for your nice comment! I’m really glad that it came out well, even with your normal blender. :) I love using it in recipes, too!
This sounds really encouraging … I live in Goa n my daughter n her friends love peanut butter that I get commercially … I’m definitely going to give it a try n let you know how it fares with local Indian peanuts… I’ve had the American peanuts n they’re far bigger in size n creamier so let’s see how this goes
Oh that’s interesting that they’re creamier! Good luck. :)
What if I have raw peanuts? Can I oven roast them before?
I’m so sorry for just now seeing your question! I was on vacation and we (surprisingly to me!) didn’t have wifi there. Yes, you can roast the peanuts first! Let them cool a little before processing so that your food processor doesn’t overheat.
Hi there what about the nutrition facts thank you live this site:)
*love
I don’t have that info but you could use this recipe analyzer for the nutritional profile. :) You’re welcome for the website! I hope you’ll like the recipes. :)
I made this peanut butter a few weeks ago and it was perfect and easy. I’ve tried two batches today and they won’t go from the bit blob to the smooth texture I got last time. Same ingredients, same recipe. I have no clue why it won’t liquify?
I’m sorry for just now seeing your question! I really have no idea if you used the same ingredients and equipment! Is there any chance that your food processor bowl was a little wet? (like you just cleaned it and there was a little bit of water left?) The peanuts are 100% the same – not a different brand or a different type (raw instead of roasted?) I’m sorry I don’t have a better idea!
Never tried it but you can bet I am!!! Thank you so much!
You’re welcome! I hope you’ll enjoy it. :)
is the nutrimix machine good to make peanut butter please
I’m sorry for just now seeing your question! I’m not familiar with that machine and can’t really find anything about it when googling. I’m guessing it’s not sold in the US? I recommend googling nutrimix + “peanut butter” in whatever language is spoken in the country where you bought the machine. :)
That so so amazing.. Thanks for your recipe.
You’re welcome! :)
What about using pb2 after adding water to it, to make it peanut butter?
I’ve never used pb2 so I’m not sure how it works. Sorry about that!
do you think these ingredients played a part in my peanut butter turning out runny
dry roasted and salted peanut ingredients list.sea salt,sugar cornstarch,maltodextrin,corn syrup solids,smoked torula yeast,paprika (color),spice,garlic powder,onion powder.or me adding 1 tbs to the mix.
or me adding 1 tbs of oil to the mix
You definitely don’t need to add oil! It breaks down nicely without it.
Sorry for just now seeing this! The peanut butter is supposed to be runny (take a look at the video if you haven’t already :)) If you don’t want it runny, you can stop processing it once it’s a consistency that you like.
Hi there! Do you know if a NutriBullet Magic Bullet food processor will work for this recipe?
Hello! Check out the comment below yours. :)
Oh ok, I didn’t see that comment there when I posted my question. Thank you though!
No worries! Hope it works well. :)
I tried two cups of dry roasted peanuts in the magic bullet with the nut chopper blade and the blending blade. The blades are too small, so it was very chunky since it missed a lot. I had to use my big food processor to finish the job.
Thanks for your feedback!