Looking for the chickpea cookies from Pinterest or Facebook? Here’s the original recipe! Scroll to the bottom of the post for a how-to recipe video.
Chickpea cookies! Chickpea cookies with no flour, no oil, no white sugar. These are just full of chickpeas. And they’re my very favorite healthy cookie so far!* I don’t know if they really classify as cookies so I’ll go with cookie dough bites.
And as a bonus, they’re grain-free, gluten-free, dairy-free and vegan. Just in case that matters to anyone out there! And if you’re worried about the chickpeas, don’t be. I don’t like chickpeas and won’t eat them but that didn’t prevent me from inhaling these.
* 2017 update: this post is 5 years old and I have a new favorite. :D You HAVE to try these paleo chocolate chip cookies if you haven’t already! There’s also a vegan option. And for hot summer days, these no-bake oatmeal cookies (naturally gluten-free + vegan) are my favorite!

I used homemade peanut butter in these cookies but store-bought (the kind with just peanuts and salt) works just as well.
Here’s how to make peanut butter! There’s also a video included. All you need is peanuts and a food processor (which you already have to pull out for this chickpea cookie recipe!).
These need the chocolate. Don’t go making them without the chocolate and then tell me that they weren’t sweet or gooey enough! These would be incredibly boring without the chocolate.
And for some weird reason, these cookie dough bites do not taste yummy in dough form. Baking them somehow brings out the sweetness and peanut butter flavor. Or maybe it’s just all that melted chocolate.
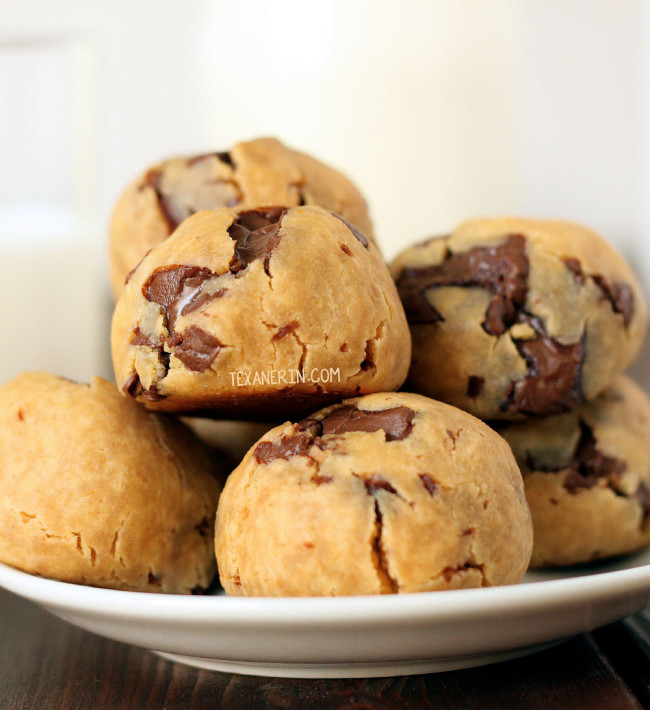
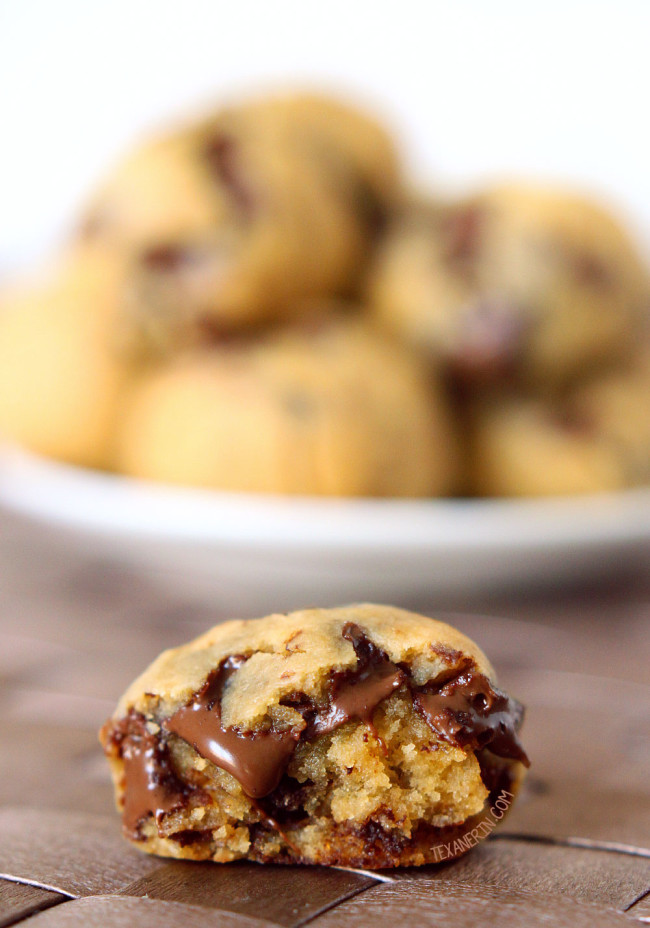
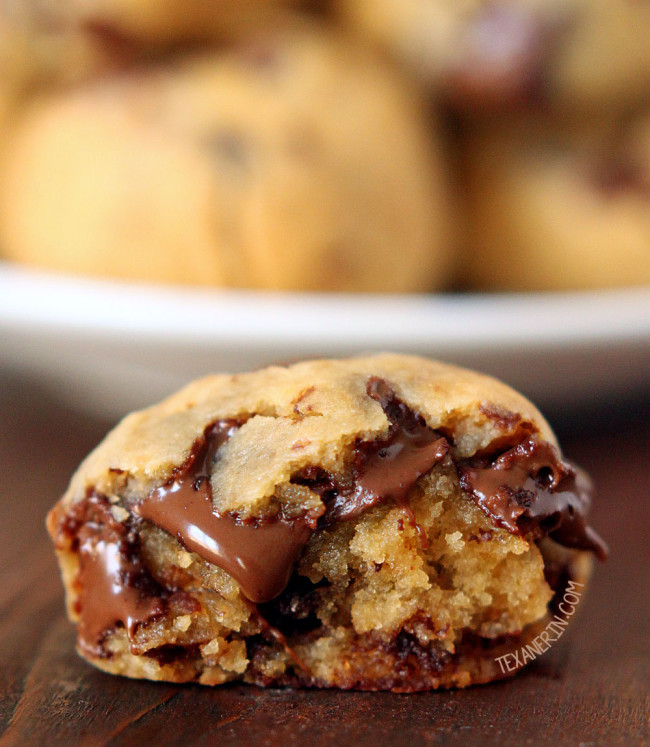
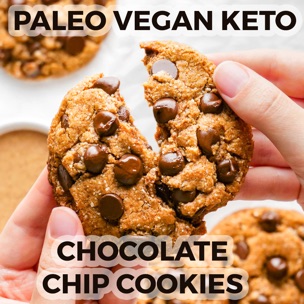
One thing I’ve learned since starting this blog is that people really love closeups of melted stuff. So there you go. :)
These aren’t the most beautiful cookie dough bites, but fresh out of the oven, with all that gooey chocolate, I bet you can’t tell that these are made with chickpeas. Or are grain-free. But cold? Yuck. These need to be warm!
You can either freeze the balls and pop a few in the oven whenever it’s on, or simply put them in the microwave until they’re warm and gooey again.
By the way, if you’re a peanut butter lover like I am, you have to try these healthy peanut butter balls. They’re also gluten-free and vegan!
Please read the following before asking a question! It will probably answer it. :)
- Tons of people have posted the nutritional analysis for these. They’re supposedly anywhere between 80-130 calories, which seems like a huge range to me. Please use a recipe analyzer like on CalorieCount if you need more information.
- You can use almond butter, sun butter, or whatever nut butter you like.
- The peanut butter should be the kind with only peanuts and salt. No added fat or sugar.
Be careful because there are some “natural” brands out there which aren’t really natural. I find that this peanut butter is usually expensive so I make my own.
You can make your own in only 5 minutes with a food processor. Check that out here. - Chickpea flour won’t work. I don’t think plain hummus will either.
- I haven’t tried anything other than chickpeas but others have used butter beans, navy beans, red kidney beans, great northern beans, and lentils with success. I generally don’t like goodies made with those types of beans but I love these cookies made with chickpeas. Please use chickpeas unless you have an allergy!
- Doing this in a blender won’t work and might kill the blender. Making these in a Blendtec blender or something equally powerful might work but I haven’t tried it.
- Adding random stuff like eggs… probably won’t work either. ;) Experimenting is great but I think this is a bad recipe to experiment with.
But thanks to the experimenters who left feedback, I’ve been able to update the recipe with alternatives to honey and peanut butter. Thanks everyone!
For my readers who are really sensitive to gluten, you might want to read my post on Is Honey Gluten-free? - For a totally sugar free version, use 30 drops of Stevia and cacao nibs.
- Do not double the recipe! It might be too much for your machine and could damage it.
- For a vegan version, you can’t use honey. Use agave.
- For a dairy-free version, use Enjoy Life chocolate chips. They’re just as delicious as regular chocolate chips. SO good!
And thanks for everyone who has pinned and left feedback. I really appreciate it. :)
Want more gluten-free treats? Here are some of my favorites!
Grain-free Peanut Butter Chocolate Chip Cookie Dough Bites (gluten-free with vegan and dairy-free options)
- Prep Time:
- Cook Time:
- Ready in:
- Yield: 14 1" cookies
Ingredients
- 1 1/4 cups canned chickpeas, well-rinsed and patted dry with a paper towel1
- 2 teaspoons vanilla extract
- 1/2 cup + 2 tablespoons (165 grams) natural peanut butter, SunButter Natural or almond butter - room temperature2
- 1/4 cup (80 grams) honey (agave or maple syrup for vegan)
- 1 teaspoon baking powder3
- a pinch of salt if your peanut butter doesn't have salt in it
- 1/2 cup (90 grams) chocolate chips (use vegan and dairy-free chocolate chips, if needed)
Directions
- Preheat your oven to 350°F / 175°C. Combine all the ingredients, except for the chocolate chips, in a food processor and process until very smooth. Make sure to scrape the sides and the top to get the little chunks of chickpeas and process again until they're combined.
- Put in the chocolate chips and stir it if you can, or pulse it once or twice. The mixture will be very thick and sticky.
- With wet hands, form into 1 1/2" balls. Place onto a Silpat or a piece of parchment paper. If you want them to look more like normal cookies, press down slightly on the balls. They don't do much rising.
- Bake for about 10 minutes. The dough balls will still be very soft when you take them out of the oven. They will not set like normal cookies.
- Store in an airtight container at room temperature (or in the fridge) for up to 1 week.
Notes
- My can of chickpeas was 400 grams, 240 grams without the water, and I used all but a few tablespoons.
- Don't even try with regular peanut butter! They'll come out oily. You MUST use natural peanut butter. :)
- If you need grain-free baking powder, you can use 1 part cream of tartar + 1 part baking soda + 2 parts arrowroot.
As an Amazon Associate, I earn from qualifying purchases. For more info, see my disclosure.




2106 comments on “The Original Peanut Butter Chocolate Chip Cookie Dough Bites Recipe (aka Chickpea Cookies)” — Add one!
37 comments are awaiting moderation!
These turned out really good! Followed recipe to a T. I’ve had other chickpea desserts so I wasn’t the least apprehensive about this recipe and naturally it did not disappoint! I used a cookie scoop instead of rolling balls in my hands! Thank you for recipe!
I’m happy that they came out well and that you weren’t apprehensive about the whole thing. That always makes thing easier. ;) Thanks so much for the feedback!
I’ve made these a number of times and they are particularly well received by my gym instructors. They all want the recipe. Thank you.
I’m happy you and the gym instructors all enjoy them! Thanks for the feedback. :)
OMG did’t expect these to be so yum.like cmon its chickpeas!!! Hahah ate straight out the batter too. Thanks for the awesome recipe lovee it !!!
Haha. Yeah. Who’d figured that chickpea cookies are actually good?! ;) Thanks for letting me know how they came out!
Loved this recipe!
Despite what you said, I particularly like them cold out of the fridge.
I changed a couple of things though which may be why I find them so delicious cold.
The only ingedient I put in the processor was the chickpeas after that I just folded the rest of the ingredients through which maintained the crunchy peanut butter bits keeping texture in the cookie.
And I added about 150 to 200g of chocolate half 90% dark lindt and the other half 70% dark lindt.
Cant wait to make more…. soooo good!
Thanks for the recipe!!!
Your changes sound great and I’m so happy that you liked them cold from the fridge! I seem to be one of the few who doesn’t like them room temperature or even cold. I also like your idea of folding in the other ingredients! I’ll have to try that sometime. Thanks so much for the feedback. :)
How can you tell when these are done? I have baked for 15 minutes, and they seem like they are barely holding together. Perhaps after they cool off more? Any guidance is appreciated!
They shouldn’t have trouble holding together but they won’t appear like a normal cookie. They should be soft and kind of gooey like cookie dough and they firm up slightly as they cool. They may brown a little around the edges but how I know when they’re ready is when they no longer look wet on top. I hope they worked out in the end! :)
Oh my god, these were delicious. Thank you!
So happy that you liked them! Thanks for the feedback. :)
I used garbanzo bean flour and these still came out fantastic! I added applesauce and maple syrup (no agave). Delicious!
I’m happy it came out well! And apple sauce sounds like a nice addition. Thanks for the feedback! :)
Just curious how much garbanzo beam flour you used – did you substitute one for one, or adjust? I’m thinking of trying to use flour as I don’t have a food processor. Thanks!
Hi Laura! I used 2 cups of garbanzo bean flour and that’s for a doubled recipe. I had to add applesauce so there was enough moisture. They come out SO good!!! You can use any gluten free flour to substitute. Let me know if you have any other questions. Enjoy!
Do you use milk chocolate chips or semi sweet?
I used semi-sweet but you can use milk or dark, if you prefer. :)
Just made these and they turned out better than expected! I used my Vitamix to make the dough and I did it for a little too long which heated up the dough so when I added the chocolate chips they got a little melted. I just put the dough in the fridge for a few minutes so it wasn’t so melty and easier to make into balls :) they turned out great and my husband and 1 year old both loved them. Thank you for sharing, look forward to trying your other recipes :)
I like the idea of slightly melted chocolate chips in the dough. :) And so happy that you and your family liked the cookies! I hope that you’ll enjoy the other recipes just as much and thanks a ton for the feedback!
Jennah, what settings and how long did you use with the Vitamix.
I did it on between a 4-6 for maybe 30 sec and turned it off and stirred it a little and did it again. It did come out pretty warm but I do live in Italy and have to use a transformer which I thibk changes the power of how strong it goes so it makes it warm up quicker. I would recommend checking the dough first before putting the CCs in in case it is warm so they don’t melt. And when the dough was warm it was more difficult to roll into balls. I pit it in the fridge for a couple minutes and it made it much easier. Hope this helps you!
Hey! Can’t wait to bake this on Friday. My friend did them and let me try them – they’re the BEST! But does it really have to be set in the fridge for 1 week? I was planning to bake and eat…?
“5.Store in an airtight container at room temperature (or in the fridge) for up to 1 week.”
Thanks for the recipe though :D
I’m so happy that you liked them! And no, they don’t need to set at all. You bake them and then eat them straight from the oven. Then you store them in an airtight container or in the refrigerator for up to 1 week. :) I added that last line because tons of people were asking how to store them. Hope that helps! :)
I will be doing a 13 mile obstical race on Killington mountain in Vermont this September , can you recommend a recipe that I can make to refuel my body while I’m racing . I will need to refuel myself while I’m on the race corse. It has to be an item that I can just pop in my mouth and easy to digest .
Hi there! I have to admit that I’m not very knowledgeable when it comes to what’s easy to digest and what’s not and what’s good for someone who’s burning through a lot of calories. So I can’t really recommend anything. Sorry about that. :( Good luck with the race!
Can you use dried chickpeas and cook them yourself for this recipe?
So sorry for the slow reply! But yes, you can use dried chickpeas and cook them yourself. I hope you’ll enjoy the cookies! :)
Love these! My friend has made them and they are delish. However I made these for the first time yesterday and they have turned out a bit strange. I overcooked them a little but they don’t taste burnt, however while the outside of them is a golden brown color, the inside is black! I used Eskal free nut butter (made from sunflower seeds) and a combination of honey and agave as I ran out of honey. I also used 85% cocoa lindt chocolate too but all other ingredients were the same. Do you know why these may have turned black on the inside but still brown on the outside?
I’m so happy that you liked them! I read that things made with sunflower seed butter sometimes turns strange colors. I’m thinking that’s what happened with yours but why the outside wasn’t affected is a mystery to me. And black?! That sounds really, really interesting, although maybe not that appetizing. ;) You’re the first person to mention them turning black so I’m afraid I don’t have much advice to give. Thanks for the feedback and I hope you could still enjoy them despite their unpleasant color!
Thanks for the reply Erin. I got home last night and the rest of them had completely turned black! So I decided to check the sesame seed peanut butter to see what could have caused this and realized that it expired a yr ago! Oops! So my guess is that it has turned rancid and has oxidised rapidly after being cooked. That explains why I felt a bit ill after eating one yesterday! Note to self: check the expiry date! I’ll have to make another batch, thankfully they are super quick and easy to make! :)
So weird! At least you know what it was. :) But was it sesame seed peanut butter or sunflower seed butter like you said in the last comment? I’m just asking in case someone asks in the future about using sesame seed peanut butter. Thanks for coming back to let me know what the culprit was! I hope your next attempt with non-rancid butter will come out better. ;)
Oops sorry it was sunflower seed nut butter :)
Just found this on the sunbutter website – explains the color change!
When substituting SunButter in your existing recipe, you may have to reduce the baking soda/powder by approx. 1/3 to start. The chlorogenic acid (chlorophyll) in sunflower seeds react with the baking soda/powder when baked causing the green color when the product cools down. Depending on the recipe, even a splash of lemon juice could help.
How strange that only a 1/3 reduction can help! Imagine you had a recipe with 1/4 tsp baking powder. That sounds like a fun one to reduce by a third. ;) Thanks so much for sharing this with me and here’s to no more black or green cookies! :)
Not had a change to make then yet, but can tell U right off they will rate a 5 stars. I have old recipes with no flour ,just no chickpeas it. And can’t wait to try yr…
Have U heard of peanut butter fudge with no flour, it also very good…
I haven’t made peanut butter fudge recently but anything peanut butter sounds good to me. :)
These are my go-to when I have a crazy sweet tooth. They are gooey, chocolatey peanut buttery and just so delicious!! My husband doesn’t really like peanut butter which makes me a lucky girl because I don’t have to share!! Lol. Anyway, I love it, it’s the best thanks for sharing:)
Haha. So happy that you don’t have to share! ;) I’m totally into the gooiness, too. Thanks a ton for the feedback!
Any suggestions for storage after making these? I’m unsure as to how I can keep them. Fridge, or room temp?
Made these tonight and I love em. The only thing preventing a fifth star is that personally I thought the chocolate chips ended up being too overwhelming I taste; I opted for dark chocolate, and even that was overly sweet. I like the taste of the dough alone! Next time I think I’ll use only a third of a cup. Still, they were delectable :)
Sorry for the slow reply, Hannah! I hope you found the answer (it’s in the last line of the instructions. ;)) Store in an airtight container at room temperature (or in the fridge) for up to 1 week. I’m happy that you enjoyed the cookies, despite finding them a bit sweet! I admit I have quite the sweet tooth and am only into these cookies for the gooey, melty chocolate bits. :) Thanks for the feedback!
My family usually hates when I make healthy recipes and will never eat them. I made these today and my brother and dad were amazed! Never guessed that they were chick peas in them and the batch is going fast :) Thank you!!!
I can sympathize with family members not eating healthier goodies. ;) So happy that you found these and that your family liked them! Thanks so much for the feedback and the rating. :)
I made these cookies today using natural peanut butter, and for some reason they come out really soft even after 10 minutes in the oven and when i tried leaving them in for 15 minutes they came out burnt :( They taste amazing though, but the baked cookies’ consistency came out like the dough!
I’m sorry they came out burned! They’re supposed to be very soft (hence the name cookie dough bites and not cookies ;)) but they should have been a little firmer than the dough. I hope you can still enjoy them despite the burned outsides!
I just finished baking your cookie-bites and I like them! They are “bites” so they are meant to be rolled into tiny balls. That makes it easy to pick them up when you pull them out of the oven. Tiny balls are ideal for “soft bites” type recipes like this one. I think next time I’ll try to put more honey into the mix to satisfy my sweet-tooth!
I’m happy you liked them! I hope you’ll like them even more with added honey. :)
I made these last week and I’m making another batch this morning. I know you said they are best warm, but I love them right out of the freezer, too — that’s also how I eat brownies. They are perfect for a quick midday snack. Thank you so much!
So sorry for the slow reply, Kristi! I’m happy to hear that you enjoyed the cookies enough to make them twice. :) And awesome that you like them straight from the freezer! I’ll try that next time because eating half a batch straight from the oven isn’t the best thing to do. ;) Thanks a bunch for your feedback!
I have been looking everywhere for a healthy, or somewhat healthier :), cookie for my sweet tooth and baking love. This recepie was really good! With some additions, and a food processer (I used my hands), these will be undetectably healthy. My mom has not even noticed the taste! These might even pass my dad’s girlfriend’s health inspection, allowing for summer baking! Thank you so much for these guilt-free cookies!
I’m so happy that you liked the cookies! Like you mentioned, I think you’ll enjoy these even more if you use a food processor. Then the chickpeas are completely undetectable. :) I hope your dad’s girlfriend will enjoy them, too. Thanks a bunch for the feedback!