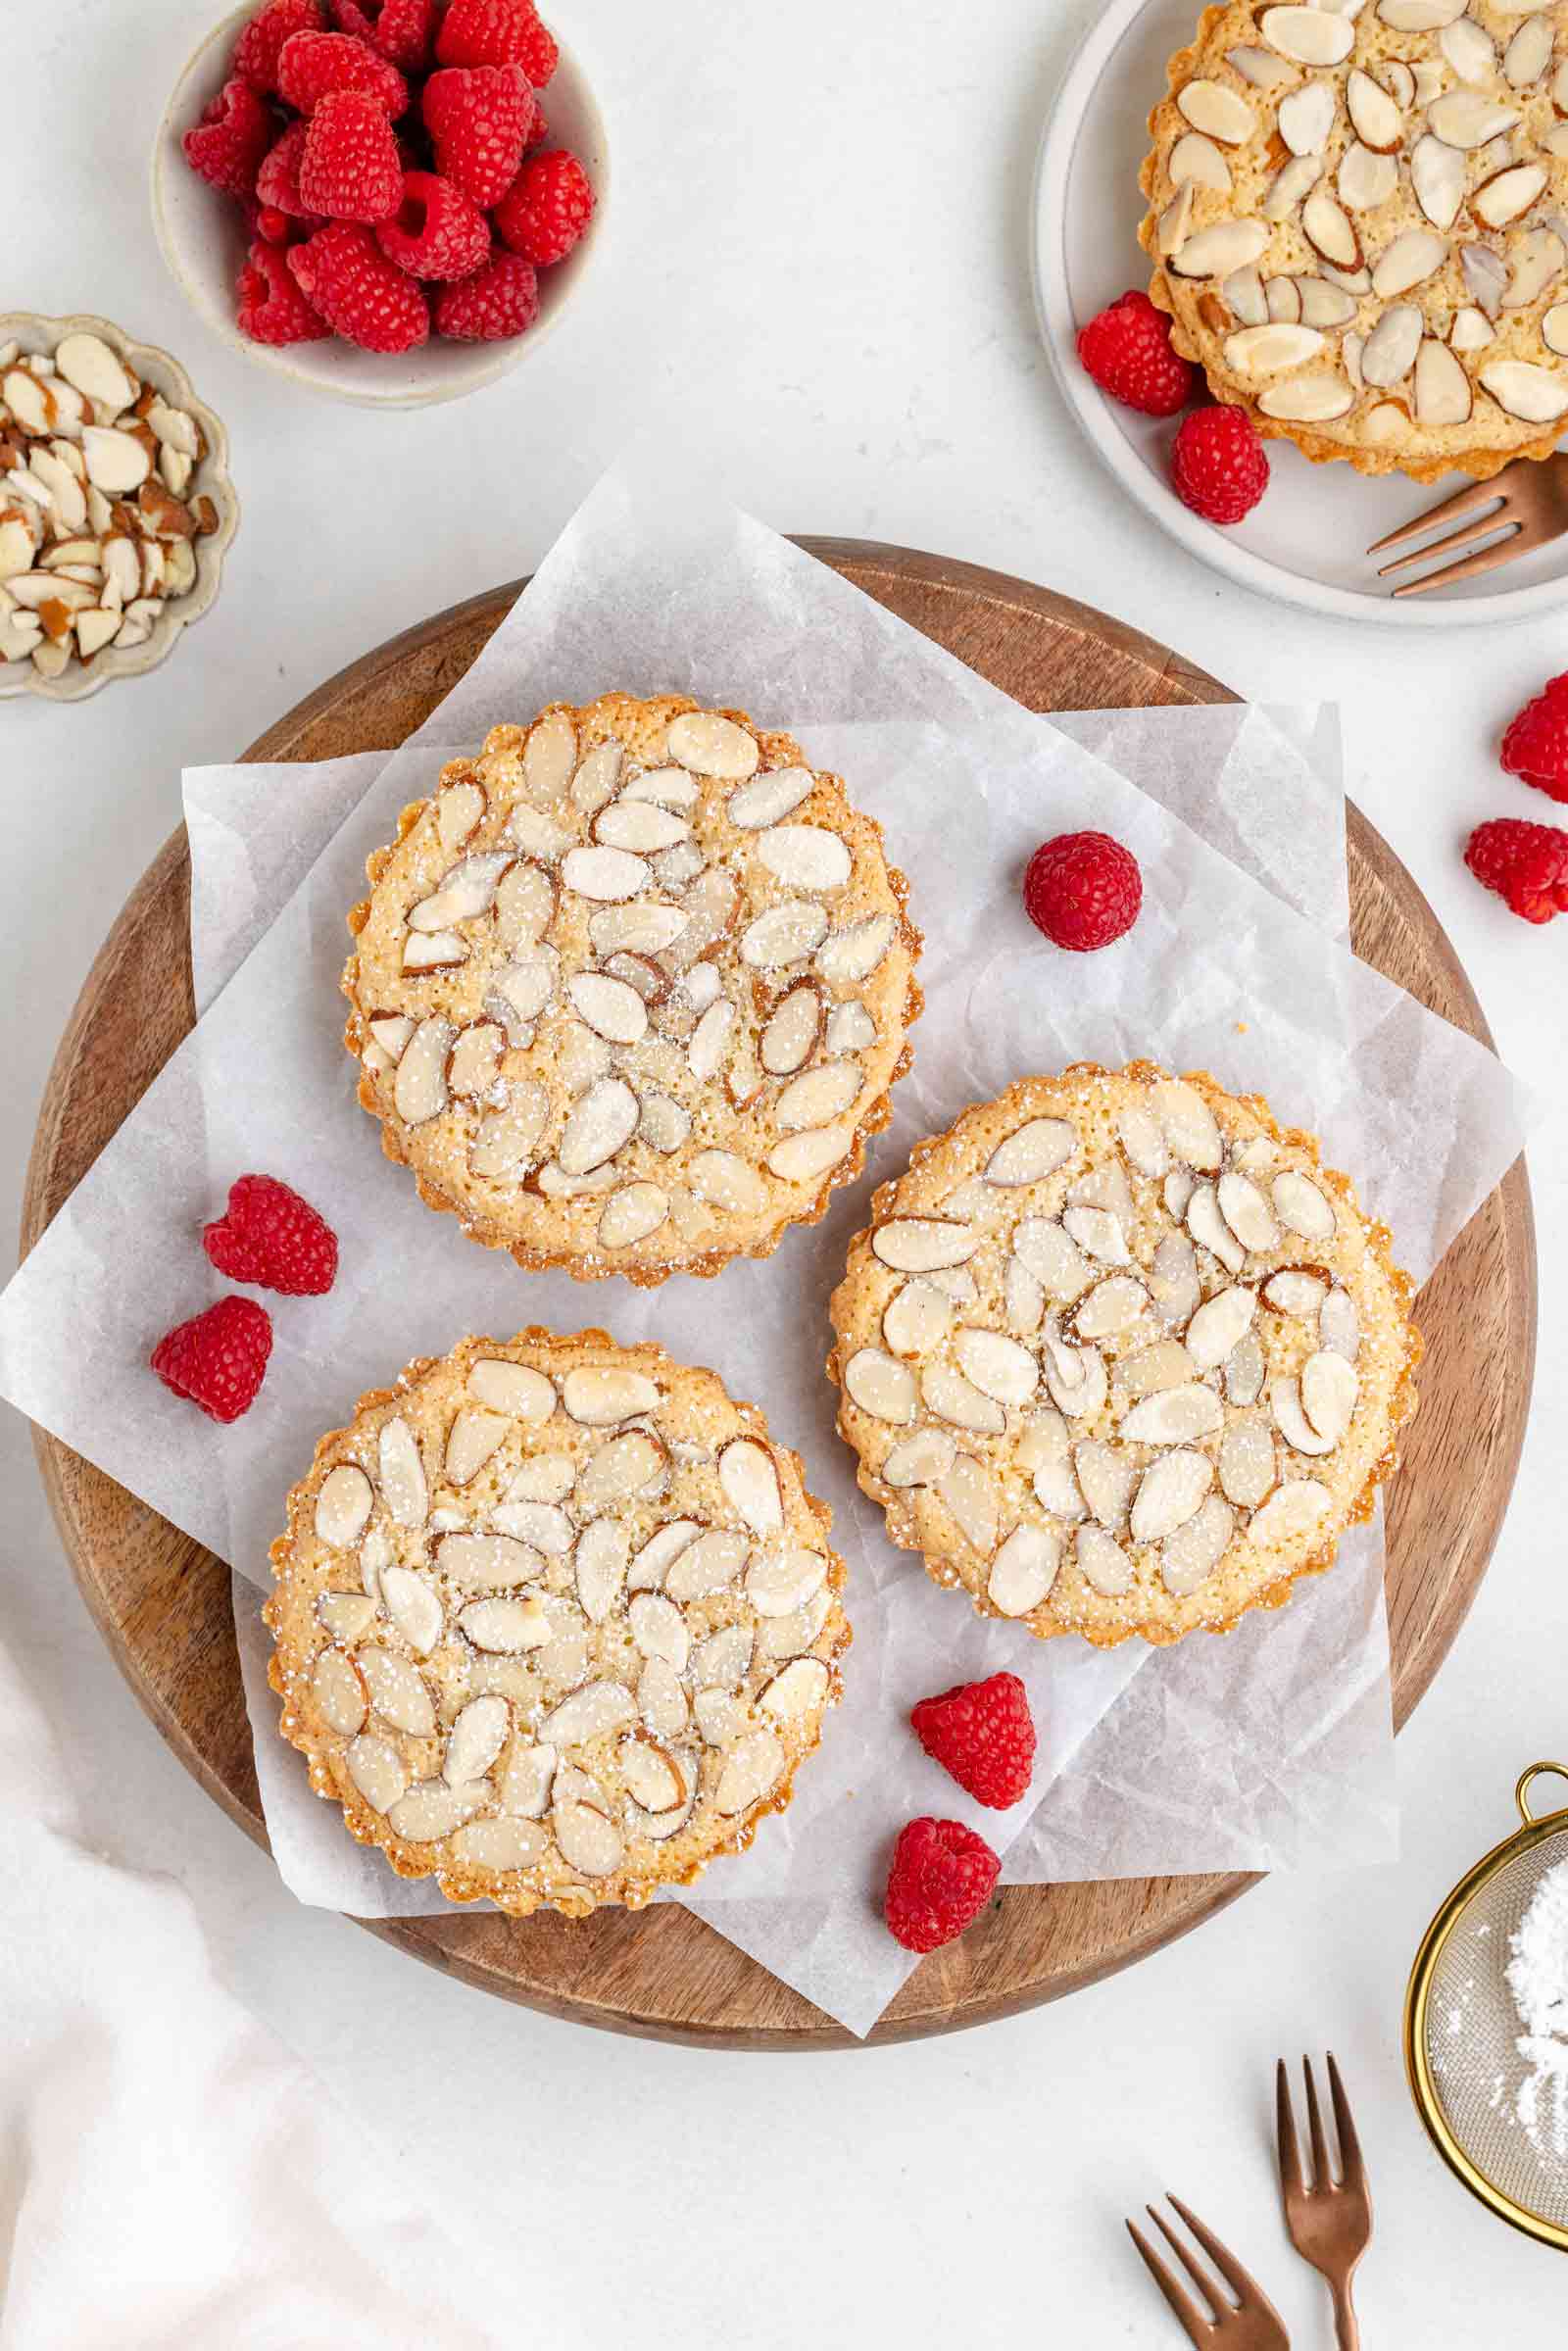
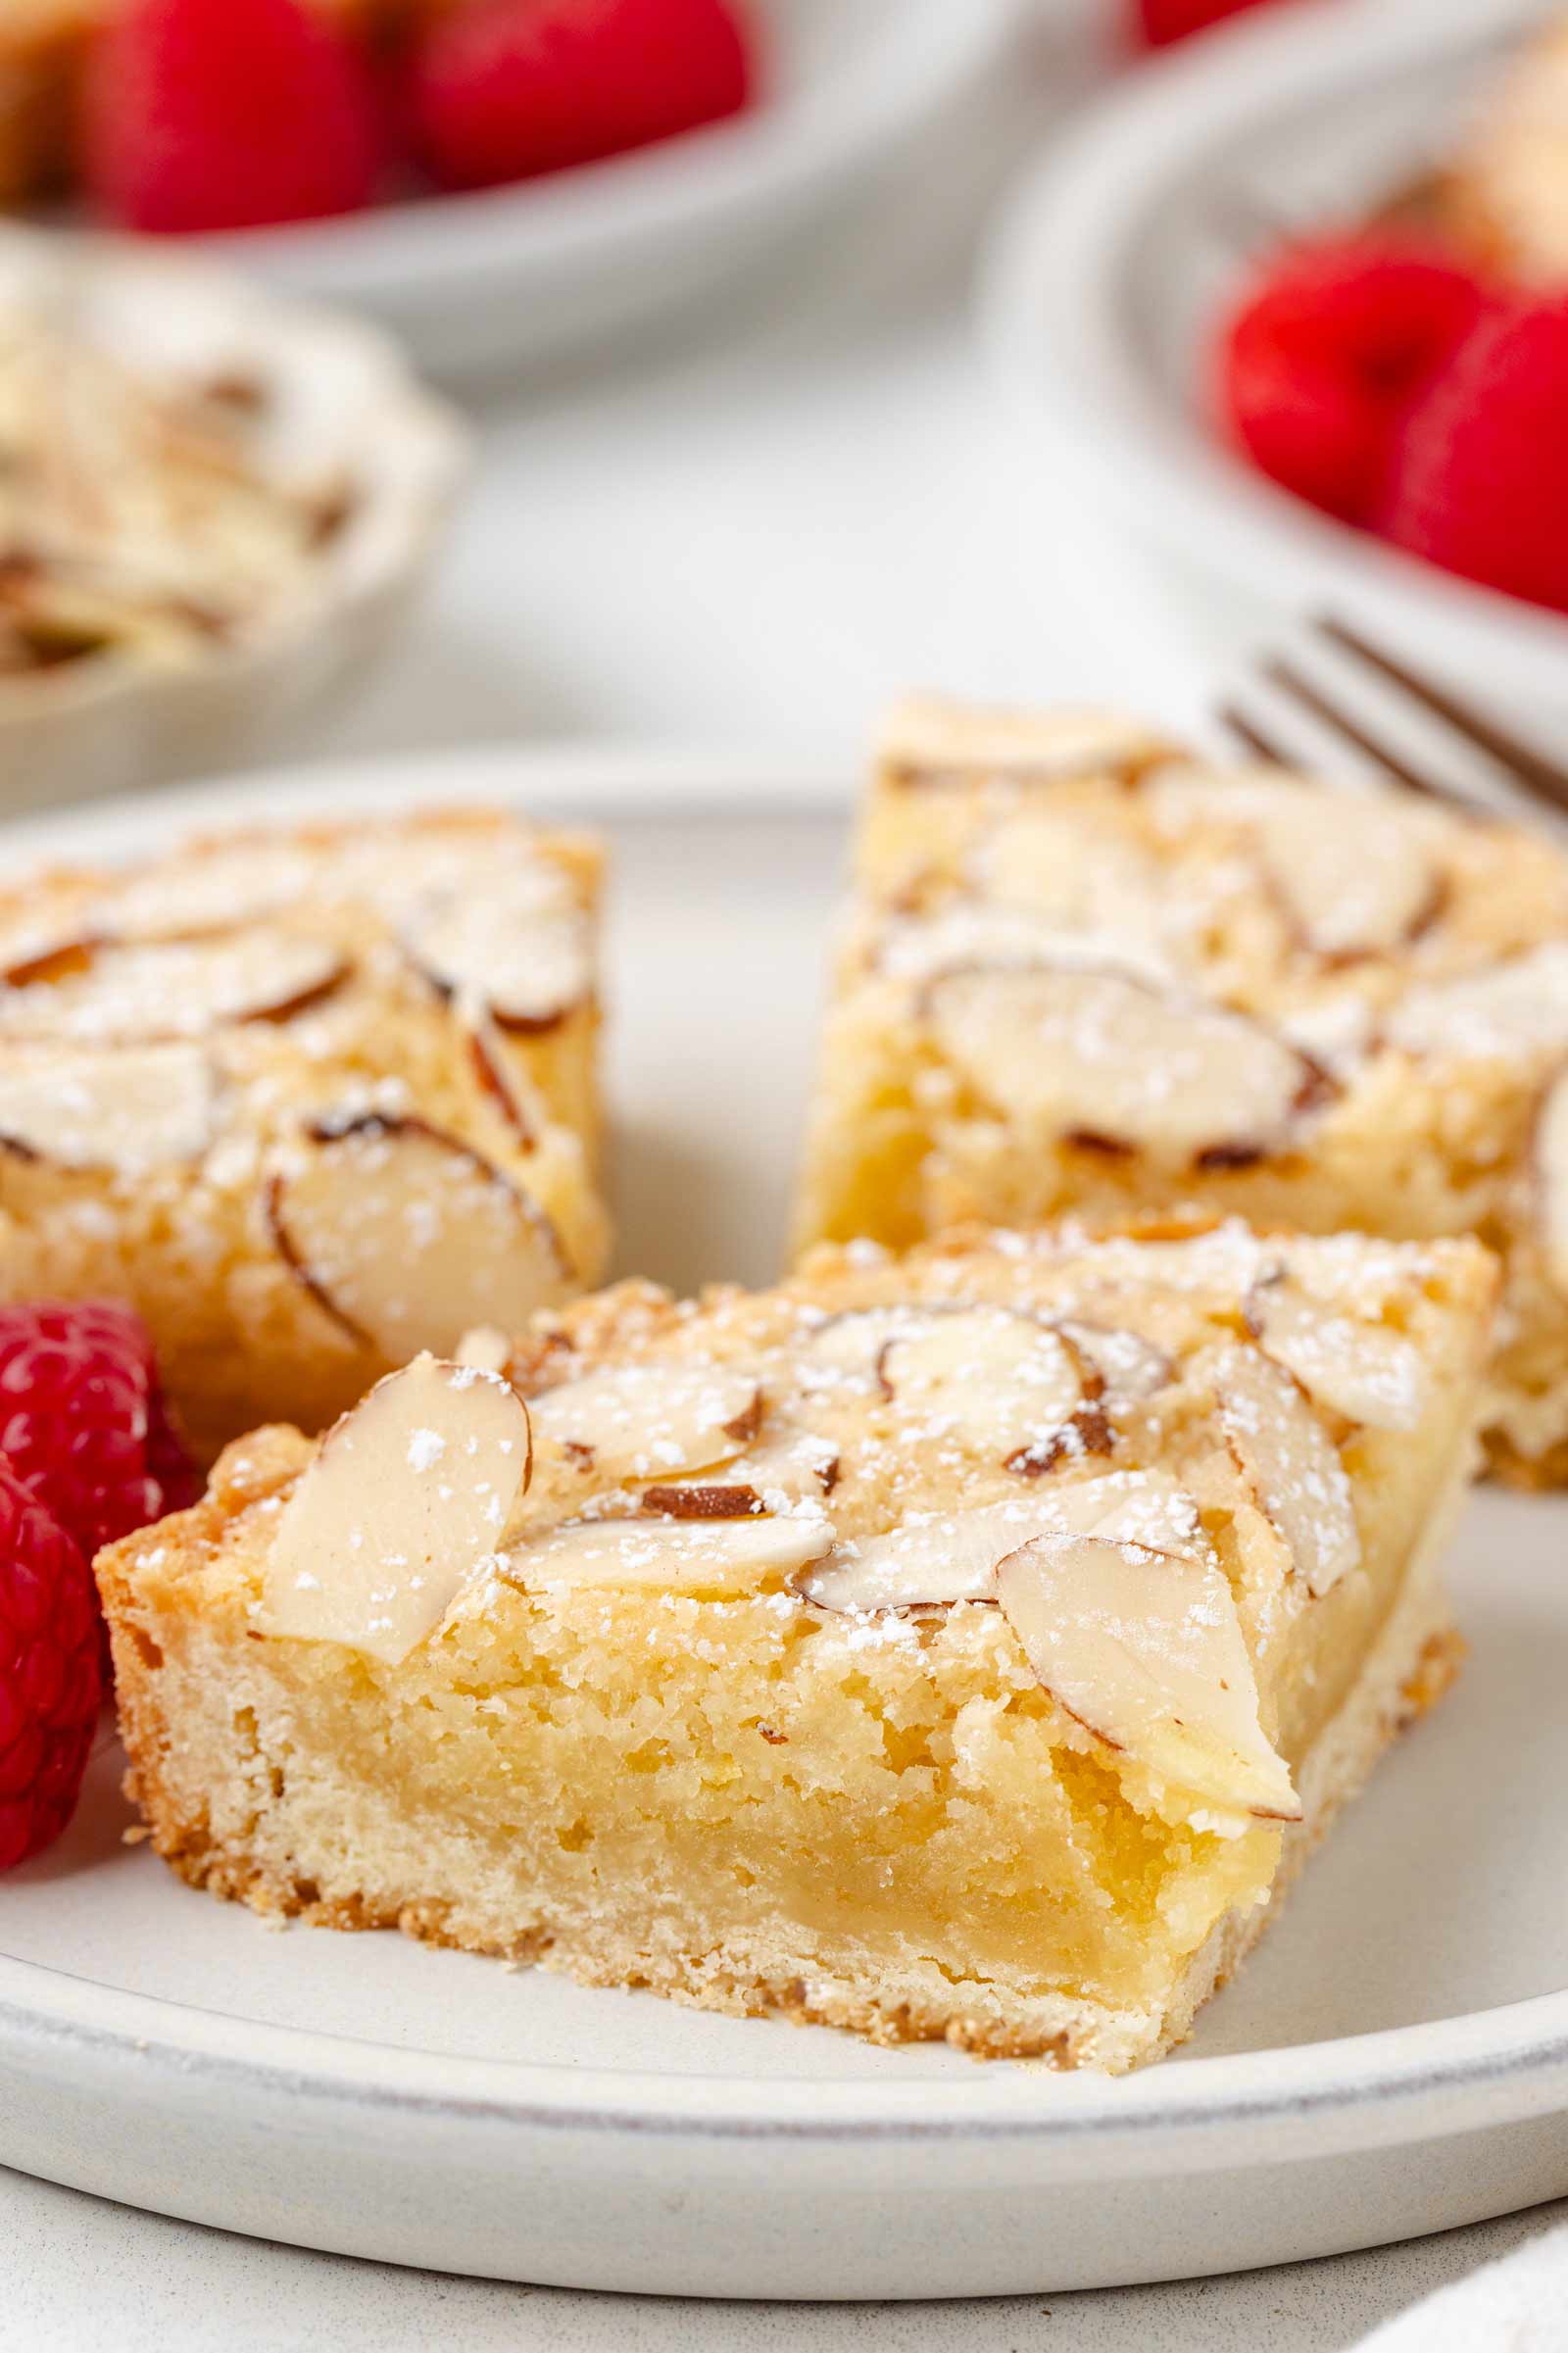
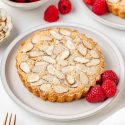
This frangipane tartlets recipe is perfect for spring, brunches, Mother’s Day, or anytime you want something impressive but not too difficult to make. These French tartlets have a buttery, crisp crust and a sweet almond filling that’s incredibly moist and rich, yet light enough to enjoy even after a big meal. They can be made traditionally or gluten-free.
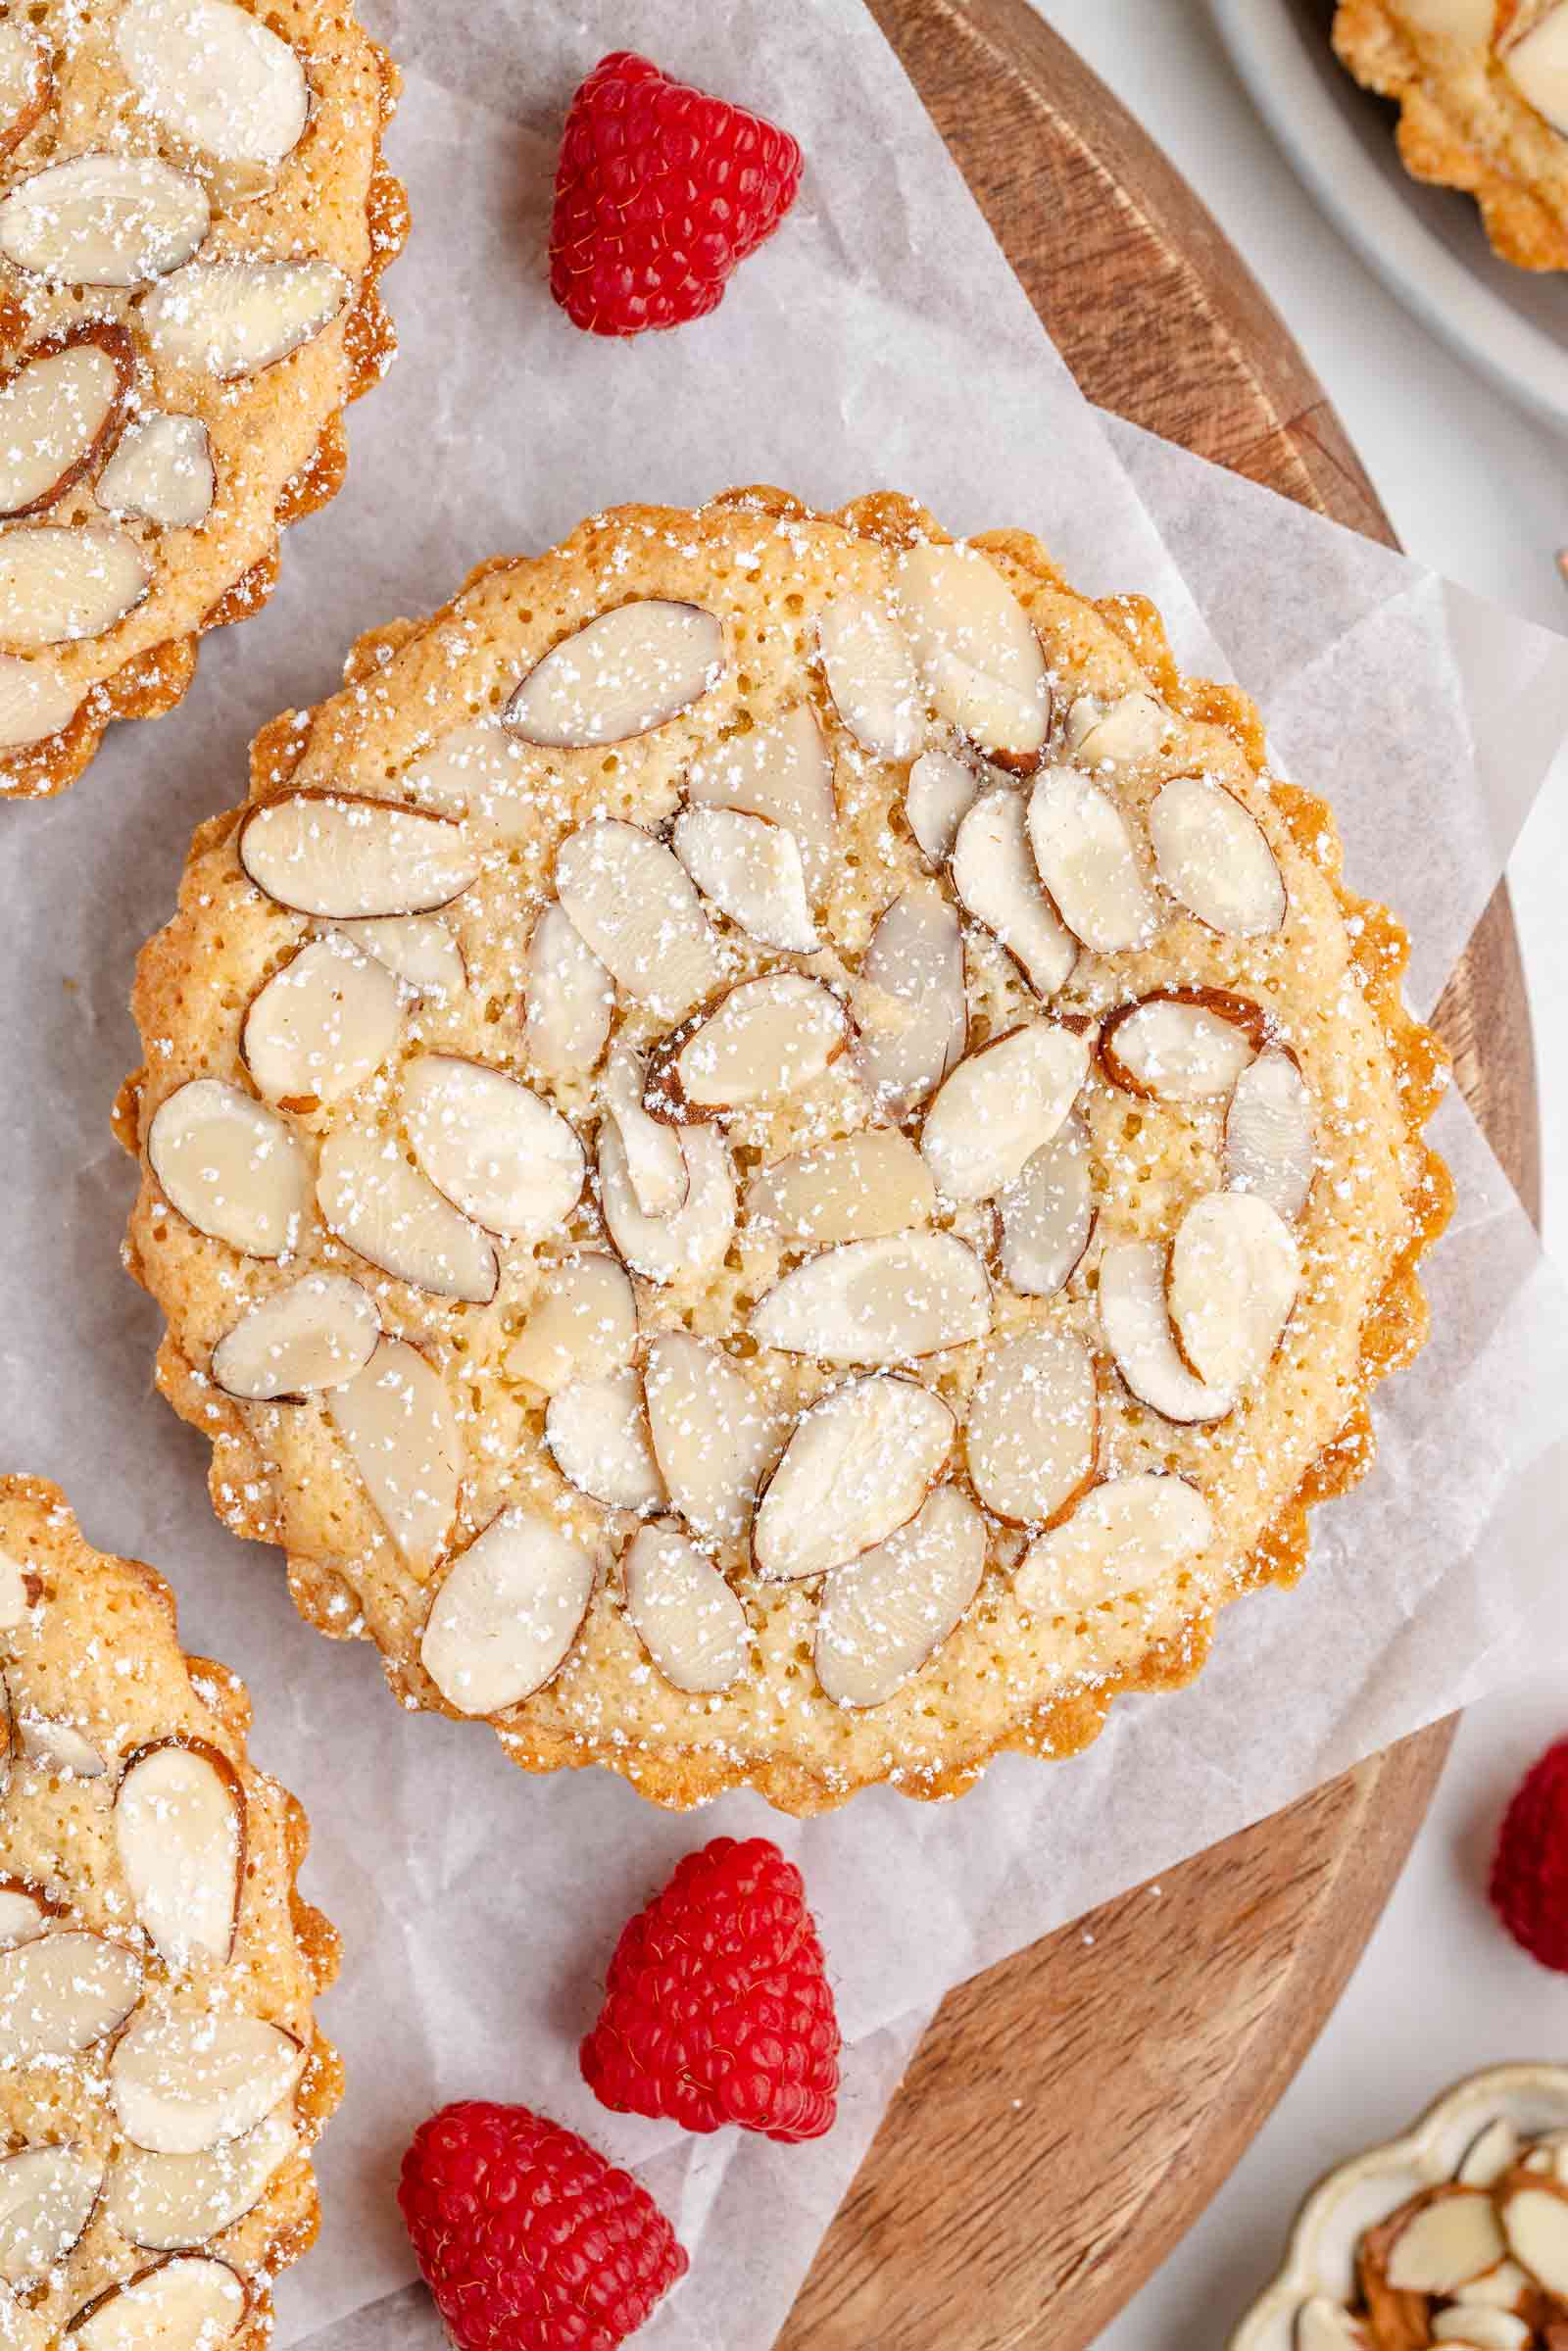
I know they’re not the flashiest dessert, and they might not sound all that thrilling, but don’t be fooled – they’re truly something special. The blend of the crisp crust and the almond-scented filling is pure magic.
They might not turn heads at first glance, but one bite and you’ll see exactly why they’re so loved.
What’s to love
If you’ve never made frangipane before, you’re going to be surprised by how quick and easy it is. These tartlets come together with basic ingredients you probably already have on hand, plus almond flour.
You don’t even need a mixer! A few stirs with a spoon or spatula is all it takes to get the filling ready.
The crust is the same simple, press-in dough used for my all my tartlet recipes lately, like these:
I’m pretty much obsessed with it, a recipe lightly adapted from King Arthur Flour, after looking for the perfect tart crust recipe for years.
They also keep beautifully, meaning you can make them ahead of time for events or holidays. They’re even freezer-friendly!
What is frangipane?
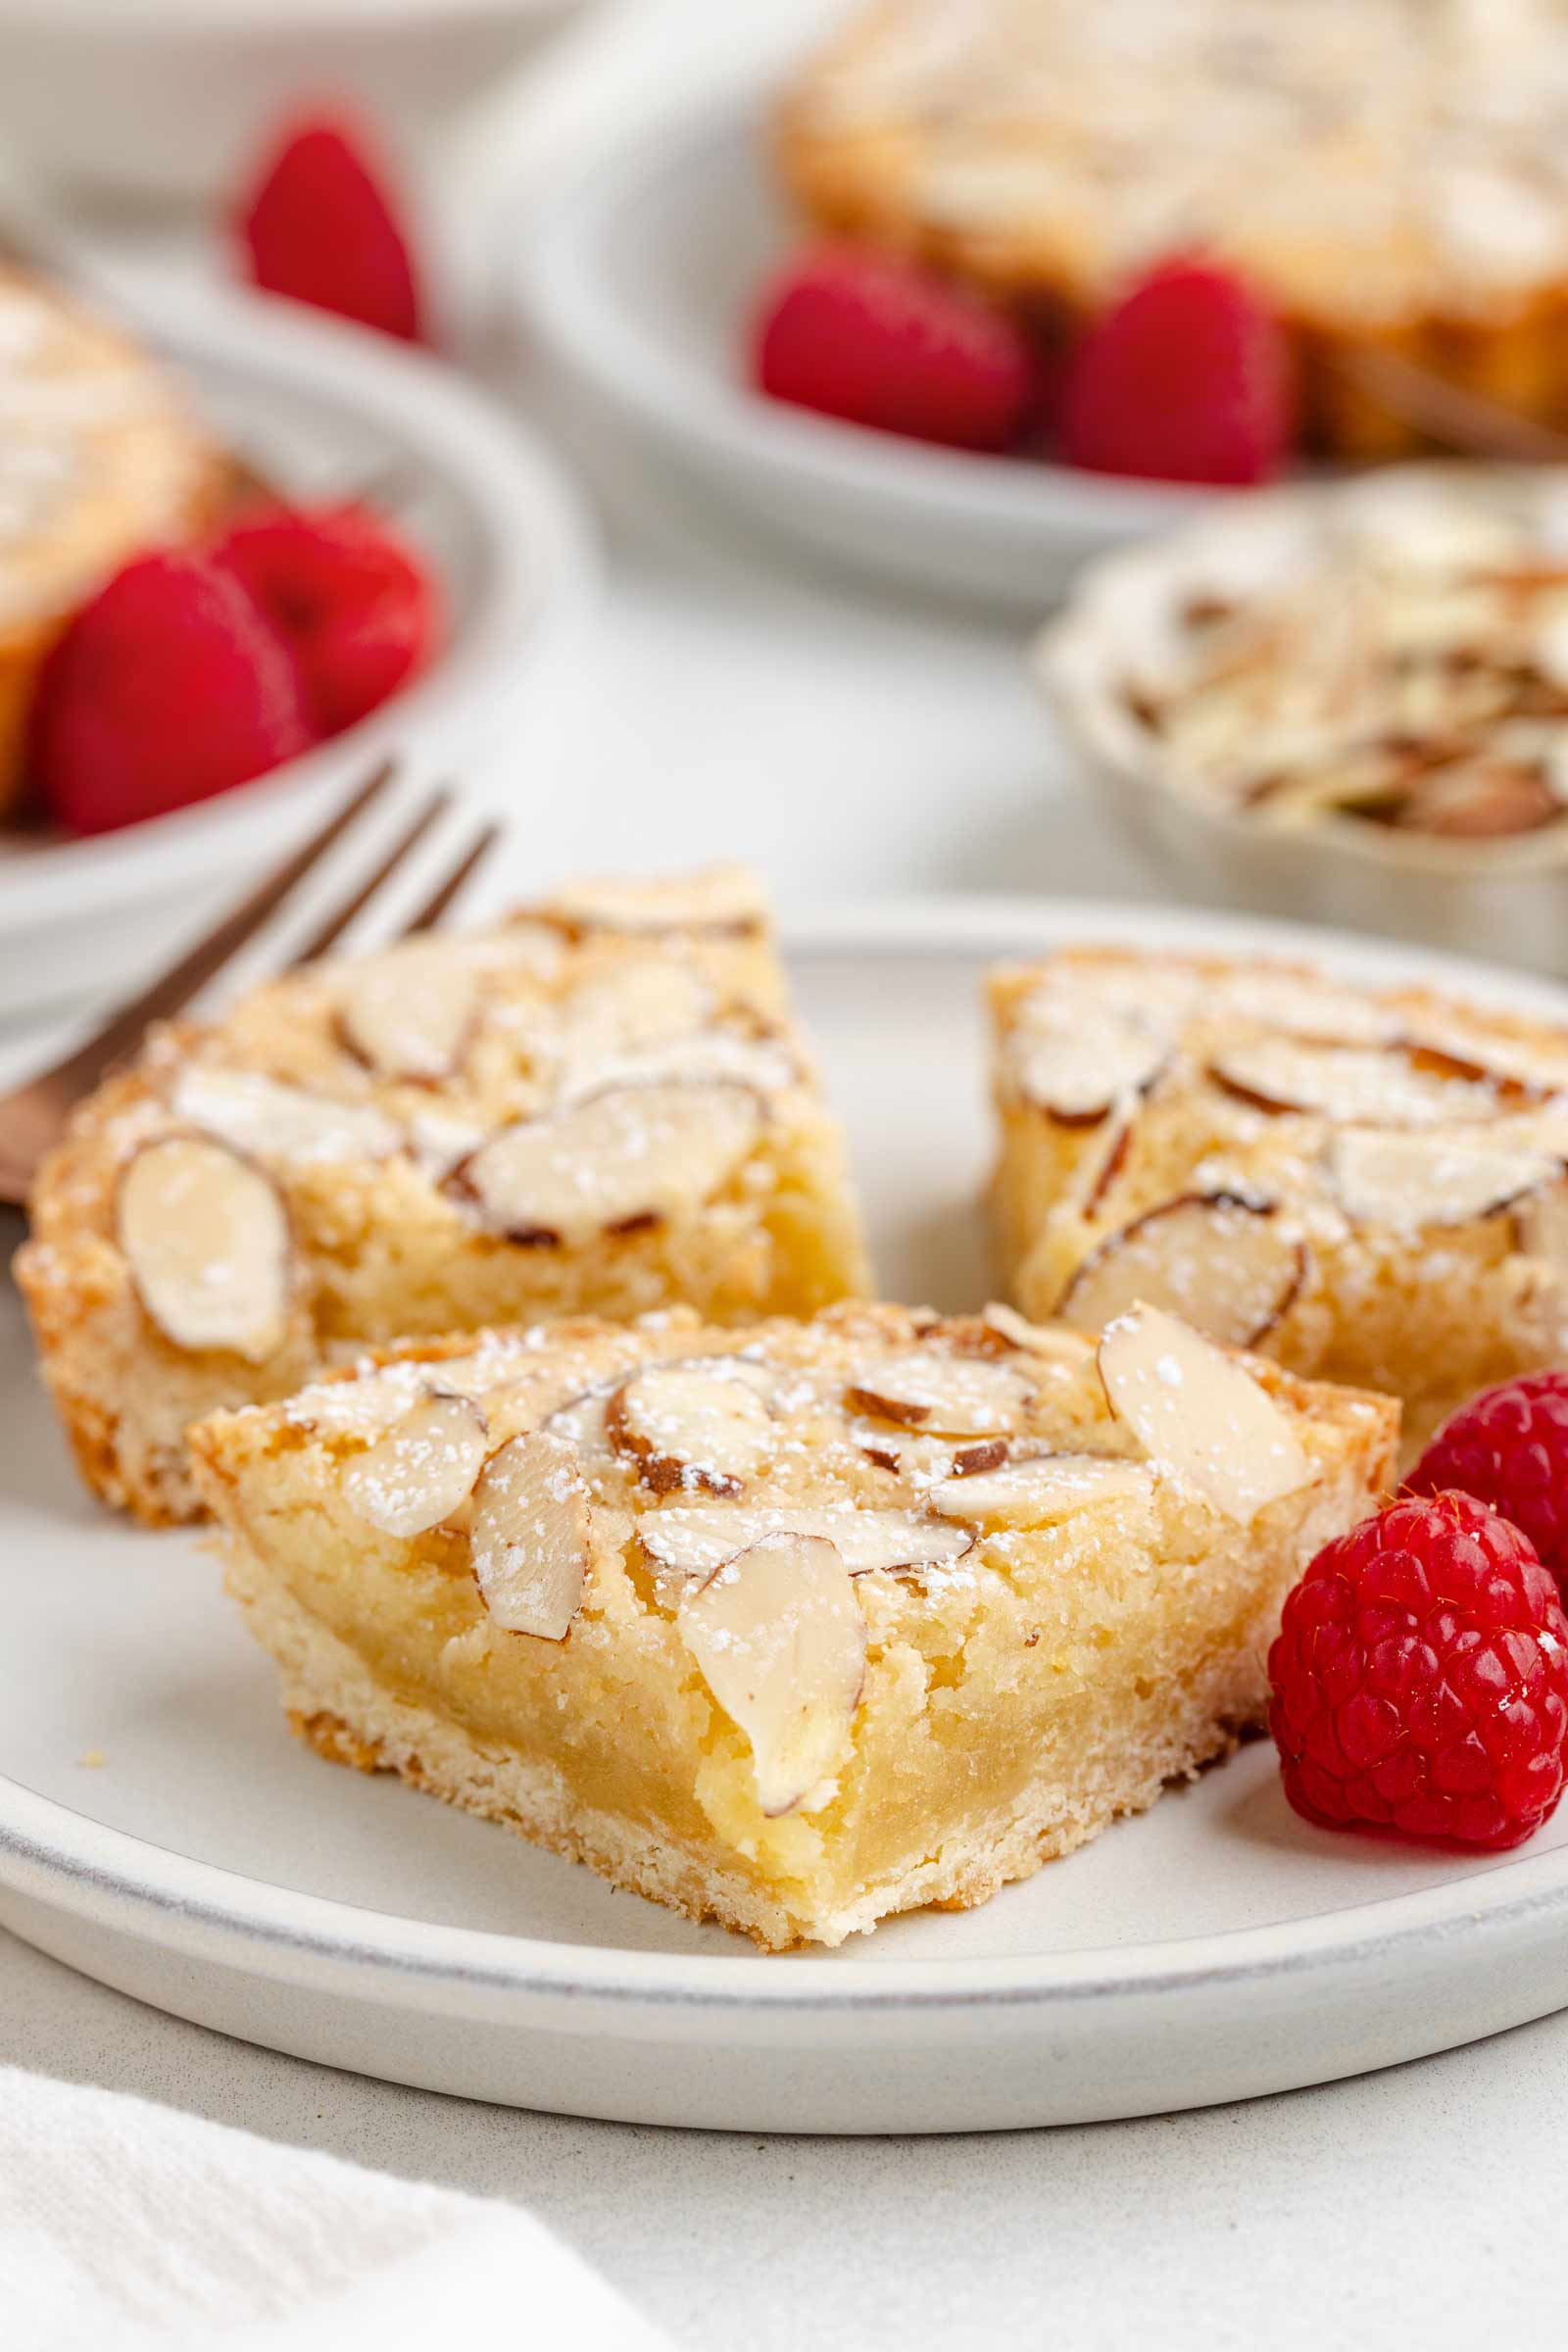
Frangipane is a creamy, almond-flavored filling traditionally used in tarts and pastries. It’s made with butter, sugar, eggs, and ground almonds (almond flour), and it bakes up into a soft, slightly dense, cake-like layer inside desserts.
Even though it sounds fancy, frangipane is incredibly easy to make and doesn’t require any special equipment.
This delicious filling is believed to have originated in France during the 17th century, named after an Italian nobleman, Marquis Muzio Frangipani, whose family was associated with almond-scented creations. In pâtisseries across France, it’s still a really popular filling for all kinds of seasonal or fancy pastries — especially anything involving almonds and fruit.
It’s often paired with fruits like raspberries, pears, cherries, or apples because the nuttiness of the almond perfectly complements the sweet-tart flavors of the fruit. You’ll find frangipane used in classic French desserts like the Galette des Rois, but it’s also popular in simple recipes like these tartlets where it really gets to shine.
I gave one of these frangipane tartlets to my French neighbor, and this was her feedback:

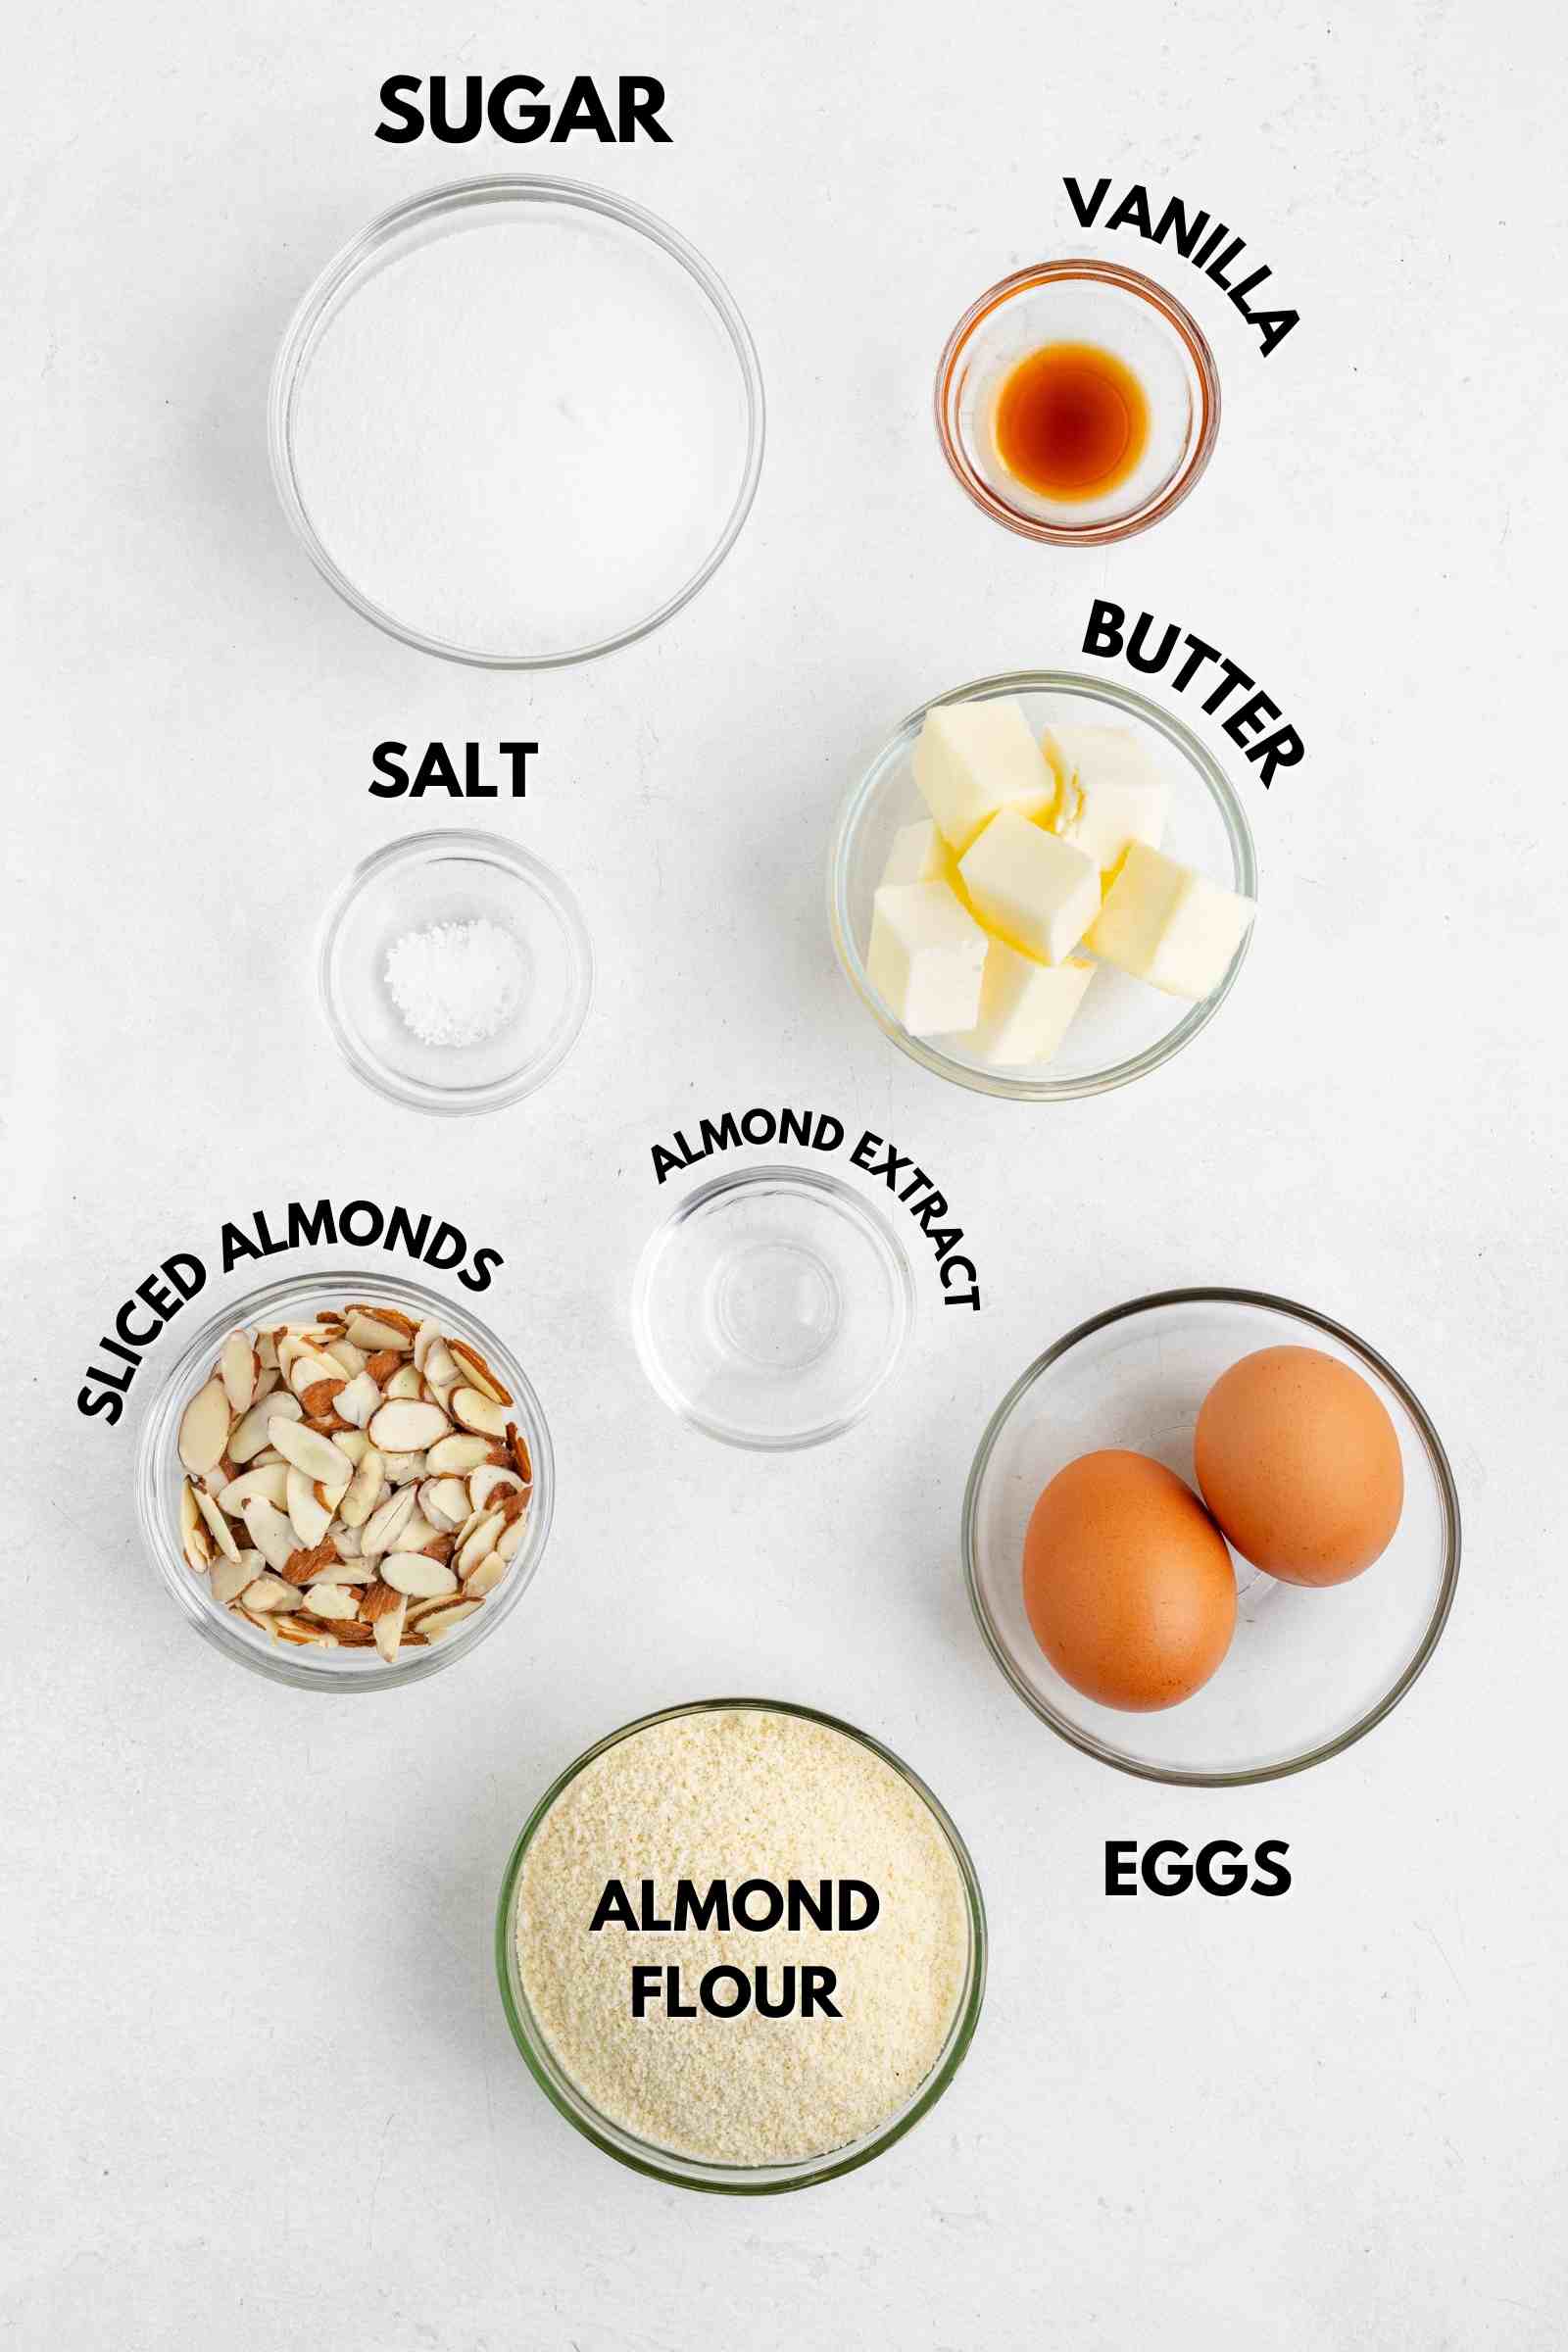
Ingredient notes
Please scroll down for the full recipe! These are just notes on select ingredients.
- Almond flour – make sure to use blanched, super-fine almond flour for the smoothest, most tender frangipane filling.
- Almond extract – traditionally, authentic French frangipane doesn’t include almond extract and relies solely on the natural flavor of ground almonds. Almond extract is more common in modern or American versions and adds a more intense almond flavor. Just like with these Austrian Linzer Cookies, we MUCH preferred the recipe with it. Feel free to omit it if you’d like a more traditional result.
- Sliced almonds – use raw almonds, as toasted almonds could brown too much or even burn while baking on top of the tartlets.
- Eggs – no subs for these, unfortunately.
How to make them
Remember to please scroll below for the full recipe.
How to make the dough
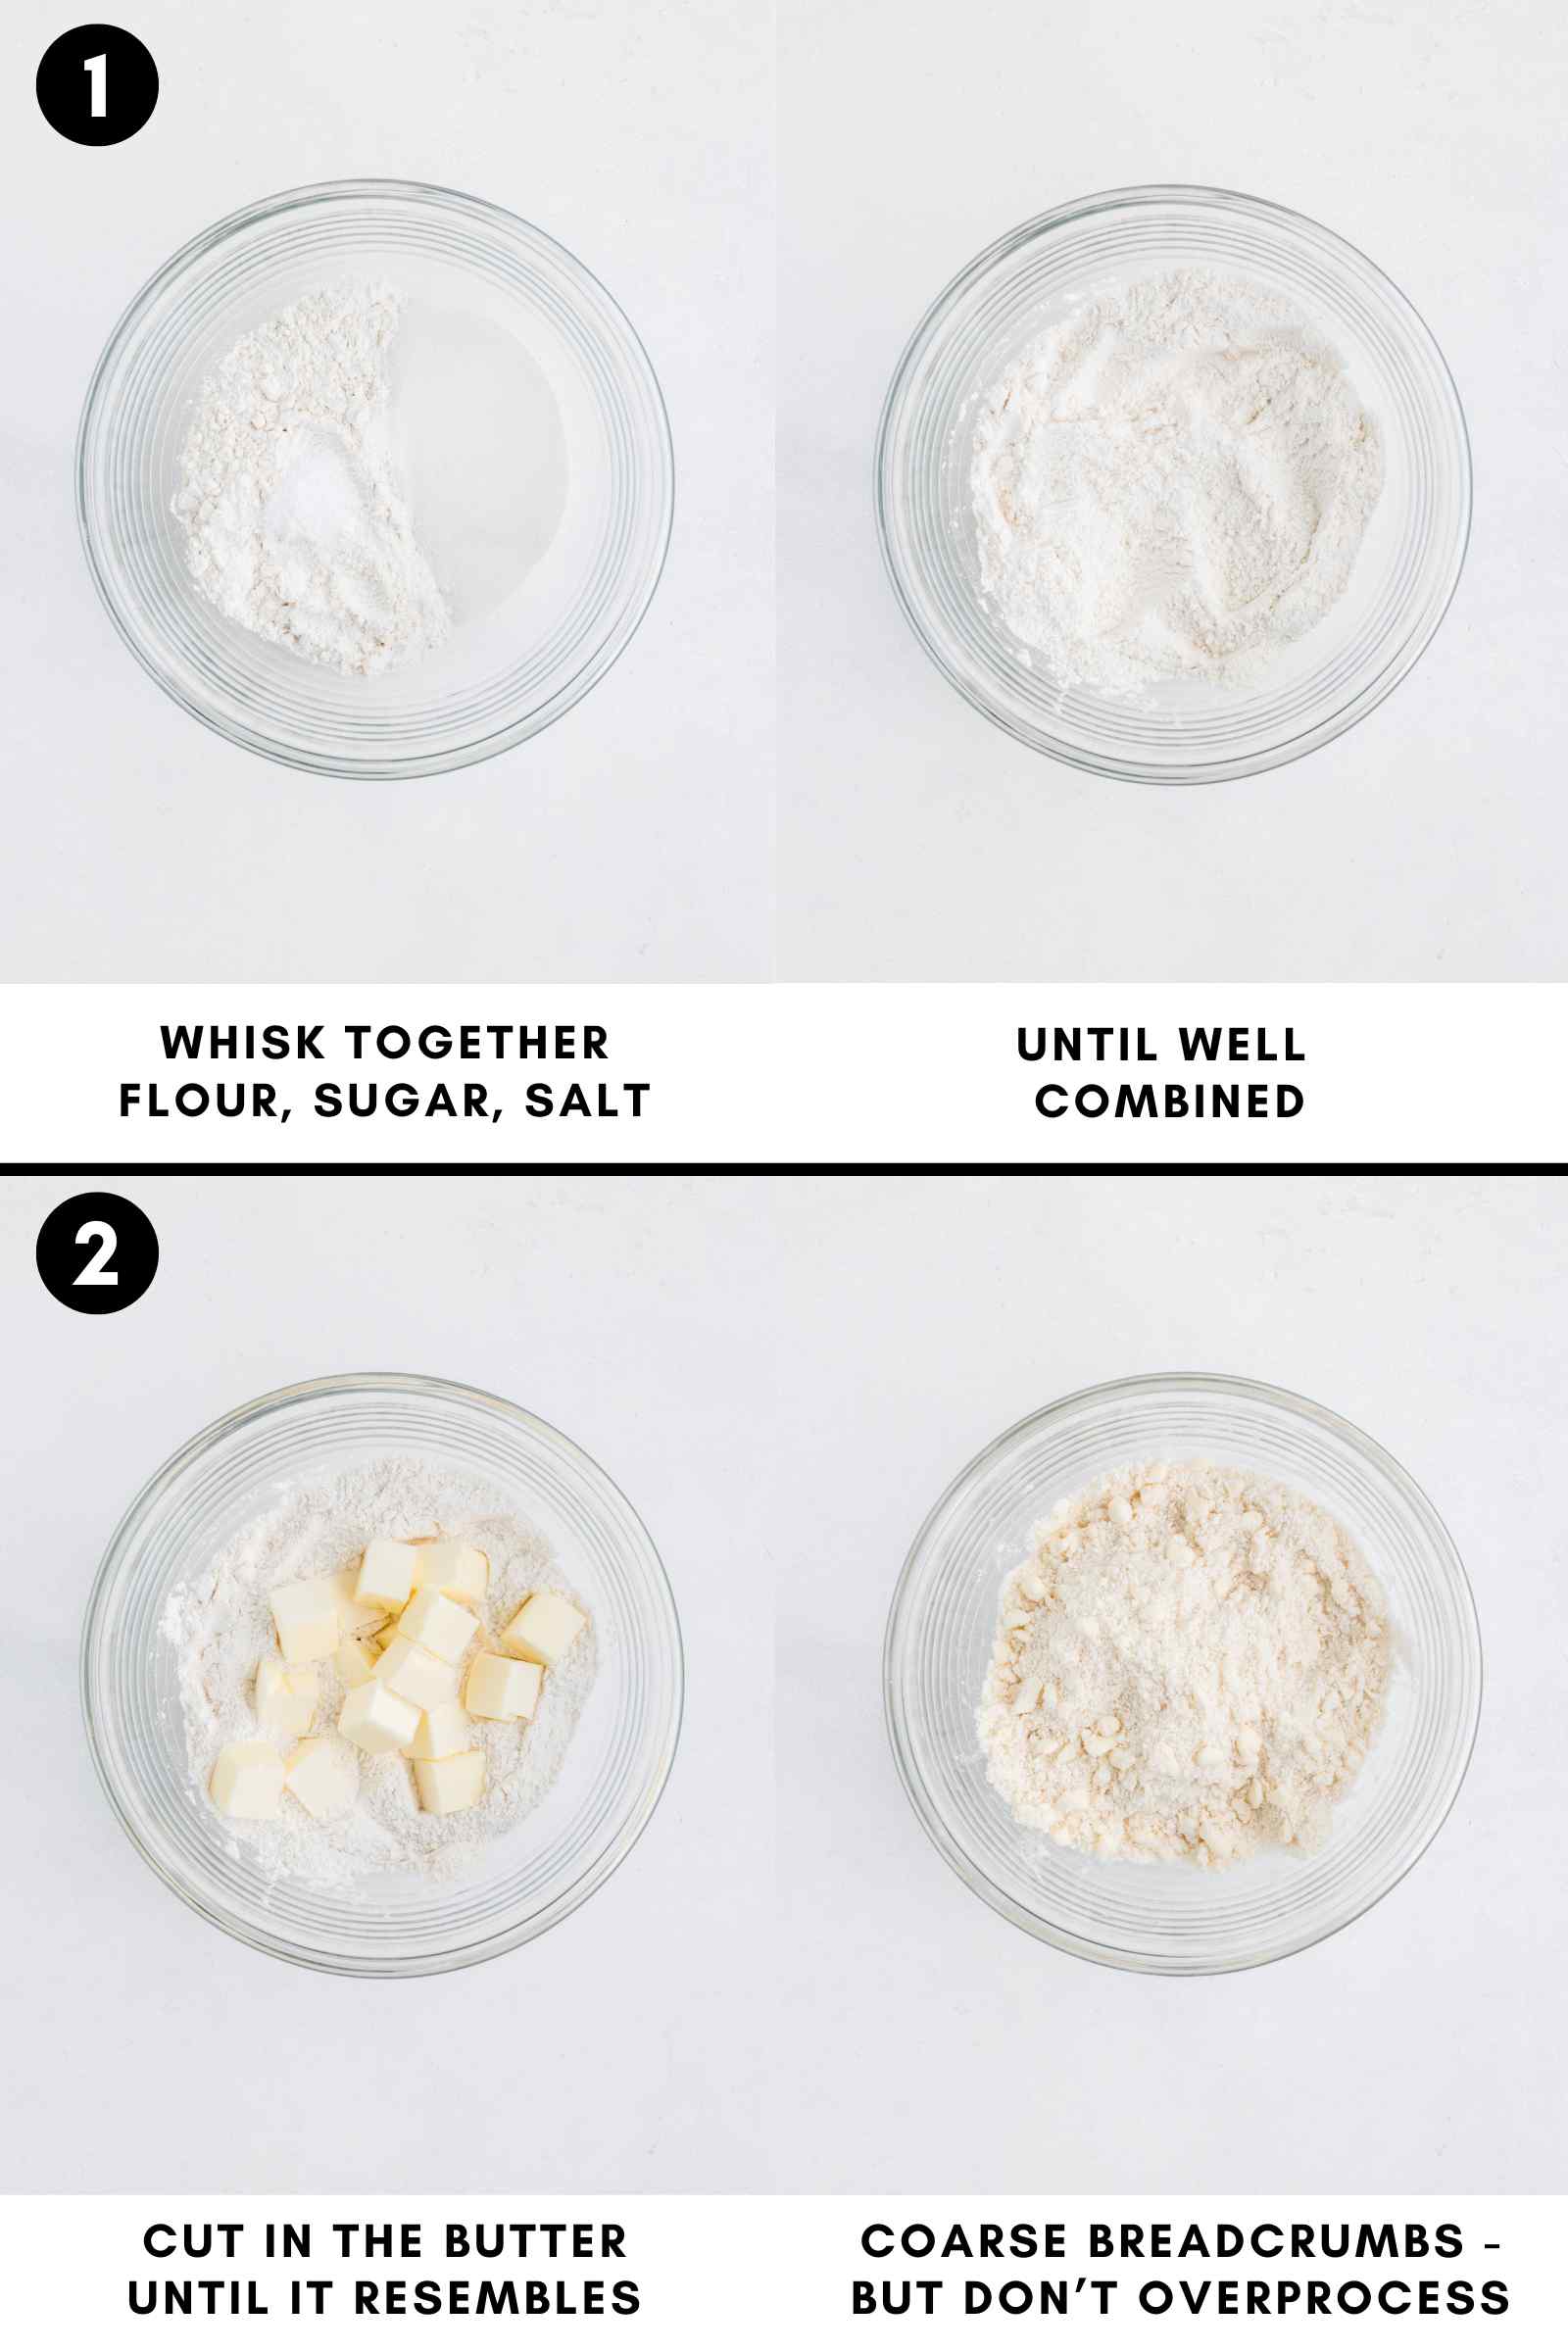
To make the dough, whisk the dry ingredients together and cut in the butter until crumbly.
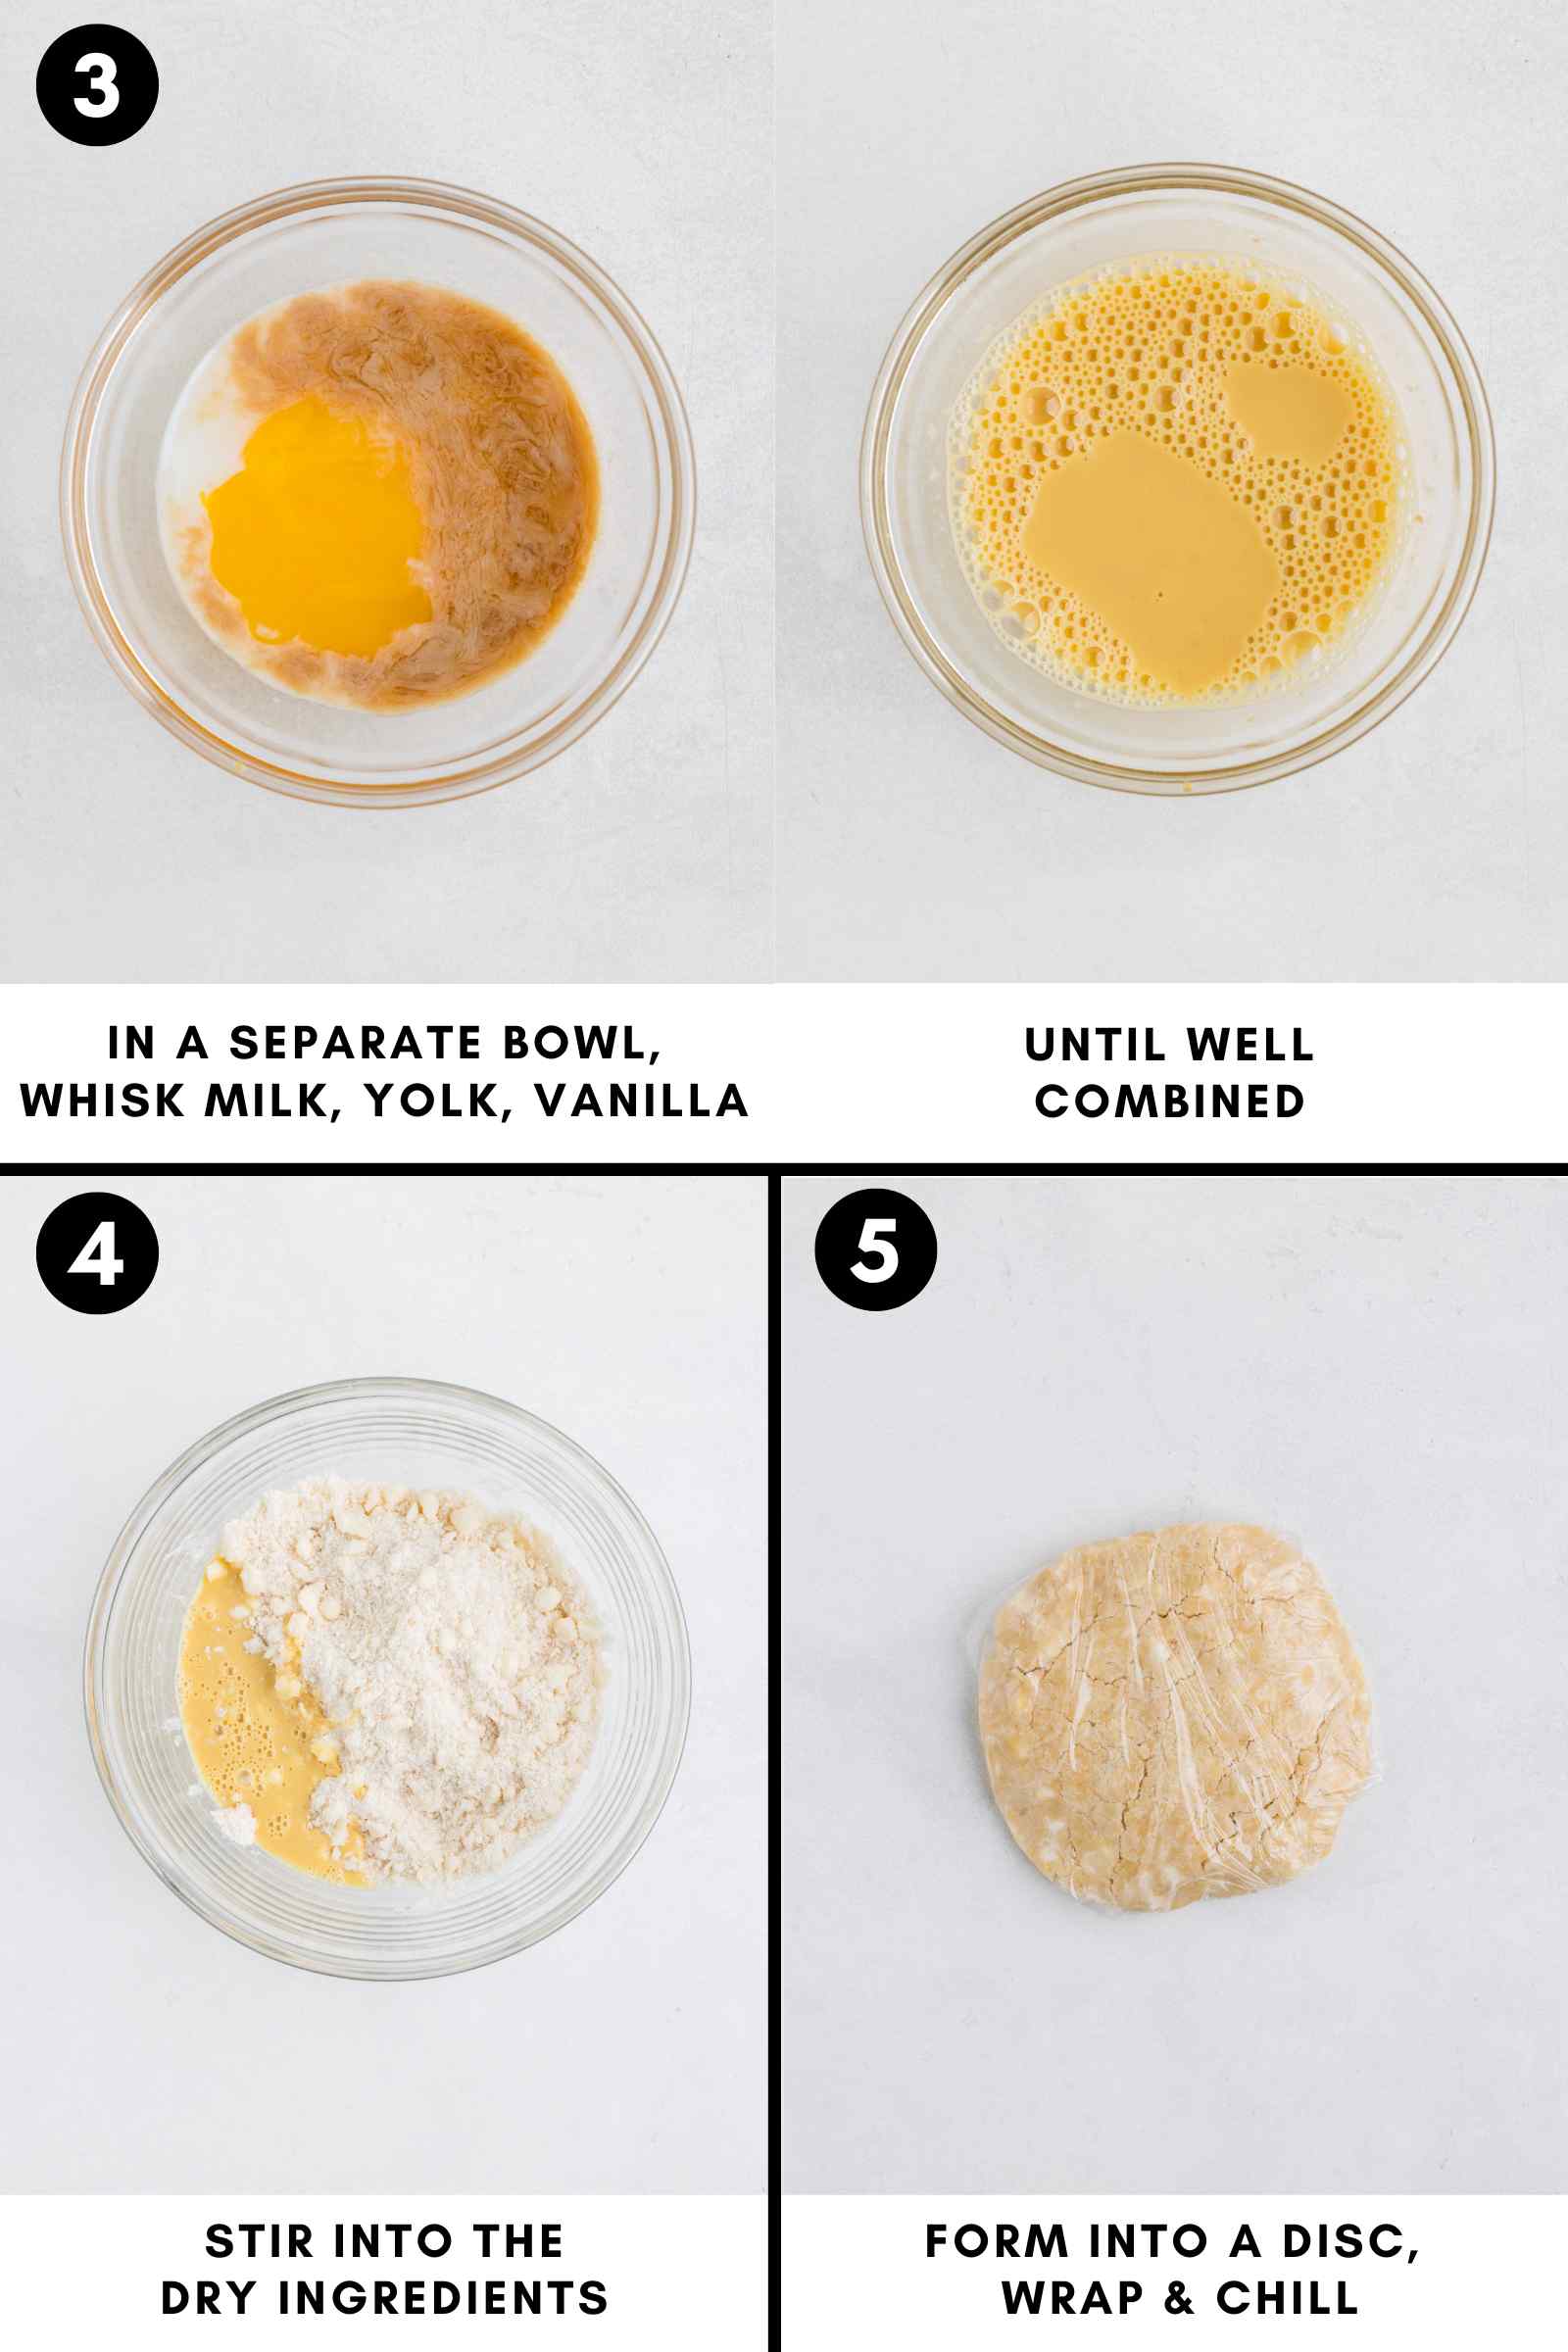
Stir in the wet ingredients. The dough will look a little dry but should hold together when squeezed.
Wrap the dough loosely in plastic wrap and chill it for at least an hour.
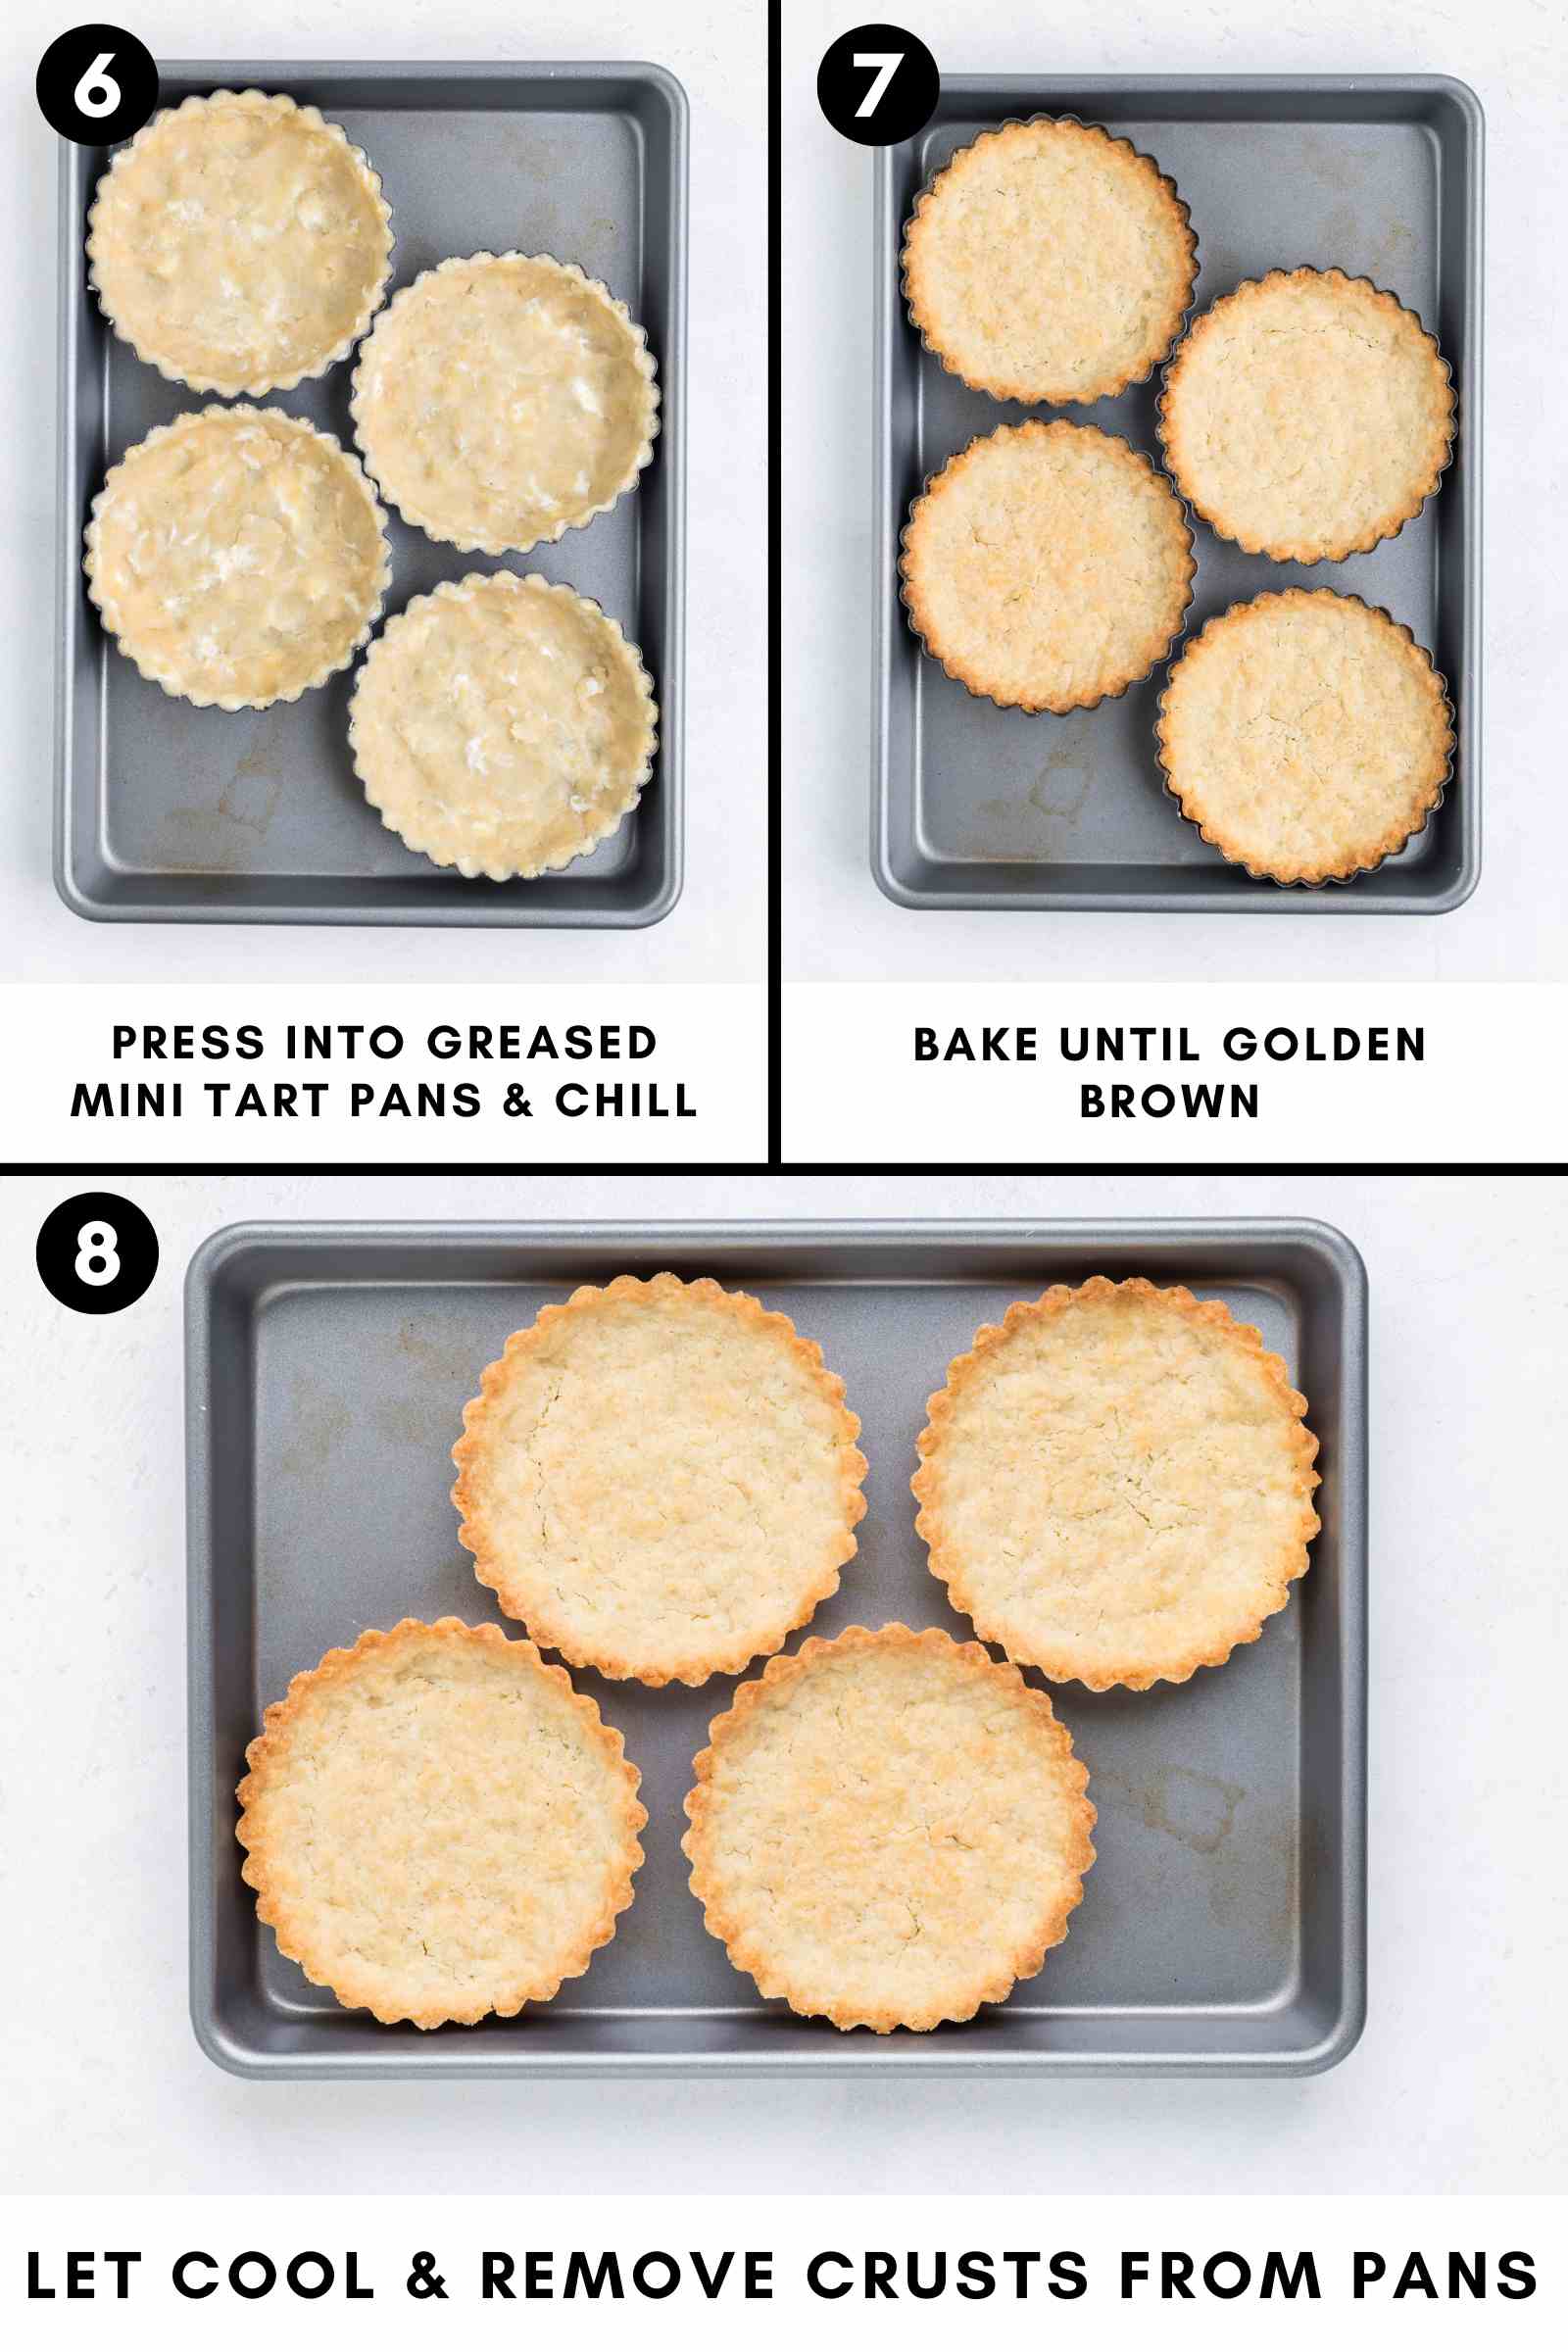
Once chilled, press it evenly into your greased tart pans, covering the bottom and sides.
Chill the tart shells, and then bake them until golden. Let them cool a bit while you make the filling.
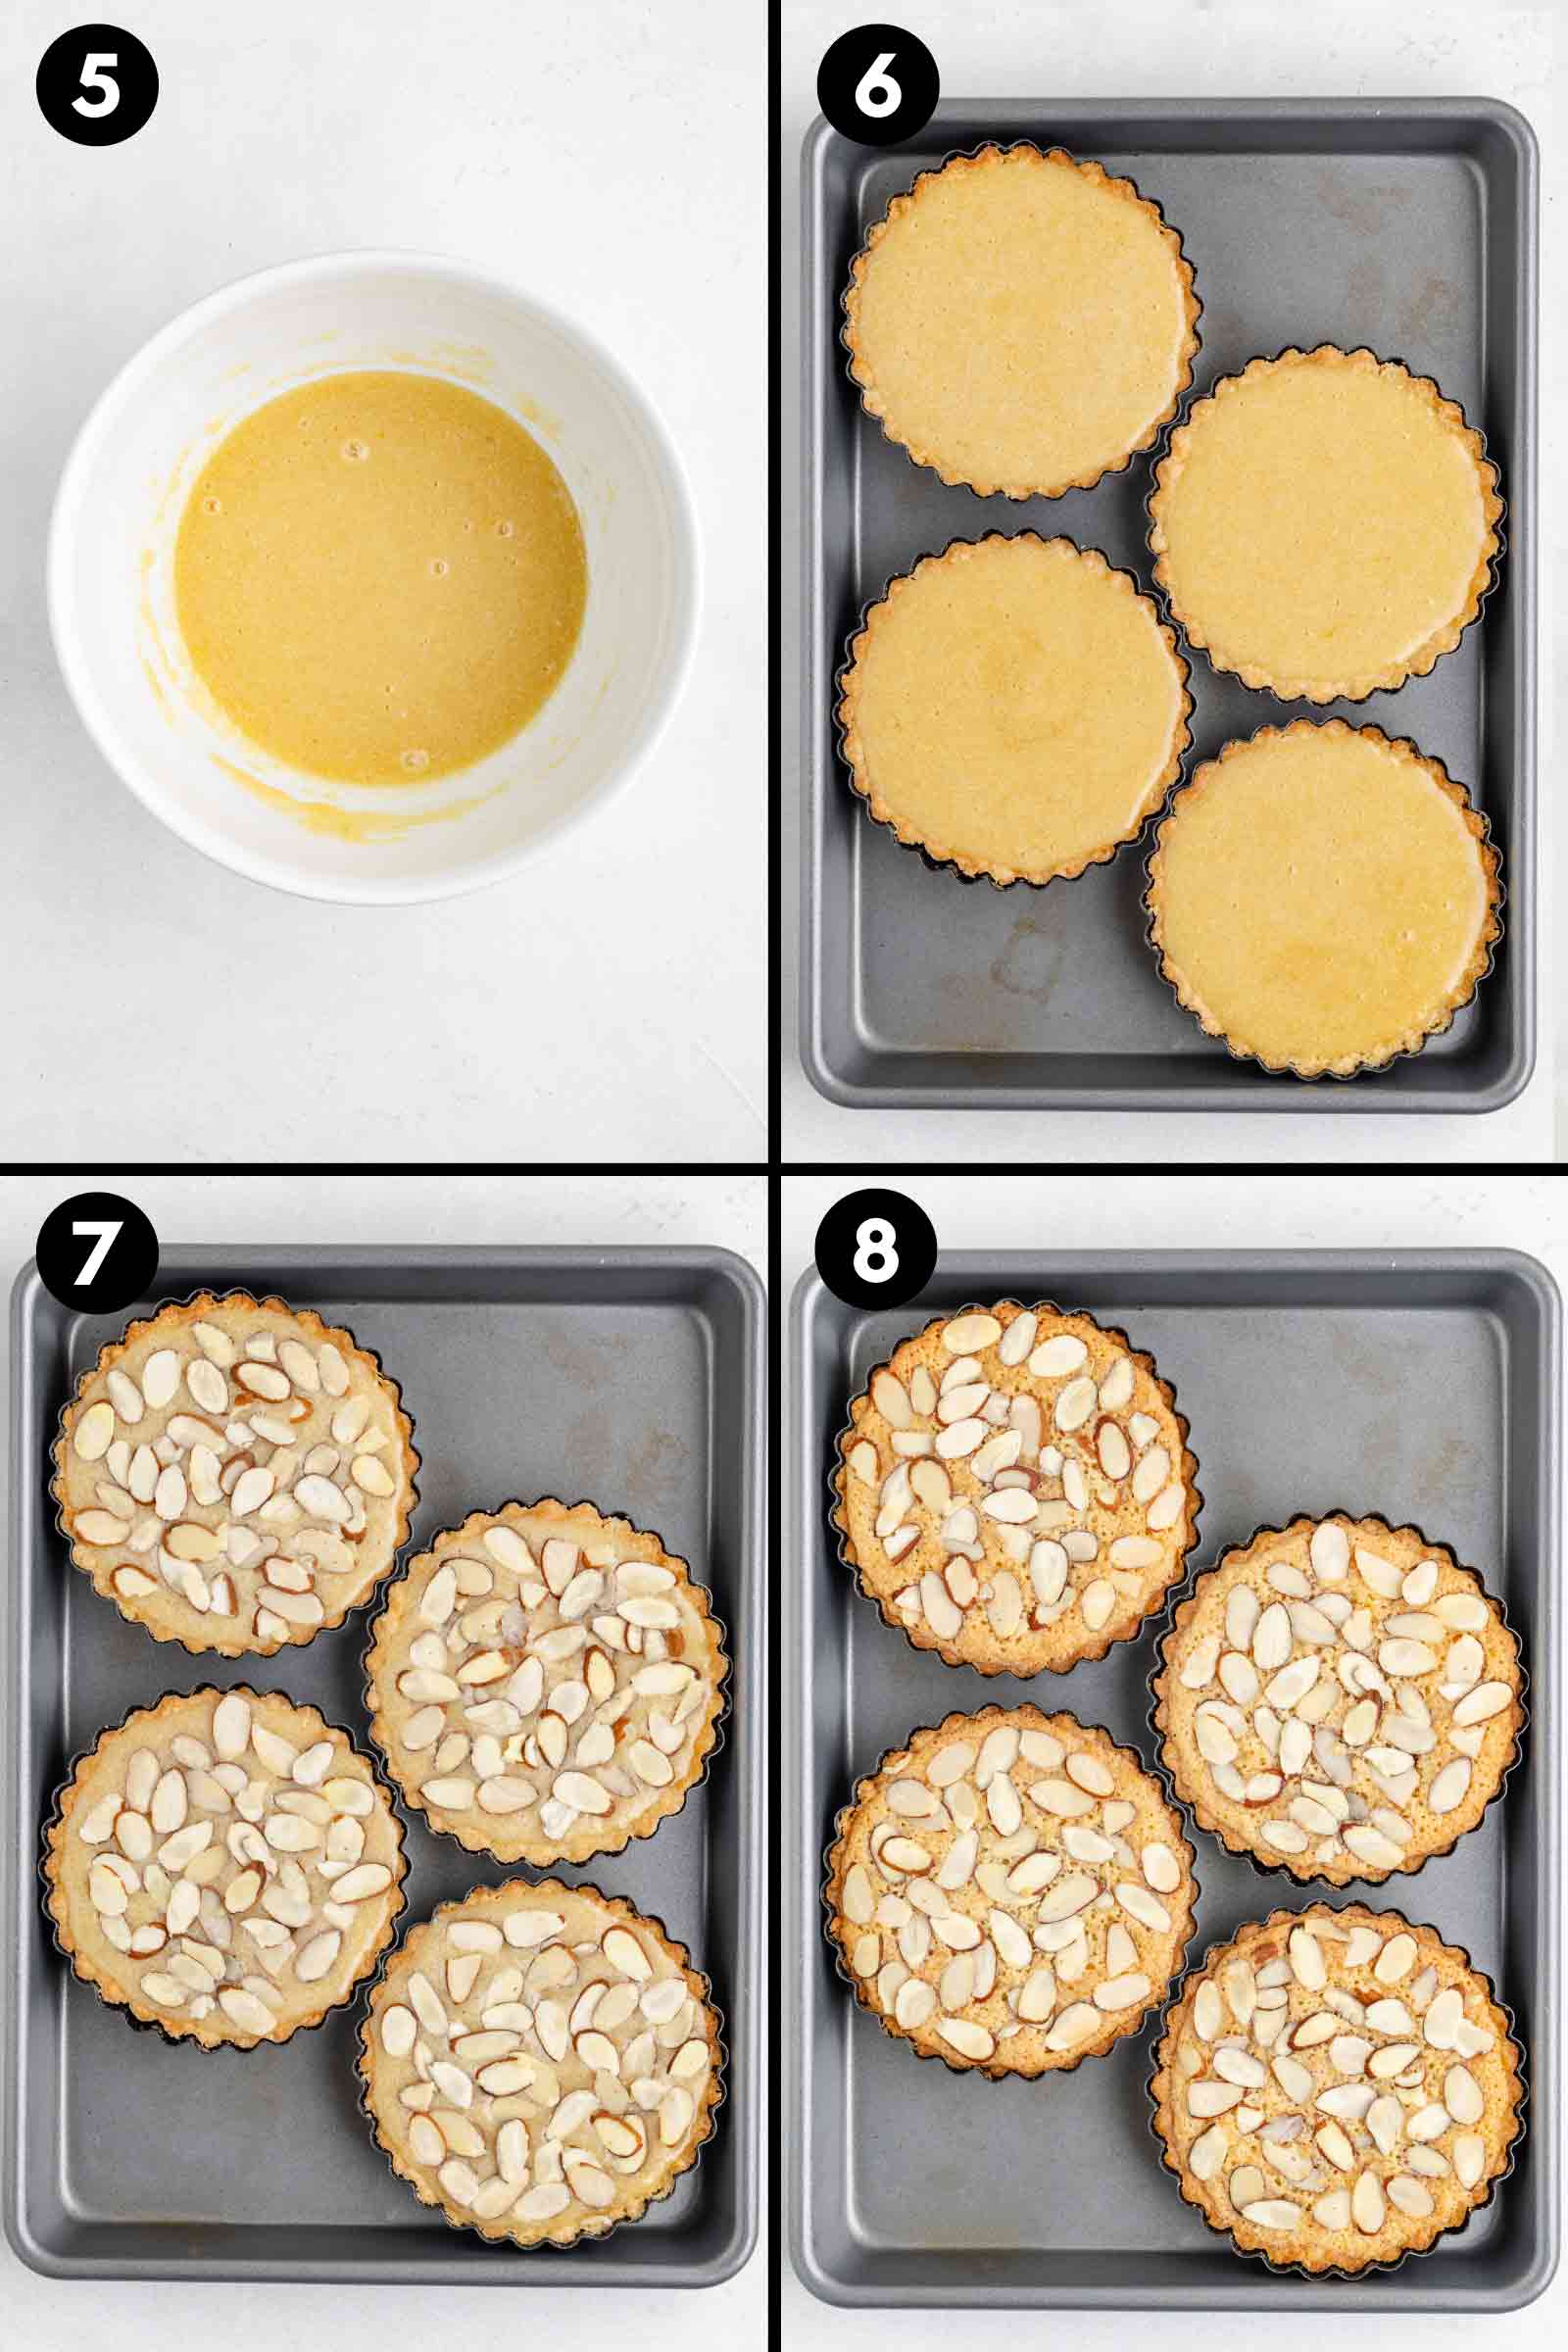
To make the filling
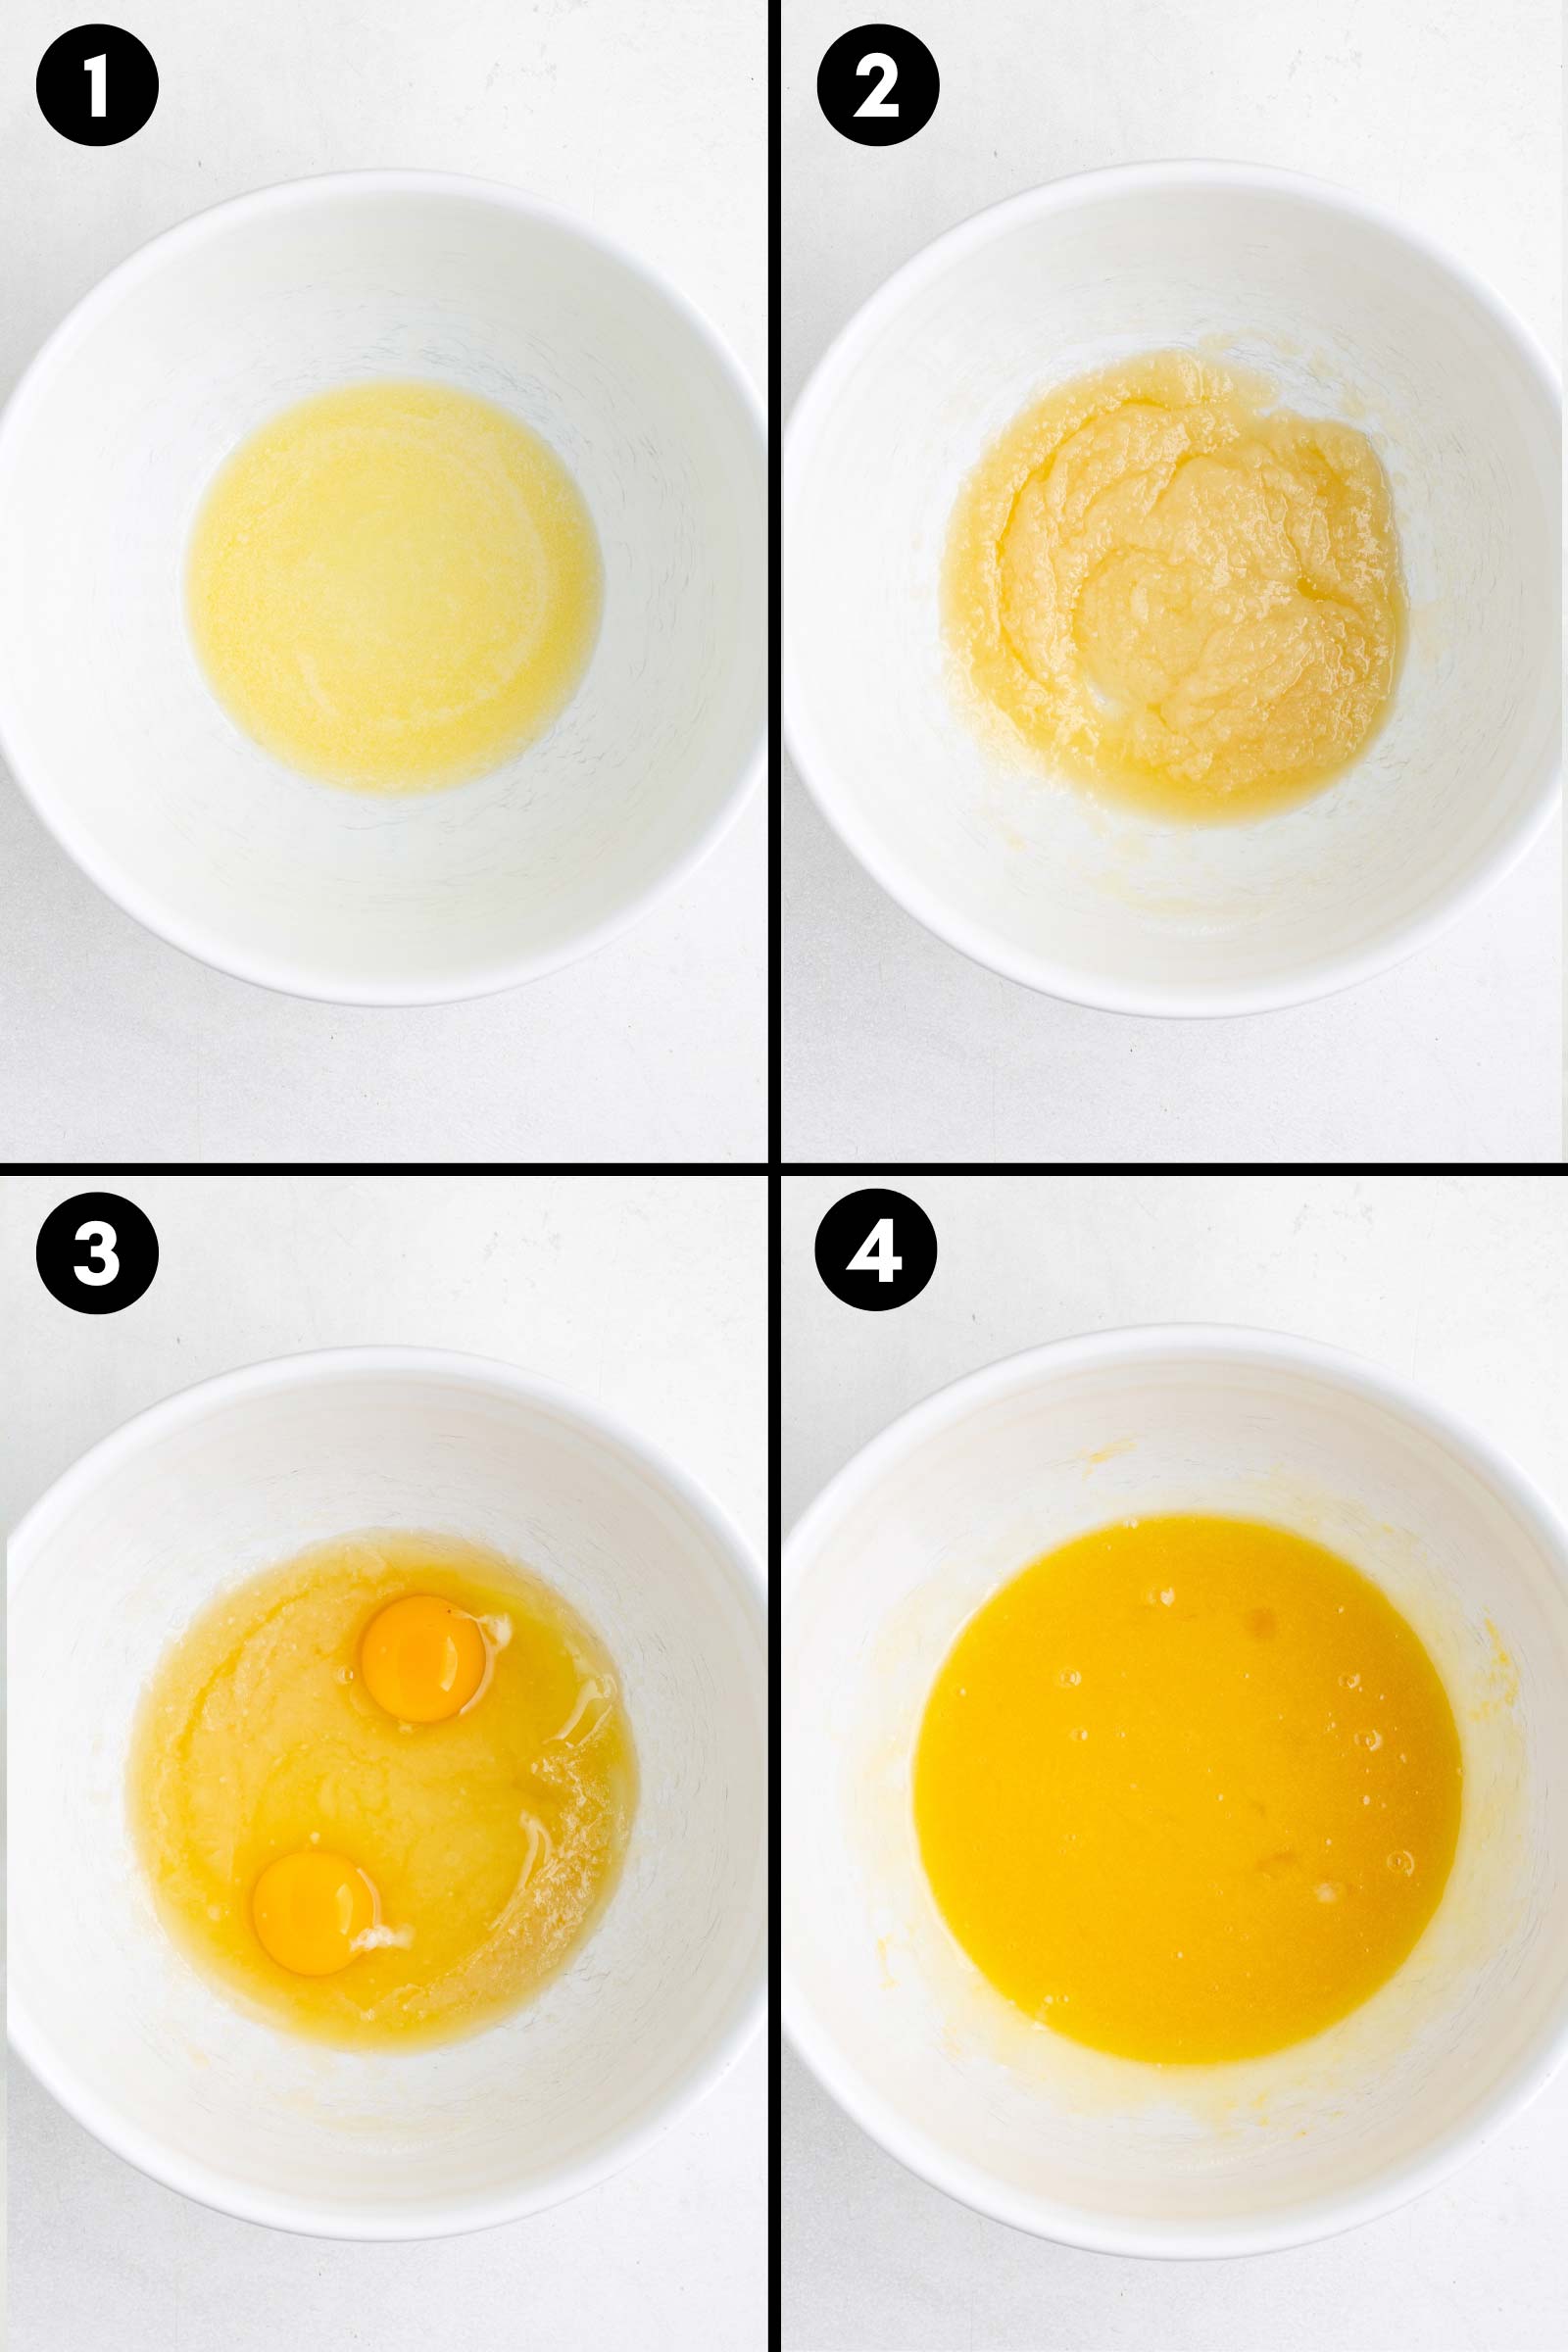
Melt the butter, stir in sugar, eggs, almond and vanilla extracts, salt, and almond flour.
Fill each shell, smooth the tops, sprinkle with sliced almonds, and bake again until the tops are golden and the filling is set. Let cool completely before removing from the pans.
Tart pans
I used these Wilton Perfect Results 4.75″ (12 cm) Tart Pans, which come in a 6-pack.
I’ve had mine for over 10 years, and they’re still in excellent condition. As with any tart pans, you’ll want to remove the tartlets from the pans before cutting to avoid scratching them up.
If you can’t find the same set, just be sure to get mini tart pans with removable bottoms so the shells are easy to release.
Tips for success
- Don’t overmix the dough – after adding the wet ingredients, stir just until the dough comes together. Overworking it can make the crust tough.
- Chill the crusts well – this helps prevent shrinking in the oven and keeps the crusts crisp.
- Measure the filling – using a scale to portion out the filling ensures the tartlets bake evenly.
- Watch the bake time – ovens vary, so start checking the tartlets a few minutes early. They should be golden on top and no longer jiggly in the center when done.
- Cool completely – let the tartlets cool fully before removing them from the pans for the sturdiest results.
Make ahead, store and freeze
These frangipane tartlets are great to prepare ahead of time!
The dough
You can make the tart dough up to 3 days in advance or freeze it for up to 3 months. Wrap the disc of dough tightly in plastic wrap, then place it in a Ziploc bag. Thaw overnight in the fridge. I don’t recommend using the microwave to thaw, but if you absolutely must, use 30% power.
Unbaked tart shells
Press the dough into the tart pans, then store them in an airtight container. Refrigerate for up to 3 days or freeze for up to 3 months.
Baked tart shells
Once baked, store the tart shells in an airtight container at room temperature for up to 3 days or refrigerate for up to 5 days. They also freeze well for up to 3 months.
The filling
It’s best to make the frangipane filling fresh, just before baking, as it only takes a few minutes to prepare and ensures the best texture and rise. I don’t recommend preparing it far in advance or freezing it.
Assembled tartlets
If you’re eating them the same day of baking or the next day, you can store them in an airtight container at room temperature for a day. Just make sure they’re in a cool, dry place and not near a warm oven or in a humid spot.
You can also refrigerate for up to 5 days. They also freeze well for up to 3 months. However, for the best texture and crisp crust, I recommend serving them the day they’re baked.

Gluten-free Option
So far, I’ve only tested the gluten-free version using King Arthur Flour Gluten-Free Measure for Measure Flour.
It comes out just as delicious as the version made with all-purpose flour. I haven’t yet tried it with Bob’s Red Mill Gluten-Free 1-to-1 Baking Flour, but based on similar recipes I’ve made, it might have a slightly grittier texture compared to King Arthur’s.
If you try another brand and aren’t thrilled with the results, I definitely recommend giving it another go with King Arthur.
✨🌸 Have you tried these frangipane tartlets? 🌸✨ Please share your feedback by leaving a review and rating – it helps me and others! I so appreciate it. 💖

Frangipane Tartlets
- Prep Time:
- Cook Time:
- Ready in:
- Yield: 4
Ingredients
- 1 1/4 cups (150 grams) all-purpose flour or King Arthur Flour Gluten-free Measure for Measure Flour for a gluten-free version
- 1/4 cup (50 grams) granulated sugar
- 1/2 teaspoon salt
- 1/2 cup (113 grams) unsalted butter, cold, cut into 1/2" cubes
- 1 large egg yolk
- 1 teaspoon vanilla extract
- 1-2 tablespoons milk
- 5 tablespoons (70 grams) unsalted butter, cut into chunks
- 2/3 cup (133 grams) granulated sugar
- 1/2 teaspoon vanilla extract
- 1/4 teaspoon almond extract
- 1/4 teaspoon kosher salt
- 2 large (50 grams each, out of shell) eggs
- 1 cup (100 grams) blanched, super-fine almond flour
- 1/4 cup (20 grams) sliced almonds
For the crust:
For the filling:
Directions
- In a medium bowl, whisk together the flour, sugar, and salt.
- Cut in the cold butter until the mixture resembles coarse breadcrumbs.
- In a separate small bowl, whisk the egg yolk, vanilla, and just 1 tablespoon of milk. Stir this into the dry ingredients.
- Use your hands to gently bring the dough together. The dough should be crumbly but cohesive when squeezed. It won’t form a ball or a loose ball like with pie dough.
- I placed a piece of plastic wrap in a mixing bowl and then dumped the dough into it and wrapped it up into a very loose, crumbly disc.
- Chill for 1 hour or up to 3 days.
- Grease 4 mini ( 4.75" or 12 cm) tart pans with removable bottoms.
- Take a fourth of the dough crumbles (I used 91 grams, but I used the extra tablespoon of milk - if you follow the recipe exactly, you can use 88 grams) and place in the pan.
- Press up the sides and evenly over the bottom of the pan. Do the same with the other 3 tart pans.
- Place in the fridge for at least 30 minutes or cover and refrigerate for up to 3 days.
- Towards the end of the chill time, preheat the oven to 375 °F (190 °C) and place a baking sheet large enough to fit all 4 tartlets in the lower third of your oven.
- After 30 minutes of chilling, place the tartlets directly onto the hot baking sheet and bake for 18-22 minutes, rotating halfway through if you notice them browning too quickly in certain areas, until the sides are nicely browned and the bottom has browned a bit.
- Remove the baking sheet and tartlets from the oven and place them on a wire rack to cool for at least 15 minutes while you prepare the filling. After about 10 minutes, the crusts should be cooled enough for you to remove them from the baking sheet and place them on the cooling rack. Put the baking sheet back in the oven. Once baked, store the tart shells in an airtight container at room temperature for up to 3 days or refrigerate for up to 5 days. They also freeze well for up to 3 months.
- Turn the heat to 350 °F (175 °C).
- In a large microwave-safe mixing bowl, melt the butter at 50% in 10-15 second bursts until it’s melted.
- Stir in the sugar, vanilla and almond extract and salt until combined.
- Stir in the eggs until well combined, and then add the almond flour.
- Pour 91 grams of filling into each partially cooled tart shell, smooth with an offset spatula and top with a tablespoon (5 grams) of sliced almonds. You can add more if you’d like. Whatever you think looks good.
- Bake for 25-28 minutes (I did 27) or until golden brown and no longer jiggly when the pan is tapped.
- Place the baking sheet with the tartlets on a cooling rack. After about 10-15 minutes of cooling, they should be cool enough to remove from the baking sheet and place directly on the cooling rack.
- I was able to easily remove them from the tart shell after 16 minutes but to be safe, I recommend waiting at least 30 minutes. I took another out 50 minutes after baking, and it was so sturdy that I could hold it with my hand.
- Let cool completely, about 1 to 1 1/2 hours. If you're eating them the same day or the next day, you can store them in an airtight container at room temperature for about 1 day. Just make sure they're in a cool, dry place, not near a warm oven or in a humid spot. You can also refrigerate for up to 5 days. They also freeze well for up to 3 months.
To make the crust:
Prepare the filling:
Crust adapted from King Arthur Flour
Join over 12,400 readers and sweeten up
your inbox with new posts for free!
This subscription is free of charge and can be canceled at any time.


There are no responses on “Frangipane Tartlets” — Be the first one!