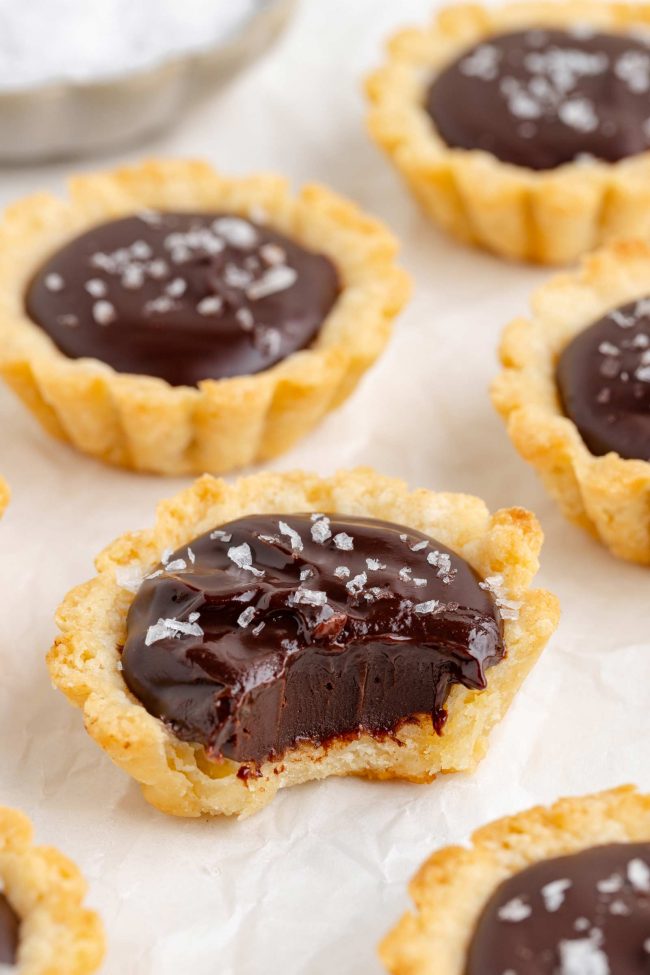
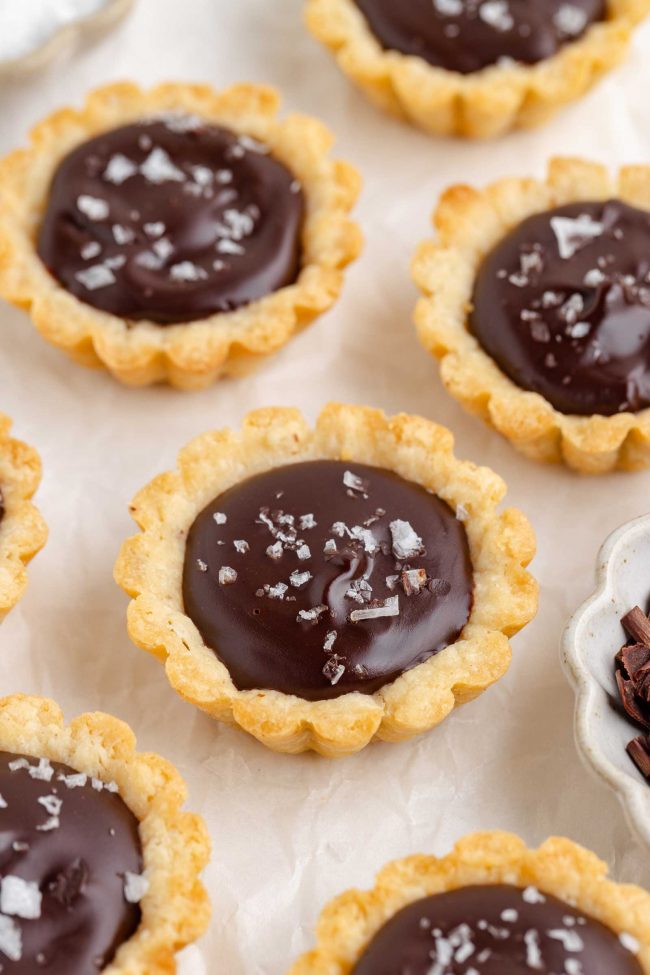
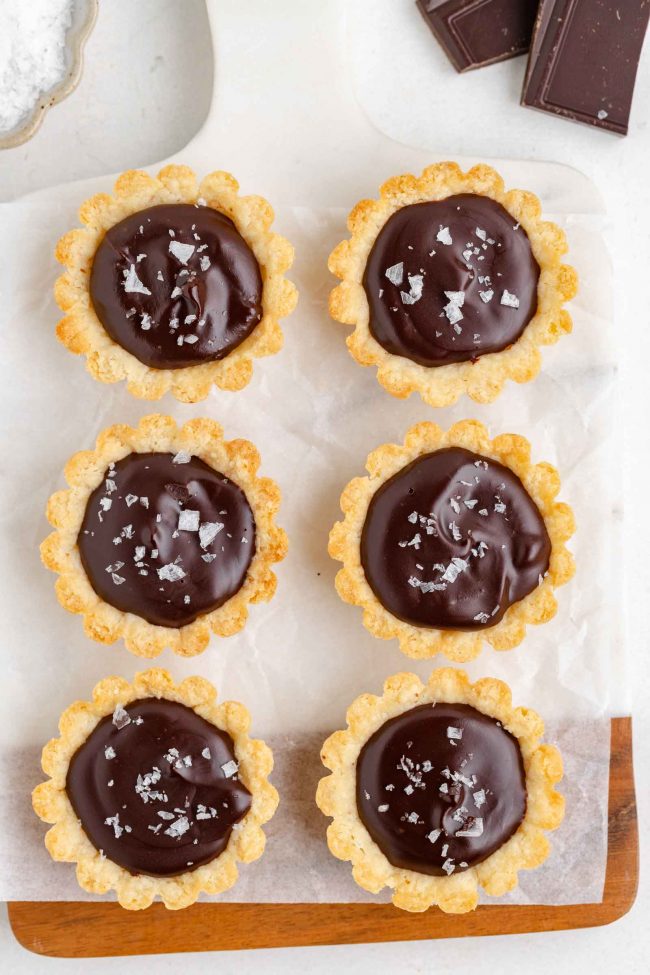
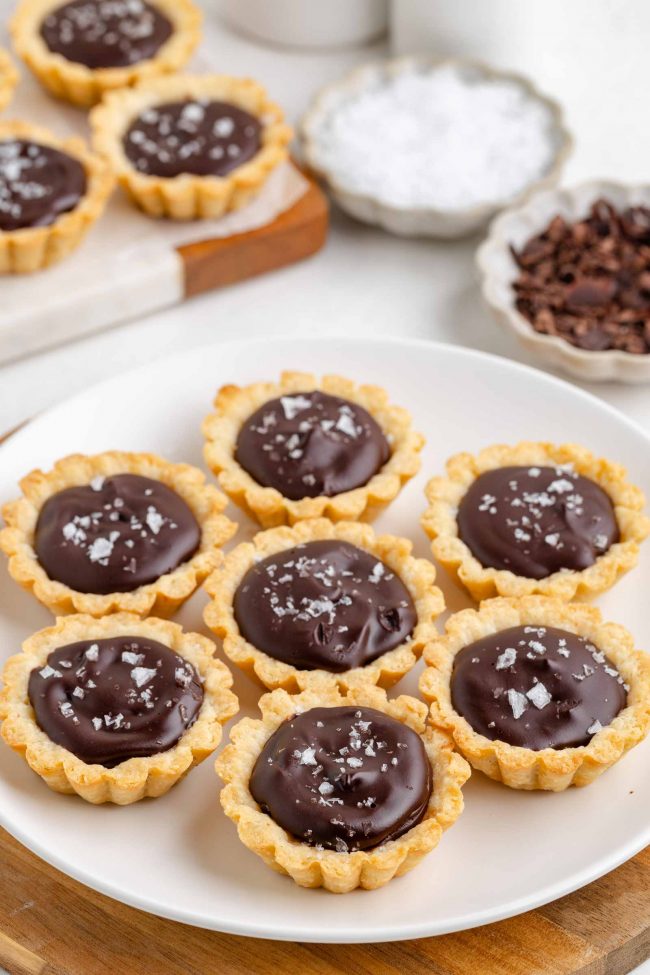
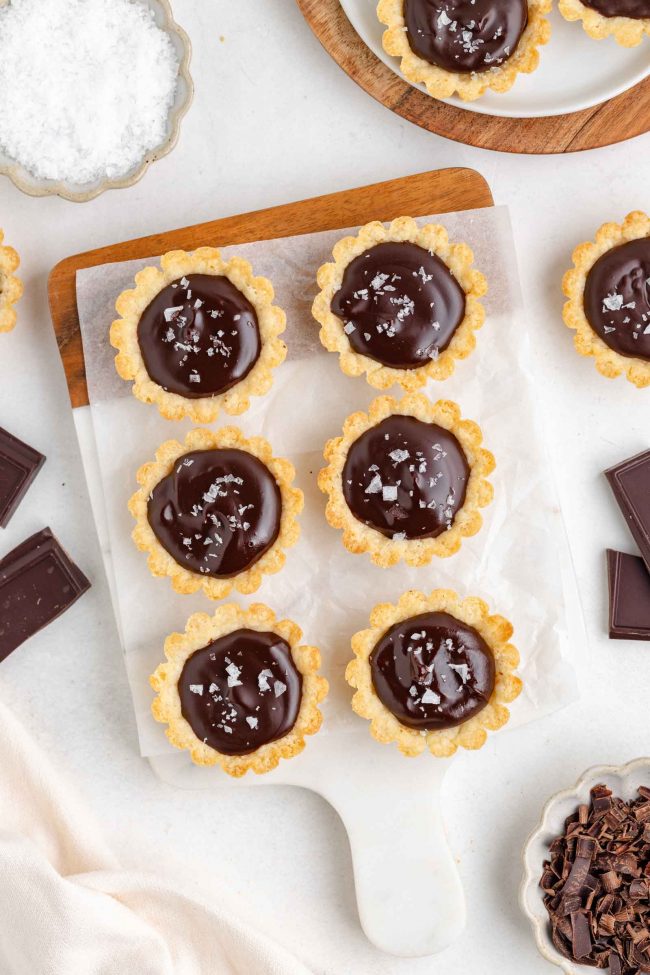
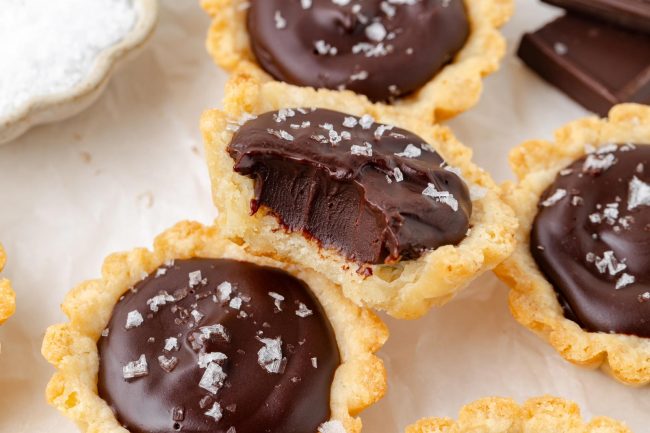
These chocolate tartlets are the perfect dessert to elevate any occasion but are especially great as a Valentine’s Day dessert. They have a buttery sweet pastry dough crust (pâte sucrée) paired with a rich, velvety chocolate ganache filling. They can be made traditionally or gluten-free.
These mini tarts are portable and easy to serve, requiring no slicing or plating. They’re sophisticated yet simple, looking impressive while being straightforward to prepare. And they’re customizable to suit any party theme as you can adapt the filling and topping as desired.
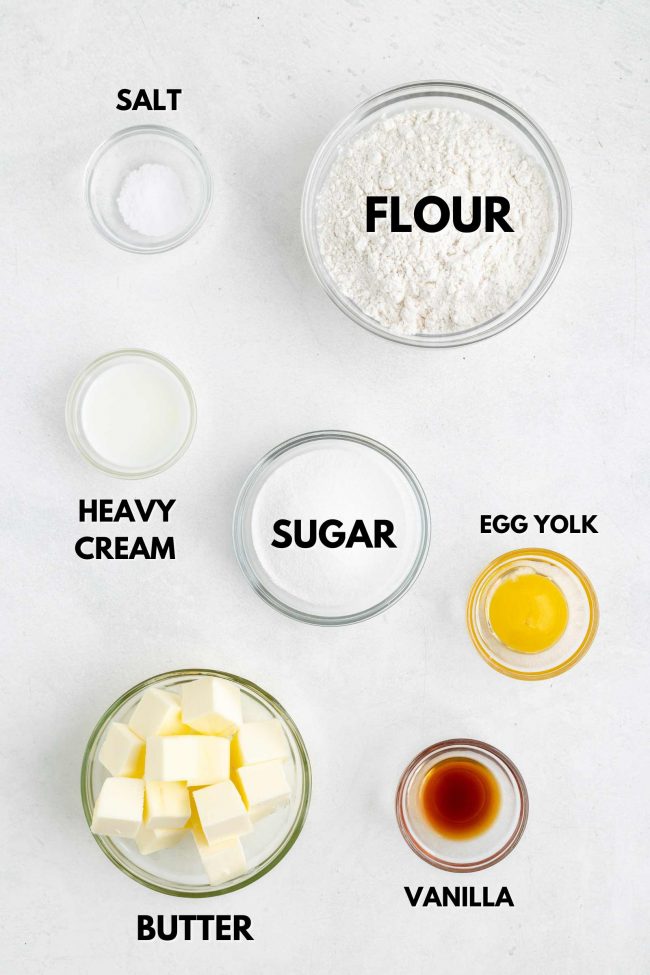
Ingredients
Here’s what you’ll need.
For the tart shells
- Flour – you can use either all-purpose flour or the gluten-free alternative I talk about below.
- Granulated sugar – adds a touch of sweetness to the crust. Don’t omit or reduce this. 1/4 cup (50 grams) of sugar is too integral to the recipe’s structure to just omit it.
- Unsalted butter – ensures a tender and flaky crust. Make sure to use it cold and cut into cubes.
- Large egg yolk – adds richness and helps bind the dough.
- Vanilla and salt – both necessary for the flavor of the crusts!
- Milk – helps bring the dough together. If you’ve tried my Pumpkin Tartlets and Apple Tartlets, you’re already familiar with this crust recipe. The tweak here is using a bit more milk for the chocolate tartlets crust, making the dough easier to roll out. I found that sticking to the original amount of milk made it quite challenging to roll and cut the dough.
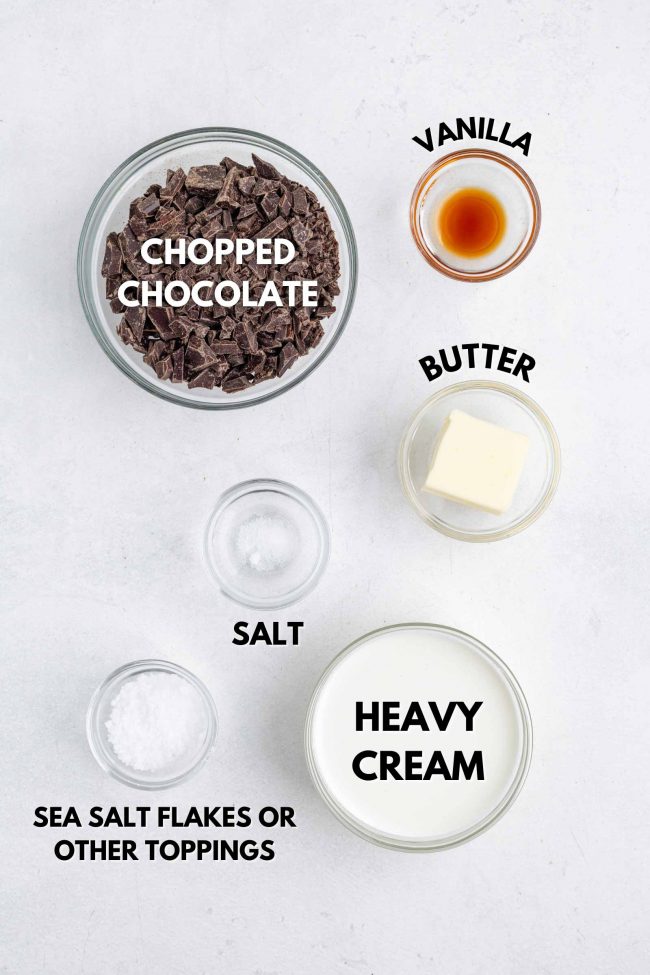
For the ganache
- Semi-sweet chocolate – forms the base of the ganache. You can substitute with dark chocolate for a less sweet option or milk chocolate for extra sweetness.
- Heavy cream – gives the ganache its silky texture. You can alternatively use canned full-fat coconut milk, but it does add some coconut flavor to the ganache.
- Unsalted butter – adds a bit more richness. You can use coconut oil in its place but remember to use refined coconut oil if you don’t want any coconut flavor.
- Salt – enhances the chocolate flavor. If your ganache seems a bit flat, you’re missing the salt! I also used flaky sea salt for topping the tartlets to add texture and a touch of elegance.
- Vanilla extract – adds depth of flavor. You can replace it with almond extract for a nutty twist.
Using prebaked tart shells
If you’re short on time or just looking for a convenient alternative, try using the prebaked tart shells from World Market. These ready-to-use tart shells save you the effort of making and baking the crust from scratch, allowing you to focus on the delicious filling and toppings.
Simply follow the instructions for preparing the ganache filling, and then fill the shells with the ganache. Let them set for about 10-20 minutes, and top with flaky sea salt or any desired toppings just before serving. This option is perfect for those who want to enjoy chocolate tartlets without spending too much time in the kitchen.
They come in a pack of 16 for $5.99. You have enough ganache for 18 tartlets, but you can easily use all of the ganache on 16 crusts.
I think their shells are a little larger than mine. I’m not sure as I haven’t tried them myself, but I’ve always read and heard such great things about them.
How to make them
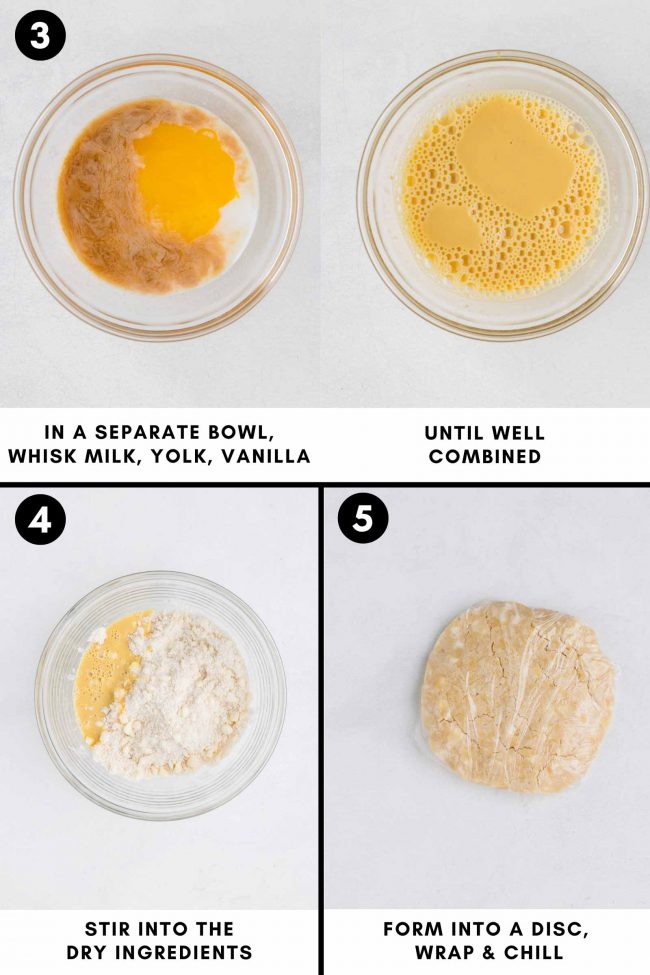
Make the crusts – whisk flour, sugar, and salt in a bowl. Cut in cold butter until mixture resembles coarse breadcrumbs.
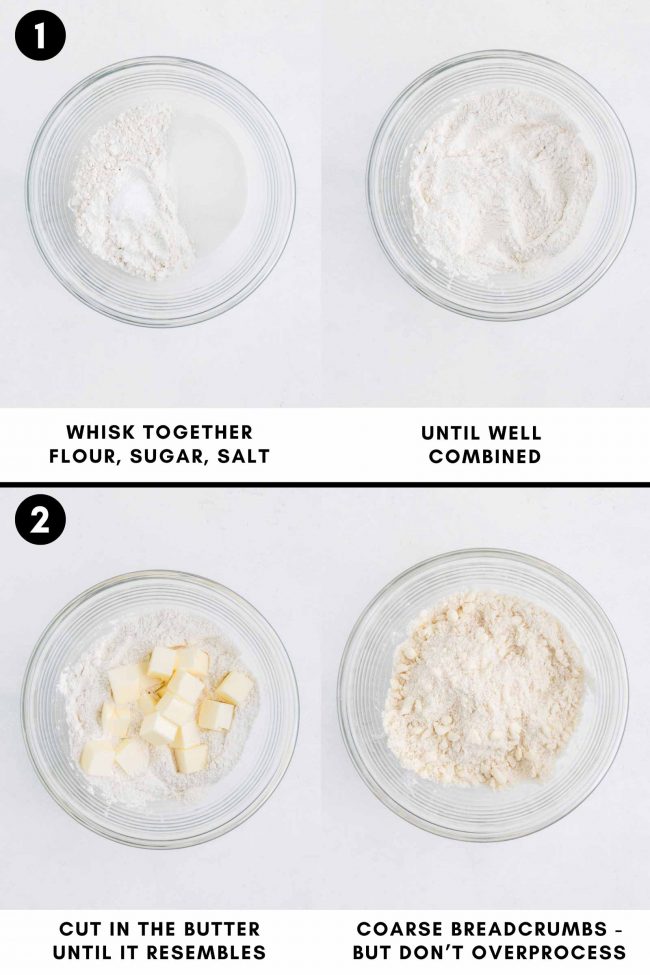
Whisk egg yolks, vanilla, and milk, then stir into dry ingredients. Work dough until it comes together, form into a disc, wrap in plastic, and chill for 1 hour.
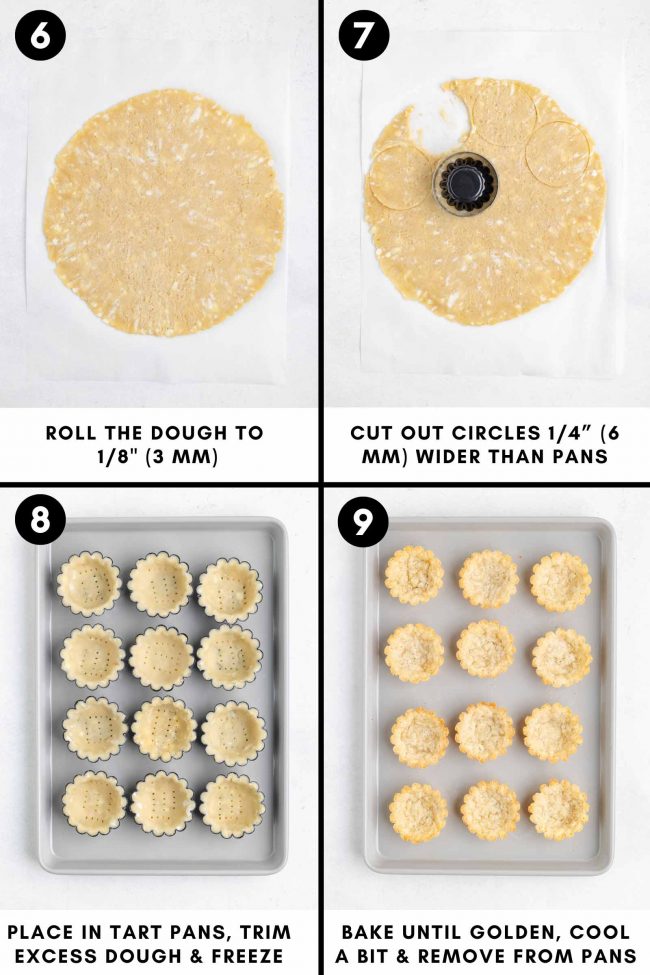
Grease tart pans. Roll out dough and cut circles to fit tart pans, pressing into place and pricking the bottoms with a fork.
Freeze for 20-30 minutes. Preheat oven to 375 °F (190 °C) and bake the tarts for 14-17 minutes until browned. Cool before removing them from the pans.
Make the filling – place chocolate and butter in a heat-proof bowl. Heat cream until steamy, pour over chocolate and butter, and cover.
Note that you should cut the butter into cubes, rather than having a big chunk of it! If it’s in chunks, it’ll melt more easily.
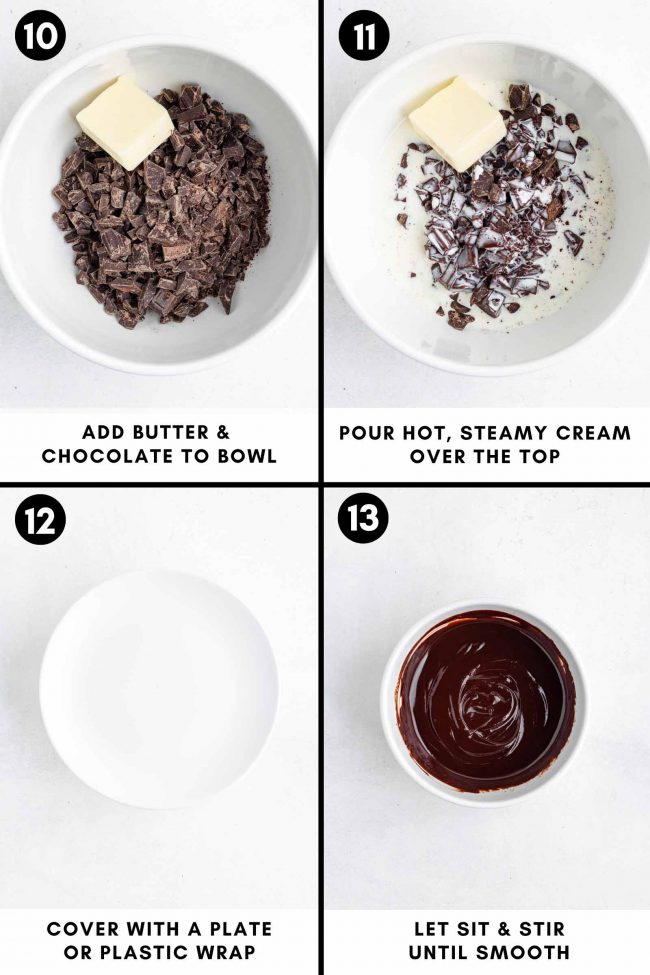
Let sit for 5 minutes, then stir in vanilla and salt until melted. Let sit until firm enough to spoon into tartlet crusts without making a mess.
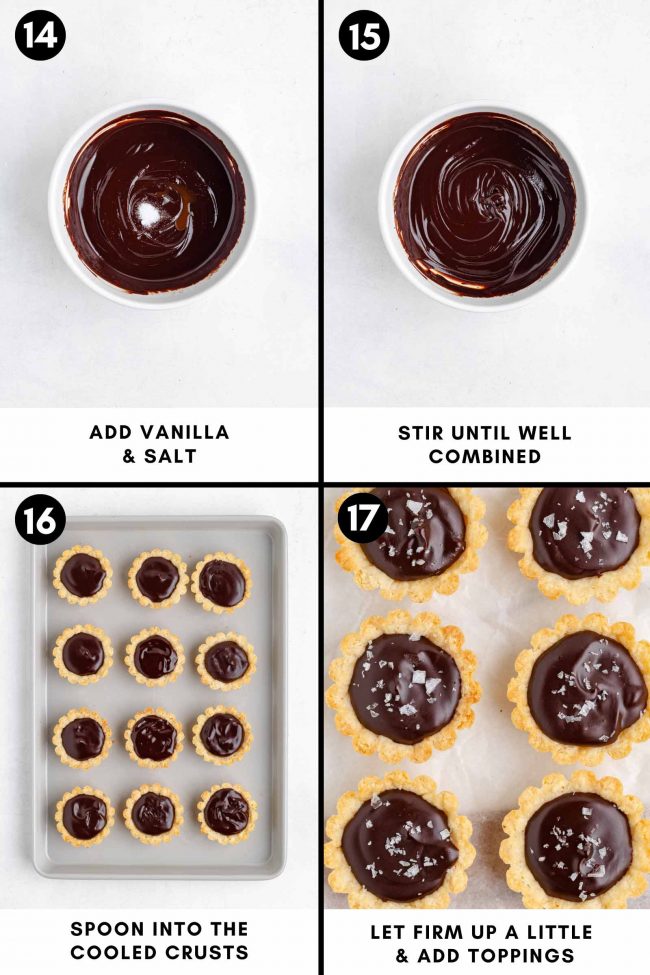
Top – spoon ganache into cooled tartlet crusts and add sea salt flakes or whatever topping you’d like.
As an Amazon Associate, I earn from qualifying purchases. For more info, see my disclosure.
Tart pans
I first tried these tarts in these Wilton Perfect Result 4.75″ (12 cm) Tart Pans.
If you’re sharing with another person, then using that size is fine. Otherwise, the tarts are too large and rich with this ganache filling.
If you want to use those, you’ll have enough dough for 4 tartlets.
The ganache yields 312 grams. 1 tbsp of the ganache = 15 grams. So you can use 78 grams or almost 1/3 cup per 4.75″ (12 cm) tart pan.
I wanted to make individual chocolate tarts, so I bought some smaller fluted tartlet pans with an upper diameter of 2.55″ (6.5 cm) and a bottom diameter of 1.77″ (4.5 cm).
My photographer used these fluted 2.6″ (6.5 cm) tartlet pans, also called egg tart molds. They have a bottom diameter of 1.65″ (4.2 cm).
Can I press in the dough instead of rolling it out?
You can! That’s what I did when I used the same dough in my Peach Tartlets and Blueberry Tartlets recipes. It’s a fantastic recipe from King Arthur Flour.
For those larger pans (the Wilton ones I mentioned above), it was easier to just press it in.
When the new pans arrived, I initially pressed the dough into the first few pans before realizing that rolling it out was better for the tiny tartlet pans.
If using the fluted style of pans as I did, it’s just really fussy to press the dough into the pans. I was spending way too much time trying to make them just perfect.
So I switched over to rolling out the dough, speeding up the process quite a bit.
Don’t I need to use pie weights?
Nope! I see that some other chocolate tartlet recipes have you use pie weights, but it’s not necessary with this tart crust recipe.
However, if you ever use this crust recipe for a 9″ tart, you’ll need pie weights. Without them, the crust tends to slump.
Make ahead and how to freeze
These tartlets are fantastic to prepare in advance!
The dough
You can make the tart dough up to 3 days ahead, or freeze it for up to 3 months. Wrap the disc of dough in plastic wrap, then place it in a Ziploc bag. Thaw the dough overnight in the fridge. Avoid using the microwave to thaw it! If you absolutely must, use 30% power.
Unbaked tart shells
You can press the dough into the tart pans, place them in an airtight container, and refrigerate for up to 3 days or freeze for up to 3 months.
Baked tart shells
Once baked, you can store them in an airtight container at room temperature for up to 3 days or refrigerate for up to 5 days. They can also be frozen for up to 3 months.
The ganache
You can prepare the ganache in advance and store it in the refrigerator for up to 3 days. To reheat, place the ganache in a heat-proof bowl and gently warm it over a pot of simmering water, stirring occasionally until it reaches a smooth consistency. Avoid overheating, as this can cause the ganache to separate.
If you prefer to freeze the ganache, pour it into an airtight container and freeze for up to 3 months. Thaw the ganache overnight in the refrigerator and reheat it gently as mentioned above.
Assembled tartlets
Once assembled, you can refrigerate the chocolate tartlets in an airtight container for up to 3-4 days. Before serving, allow them to sit at room temperature for about 15-20 minutes to let the ganache soften slightly and enhance the flavor.
By preparing these components ahead of time, you can minimize stress and enjoy serving these treats to your guests without any last-minute rushing.
How to store and freeze
Proper storage ensures your chocolate tartlets stay fresh and delicious.
- Store assembled tartlets in an airtight container in the refrigerator for up to 3 days. Bring them to room temperature before serving to allow the ganache to soften slightly.
- For longer storage, freeze the unfilled tart shells for up to 1 month. Wrap each shell in plastic wrap and place them in a freezer-safe container to avoid freezer burn.
- If you prefer to freeze the ganache separately, transfer it to an airtight container. Thaw it in the refrigerator, and then stir well before use. However, freshly made ganache offers the best texture.
While these tarts are best enjoyed fresh, proper storage can help you extend their shelf life without compromising quality.
Tips
Here are some tips to ensure your mini chocolate tarts turn out perfectly.
- Use high-quality chocolate with at least 60% cocoa content for the richest flavor. Avoid using chocolate chips, as they may contain stabilizers that affect texture.
- Chill the tartlet shells before baking to prevent shrinking and maintain their shape.
- Roll the dough evenly to ensure uniform tart shells. A rolling pin with thickness guides can help achieve this.
- When making the ganache, avoid overheating the cream to prevent separation. Heat it until just steaming, then pour it over the chocolate.
- Allow the ganache to cool slightly before filling the tartlets to avoid soggy crusts.
- Top with decorative elements like edible gold leaf, chocolate curls, or fresh berries for a professional finish.
Troubleshooting
If you encounter any issues while making chocolate tartlets, here’s how to resolve them.
- Crust shrinking or cracking – ensure you properly chill the dough before baking and avoid overworking it. If the crust cracks, you can patch it with extra dough or brush it with melted chocolate to seal any gaps.
- Ganache is too thin – refrigerate it briefly to firm up. Adding extra melted chocolate can also help thicken it.
- Ganache doesn’t set – this issue often results from incorrect ratios. Double-check your measurements and use a scale for accuracy. If needed, gently reheat the ganache and add more chocolate.
- Ganache separating – ensure that the cream is hot enough when poured over the chocolate, and stir gently until fully combined. If the ganache separates, try re-emulsifying it by gently heating and stirring until smooth.
- Overbaked crusts– monitor the baking time closely and remove the crusts from the oven as soon as they are golden brown. If they’re overbaked, they can become too hard and difficult to fill.
- Crust cracks when removed from the pan – remove the crusts while they are slightly warm, as they are more pliable. If the crusts are too cool, gently tap the pan to release them.
Variations
There are countless ways to put your own twist on chocolate tartlets! Here are a few ideas to get you started.
- Fruit topping – add fresh berries, sliced bananas, or whatever fruit you like that goes well with chocolate on top of the ganache for a burst of fruity flavor.
- Nutty crunch – sprinkle chopped nuts like almonds, hazelnuts, or pistachios over the ganache for added texture and flavor. You can also add some to the ganache! Make sure to use roasted nuts for the best flavor and texture.
- Spice it up – add a pinch of cinnamon, chili powder, or espresso powder to the ganache for a unique twist.
- Mint chocolate – add a few drops of peppermint extract to the ganache for a refreshing minty flavor.
- Caramel or peanut butter – you can add a layer under the ganache for extra flavor.
- White chocolate ganache – for a sweeter and visually striking alternative.
- Incorporate liqueurs – like Grand Marnier, Baileys, or Frangelico into the ganache for an adult twist.
Gluten-free option
So far, I’ve only tried this tart crust with King Arthur Flour Gluten-free Measure for Measure Flour.
It’s just as delicious as the version made with all-purpose flour. I haven’t tried it with Bob’s Red Mill Gluten-free 1-to-1 Baking Flour yet, but based on similar recipes I’ve made, it might be a bit grittier compared to King Arthur’s.
If you experiment with another brand and are not satisfied with the results, I highly recommend giving it another go with King Arthur.
I hope you’ll enjoy these chocolate tartlets! I’d love to hear your thoughts in the comments below. Thanks for reading! :)

Chocolate Tartlets

- Prep Time:
- Cook Time:
- Ready in:
- Yield: 18
Ingredients
- 1 1/4 cups (150 grams) all-purpose flour or King Arthur Flour Gluten-free Measure for Measure Flour for a gluten-free version
- 1/4 cup (50 grams) granulated sugar
- 1/2 teaspoon salt
- 8 tablespoons (113 grams) unsalted butter, cold, cut into 1/2" cubes
- 1 large egg yolk
- 1 teaspoon vanilla extract
- 1 1/2 to 2 tablespoons milk
- 1 1/3 cups (226 grams) chopped semi-sweet chocolate
- 2/3 cup (158 ml) heavy cream
- 3 tablespoons (42 grams) unsalted butter
- 1/2 teaspoon vanilla extract
- 1/8 teaspoon salt
- flaky sea salt
For the crust:
For the filling:
Directions
- In a medium bowl, whisk together the flour, sugar, and salt.
- Cut in the cold butter until the mixture resembles coarse breadcrumbs.
- In a separate small bowl, whisk the egg yolks, vanilla, and 1 1/2 tablespoons of milk. Stir this into the dry ingredients.
- Use your hands to work the dough and bring it together. The dough shouldn’t be crumbly, as you're going to roll it out. If necessary, add more milk, but don't add too much, as it'll make the baked crusts soft.
- Form into a disc and wrap with plastic wrap.
- Chill for 1 hour. You can also freeze it for up to 3 months. While it’s chilling, you can make the filling (below).
- Grease eighteen 2.6” (6.5 cm) fluted non-stick mini tart pans.
- Roll out the dough between 2 pieces of parchment paper to about 1/8 inch (3 mm). I used the bottom of a glass (a cookie cutter would give you better, cleaner-cut edges) to make circles that were about 1/4” (6 mm) wider than the widest part of the tart pans, and I still had to trim some away. Do a test to make sure your circles are the right size for your pans. If the dough becomes hard to work with, stick it in the freezer for a few minutes. Then you’ll be able to very easily remove the circle cut-outs. If the circles don’t come off the parchment paper perfectly, it doesn’t really matter since you’ll be pressing them down into the pans and will likely have to trim some off anyway.
- Place a circle cut-out over the top of the greased mini tart pan and press it firmly into place. Be sure to press down around the bottom edge to remove any air pockets.
- Prick holes over the bottom (not going all the way through the crust, but almost) with a fork. Repeat with the remaining tartlet pans.
- Place in the freezer for 20-30 minutes.
- Towards the end of the chill time, preheat the oven to 375 °F (190 °C) and place a baking sheet large enough to fit the tartlet pans in the lower third of your oven.
- Place the tartlets directly onto the hot baking sheet and bake for 14-17 minutes, rotating the pan halfway through if you notice them browning too quickly in certain areas, until the sides are nicely browned and the bottom has browned.
- Remove the baking sheet and tartlets from the oven and place them on a wire rack to cool for about 15-20 minutes before removing the crusts from the pans. To do that, just turn the pan over and let the crust fall into your hand. It’s important to do this while they’re still a bit warm. They came out super easily.
- If making ahead of time, you can put the cooled crusts in an airtight container and store them at room temp for up to 3 days.
- Place the chocolate and butter cubes in a medium heat-proof bowl.
- Heat the cream in a small saucepan over medium heat until hot and steamy.
- Pour the cream over the chocolate and butter, cover with plastic wrap or a plate, and let sit for 5 minutes.
- Add the vanilla and salt, and stir until the chocolate is totally melted.
- Let sit for about 10-20 minutes or until firm enough to easily spoon into the cooled tartlet crusts.
- I recommend doing this the day of serving so that the crusts are at their peak texture.
- Spoon 1 1/2 tablespoons (22.5 grams) of ganache into each cooled tartlet crust.
- If the ganache is still quite runny, let it firm up a bit (a few minutes in the fridge should do) before adding your toppings, if using.
- Store assembled tartlets in an airtight container in the refrigerator for up to 3 days. Bring them to room temperature before serving to allow the ganache to soften slightly.
Make the crusts:
Make the filling:
Top:
Crust adapted from King Arthur Flour


2 comments on “Chocolate Tartlets” — Add one!
2 comments are awaiting moderation!
Loved these! Made these for a bake sale at work, and they were the first to sell out. Everyone loved the rich chocolate flavor and the buttery crust. I had to print out extra copies of the recipe!
Yay! I’m glad to hear that. Thanks for sharing the recipe with your colleagues and for your feedback!