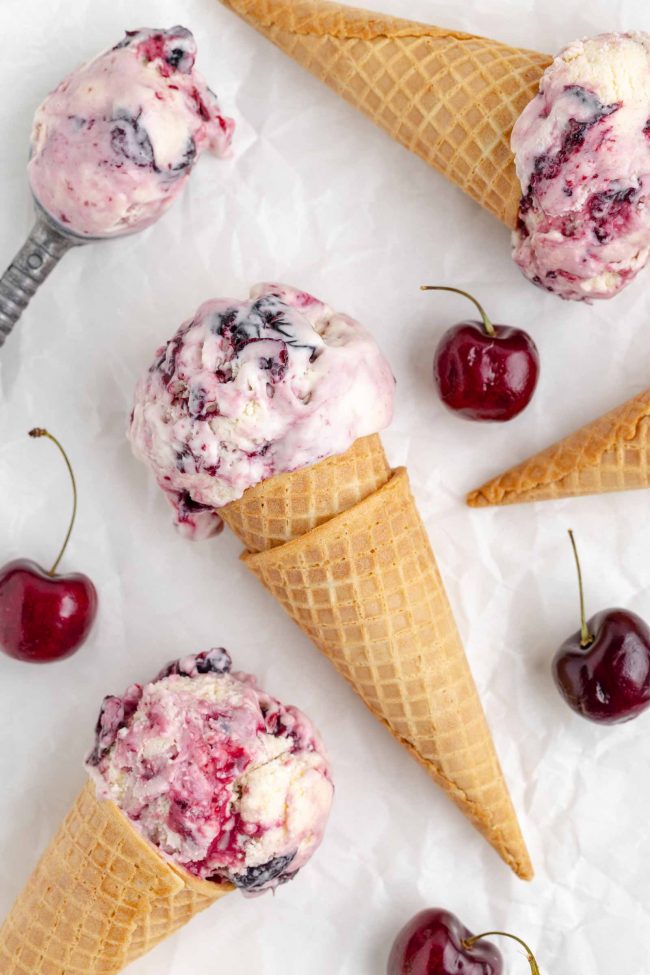
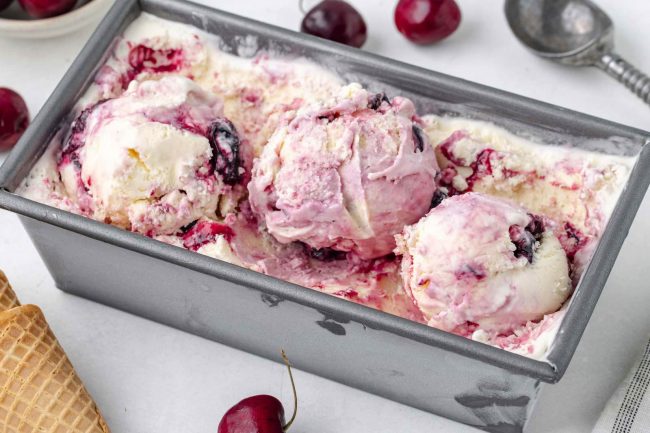
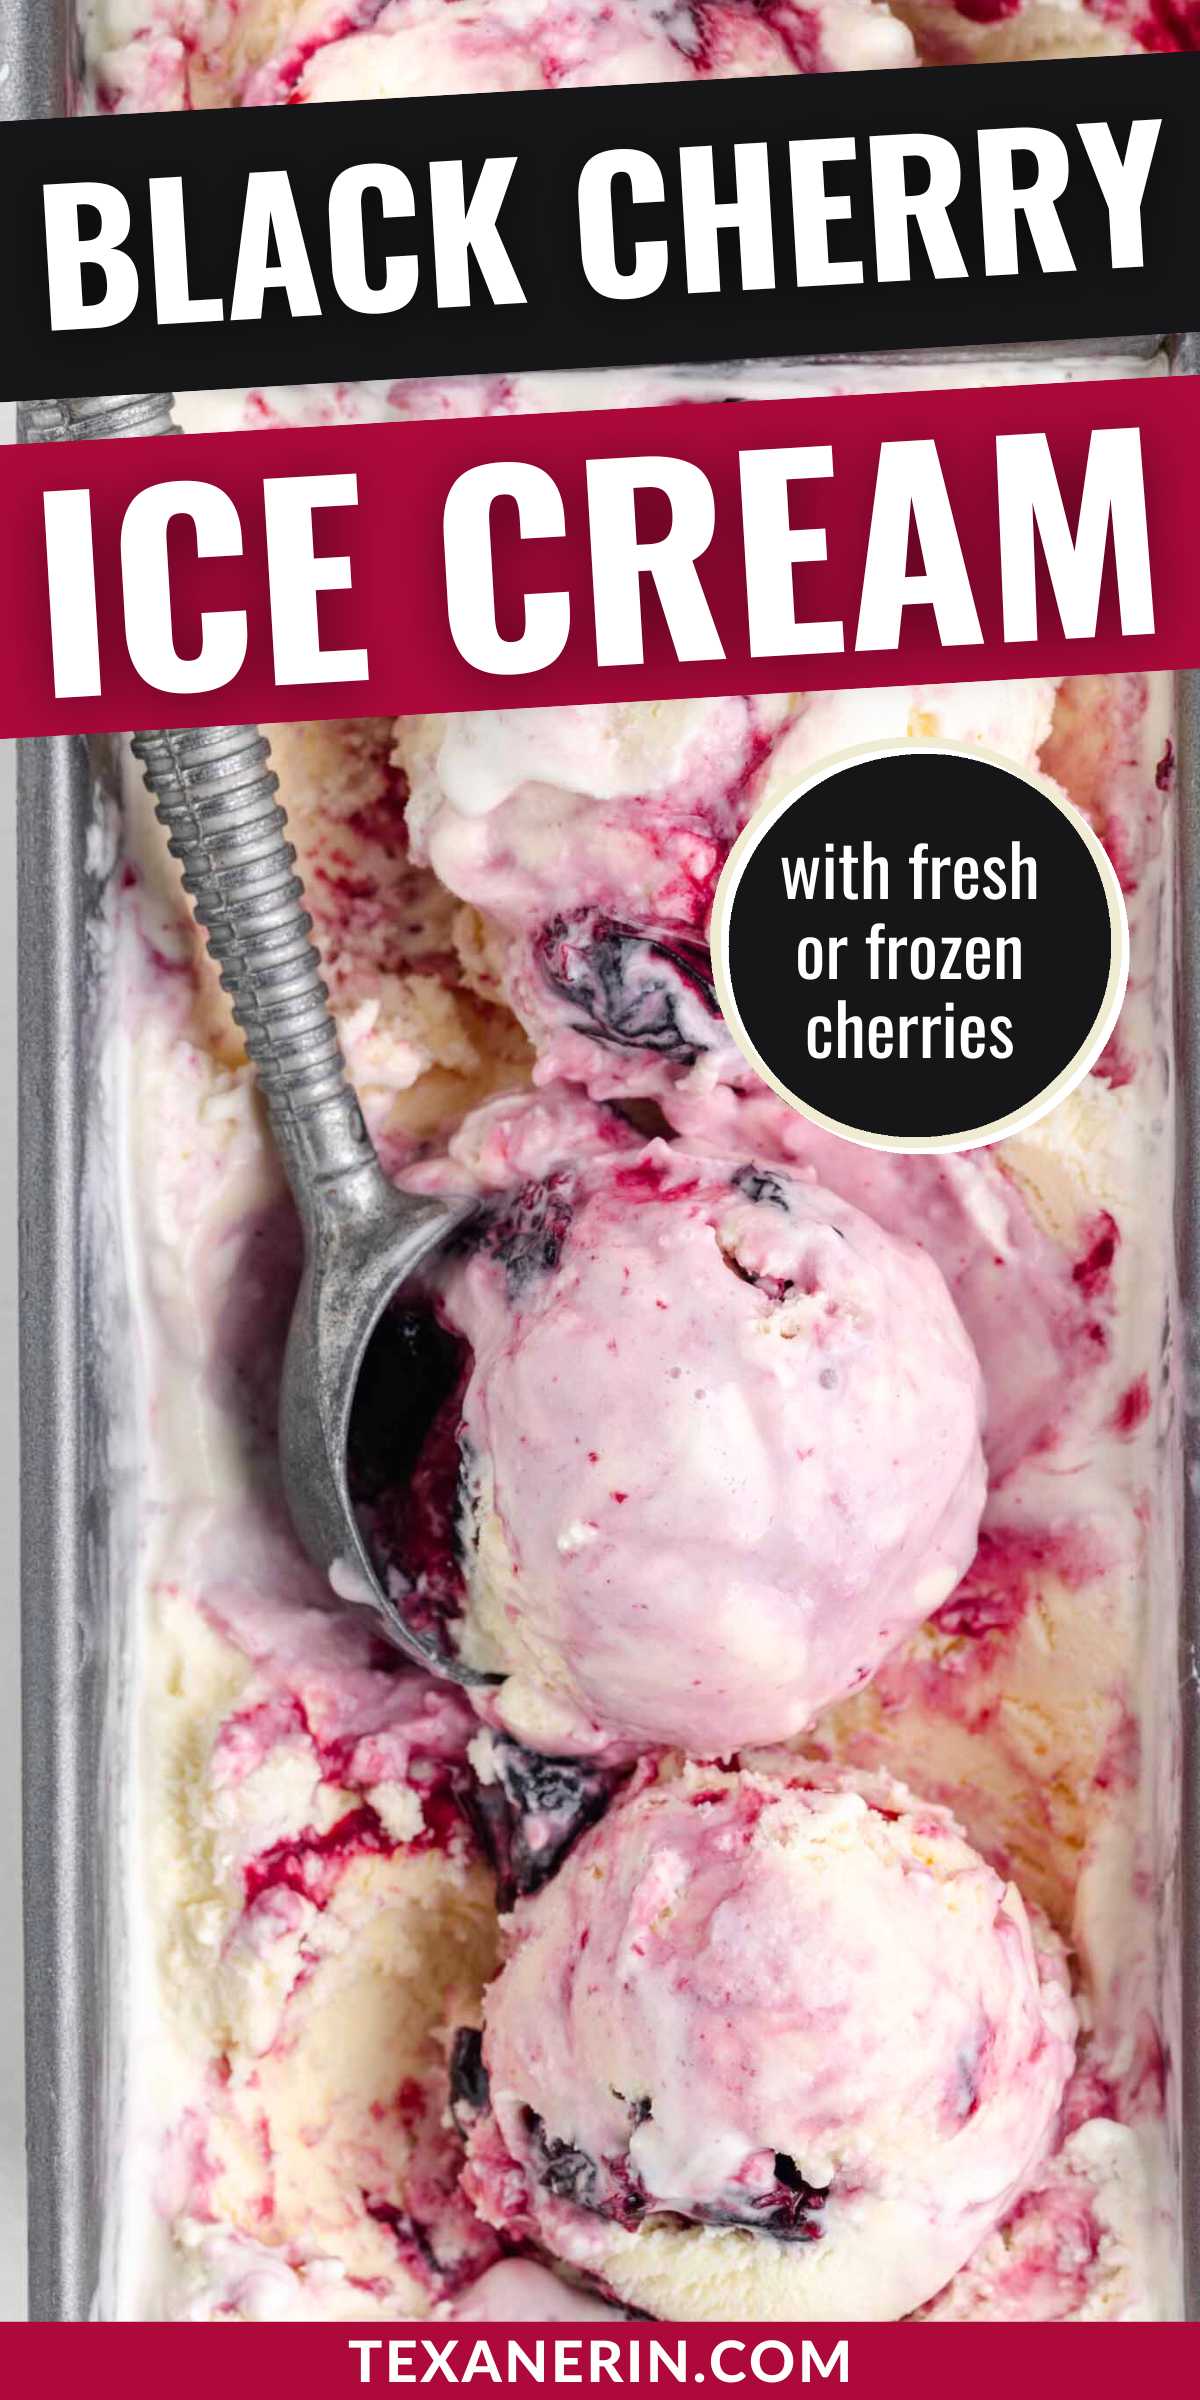
This black cherry ice cream is a cool summer treat that combines the creamy goodness of French vanilla ice cream with a luscious cherry swirl made from fresh or frozen sweet cherries. It’s the perfect dessert to enjoy on a warm day or to impress your guests at a summer gathering.
I say impress because my photographer’s husband declared this ice cream to be the best thing she’s ever made. 😆 I’m not the hugest cherry fan, so I prefer other desserts, but if you are – I think you should take it as a sign that you need to make this ice cream. ;)
There’s something incredibly satisfying about making your own ice cream at home, especially when it involves the rich, sweet flavor of cherries.
The cherry swirl in this ice cream is made from frozen sweet cherries, which are readily available and convenient to use. It adds a beautiful touch to the ice cream, making it a stunning dessert to serve to guests.
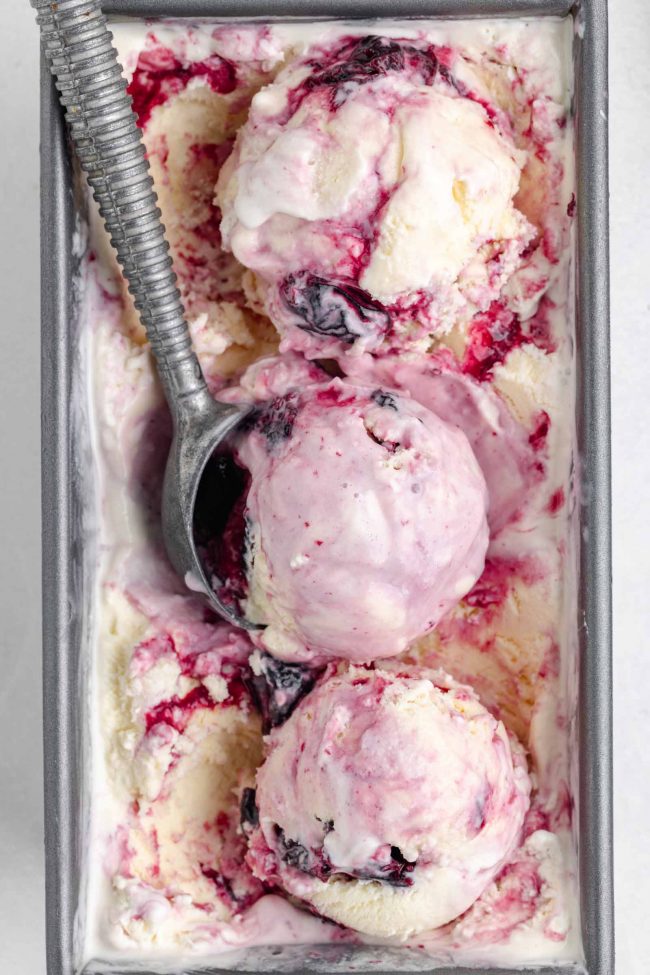
The cherries are cooked down with sugar (or honey or maple syrup), lemon juice, and a hint of vanilla and almond extracts to create a vibrant, flavorful swirl that complements the creamy vanilla base beautifully. This swirl adds a burst of fruity goodness in every bite!
If you’d like even more fruity ice cream, I think adding the cherry swirl to this Lime Ice Cream would result in an interesting and super unique ice cream flavor.
For the swirl, I used the homemade Cherry Preserves recipe I posted yesterday, but you can also use 1 1/3 cups (430 grams) of store-bought preserves.
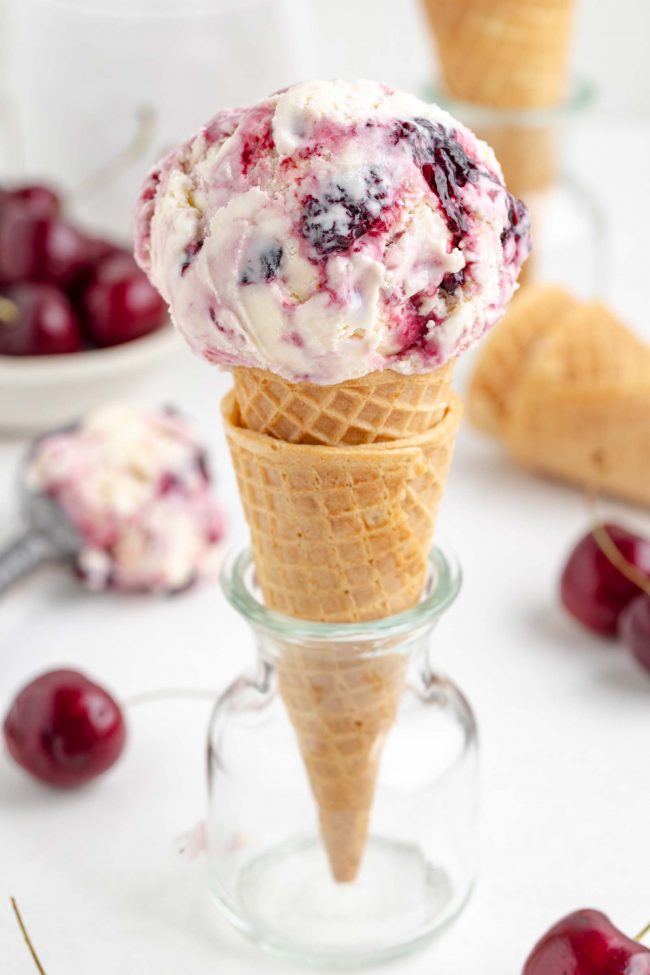
What are black cherries?
Black cherries refer to a category of cherry varieties known for their deep, dark color and rich flavor. Here’s a closer look.
- Color – black cherries are distinguished by their dark, almost black color when fully ripe. The dark color is a result of the high anthocyanin content in the fruit, which gives them their rich hue.
- Flavor – black cherries are generally sweet, though their flavor can range from mildly sweet to slightly tart, depending on the variety. They have a complex taste profile that is often richer and more robust compared to lighter-colored cherries.
- Texture – the texture of black cherries is typically firm and juicy, making them suitable for both eating fresh and using in cooking and baking.
- Common varieties – black cherries include several varieties such as Bing cherries, Lambert cherries, and Chelan cherries. Each variety has its own unique characteristics but shares the deep color and rich flavor typical of black cherries.
Can’t find any of those varieties? Any sweet cherry will do in this recipe!
Fresh or frozen.
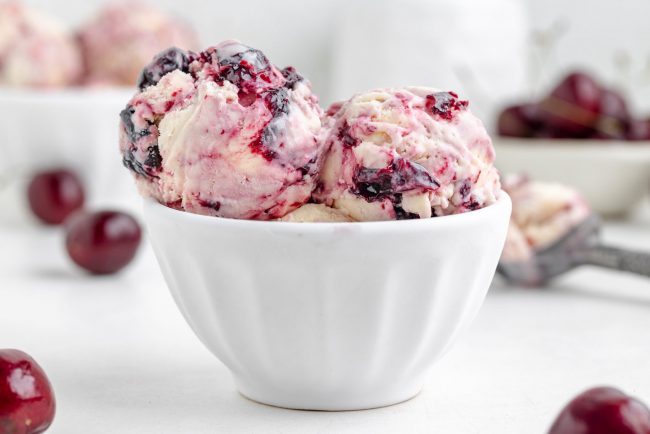
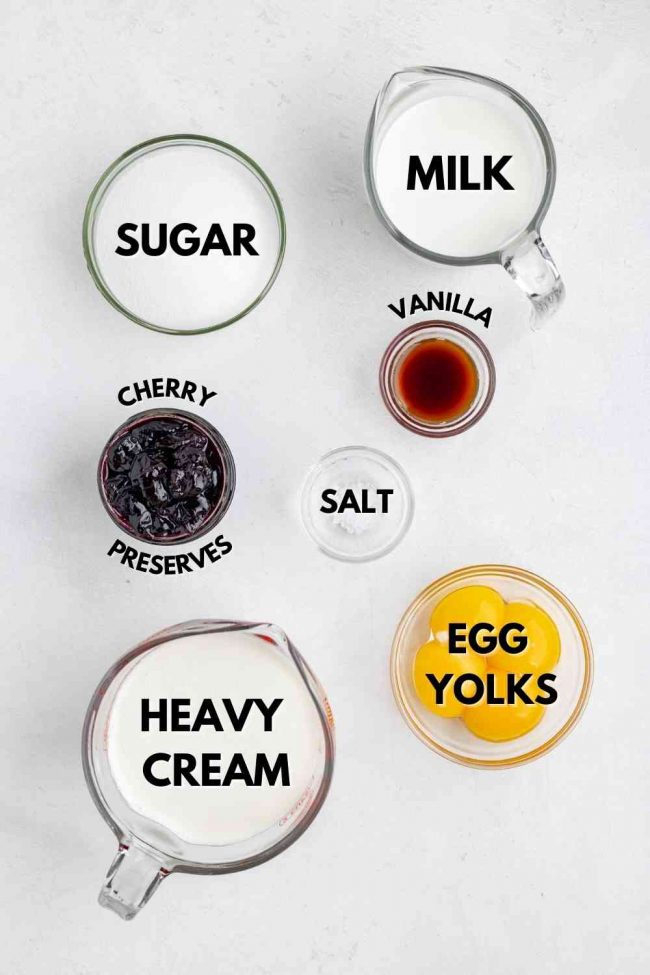
Ingredients
Here’s an overview of everything you’ll need.
For the ice cream
- Egg yolks – essential for the custard base, they create a rich and creamy texture. Whole eggs cannot replace egg yolks, also omitting them is not an option.
- Heavy cream – provides the rich, creamy texture of the ice cream. Whipping cream can be used as a substitute, but it will result in a less rich ice cream.
- Whole milk – lightens the ice cream compared to using only heavy cream. Combining whole milk with heavy cream offers balanced creaminess without making the ice cream too dense. Using only heavy cream can result in an overly heavy or cloying texture.
- Sugar – granulated sugar is necessary. Liquid sweeteners would make the ice cream too runny and icy.
- Salt – a pinch enhances the other flavors without making the ice cream salty.
Cherry swirl
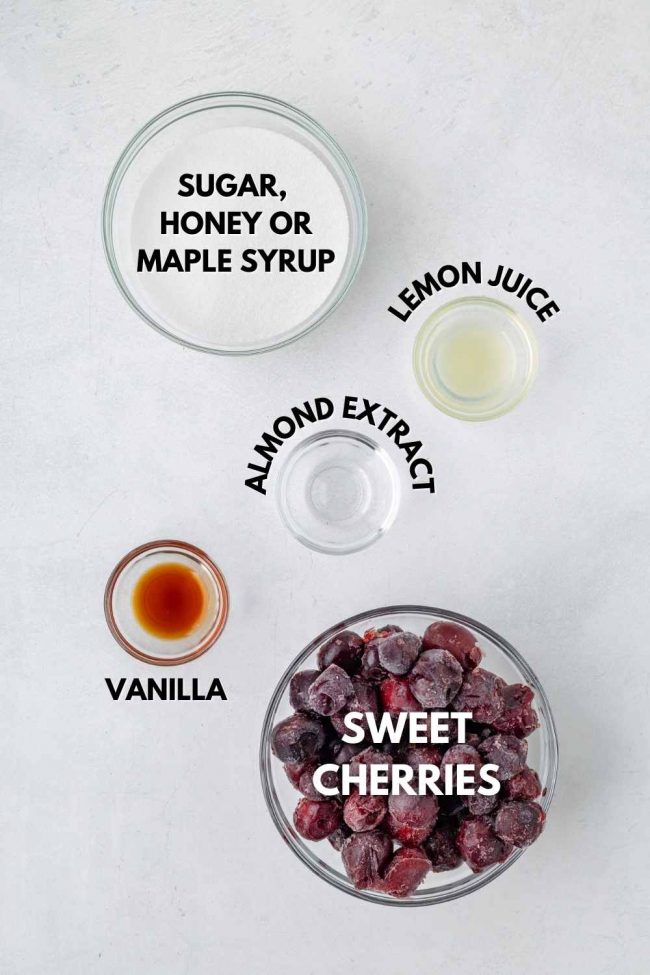
- Fresh or frozen pitted sweet cherries – provide the primary fruity flavor and natural sweetness for the swirl.
- Sweetener – granulated sugar, honey or maple syrup is used to sweeten the cherries and balance their natural tartness.
- Lemon juice – adds a touch of acidity, which enhances the cherry flavor and provides a refreshing contrast.
- Vanilla extract – adds a warm, sweet aroma that complements the cherries and enhances the overall flavor.
- Almond extract – adds a subtle, nutty flavor that pairs beautifully with the cherries and vanilla.
French vanilla base
The base of this black cherry ice cream is a classic French Vanilla Ice Cream but with some small changes. Instead of using a vanilla bean, this recipe relies on vanilla extract to infuse the ice cream with its signature flavor.
Additionally, it uses one fewer egg yolk, which results in a slightly lighter texture while still maintaining the rich creaminess that French vanilla ice cream is known for.
What is French vanilla ice cream, anyway?
It’s a rich and creamy variety of ice cream, characterized by its smooth texture and custard-like flavor. Unlike regular or Philadelphia-style vanilla ice cream, which is typically made with a simple mixture of cream, sugar, and vanilla extract, French vanilla ice cream includes egg yolks in its base.
This addition gives it a deeper, more complex flavor and a yellowish hue.
Can I use all milk/cream/half-and-half?
As mentioned earlier, using all cream isn’t recommended, as most people find the texture of ice cream made with just heavy cream to be unpleasant.
Using all milk wouldn’t work either, as there’s not enough fat to create ice cream.
This recipe calls for 2 cups of heavy cream and 1 cup of whole milk, providing 184 grams of fat. Using 3 cups of half-and-half only gives you 83 grams of fat, which is insufficient for a creamy texture.
If you’re short on heavy cream or milk, substituting some half-and-half is fine, but remember that less fat means less creamy ice cream.
Can I use low-fat or fat-free milk?
Yes, if that’s all you have, but adjust the ratio to include more heavy cream. For example, use 3/4 cup of low-fat or fat-free milk and 2 1/4 cups of cream. The extra cream will make up for the missing fat in the milk.
How to make the ice cream base
You’ll want to make the ice cream base first. You’ll have plenty of time to make the cherry swirl and for it to cool while you wait for the custard to chill.
You heat the milk, part of the sugar, and salt until steamy.
While that’s heating up, you whisk the egg yolks with the remaining sugar until.
This mixture is then slowly tempered with hot cream and milk, ensuring the eggs don’t curdle.
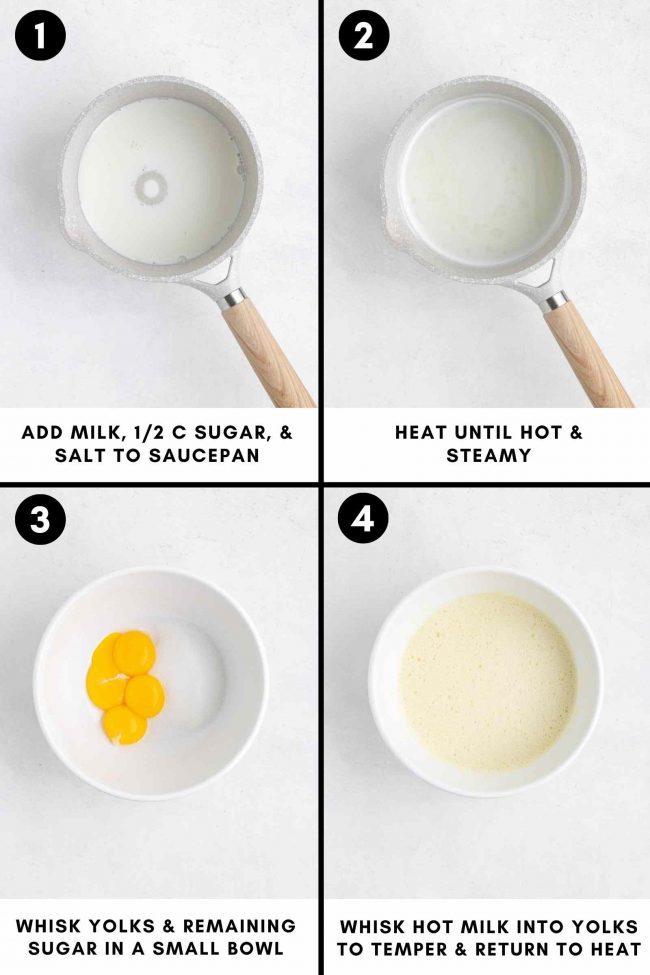
The custard is cooked until it thickens enough to coat the back of a spoon, creating a velvety foundation for the ice cream. This technique requires just a little patience and precision but results in the BEST vanilla ice cream!
If you’ve got a thermometer, use it! You want to cook the custard until the mixture registers about 170 °F (77 °C) on an instant-read thermometer. This will take about 3-7 minutes.
And be careful not to boil the mixture. The coagulation temperature is about 180 °F (82 °c), so keep an eye on it. My mixture had some tiny eggy bits, but they were removed when straining later on.
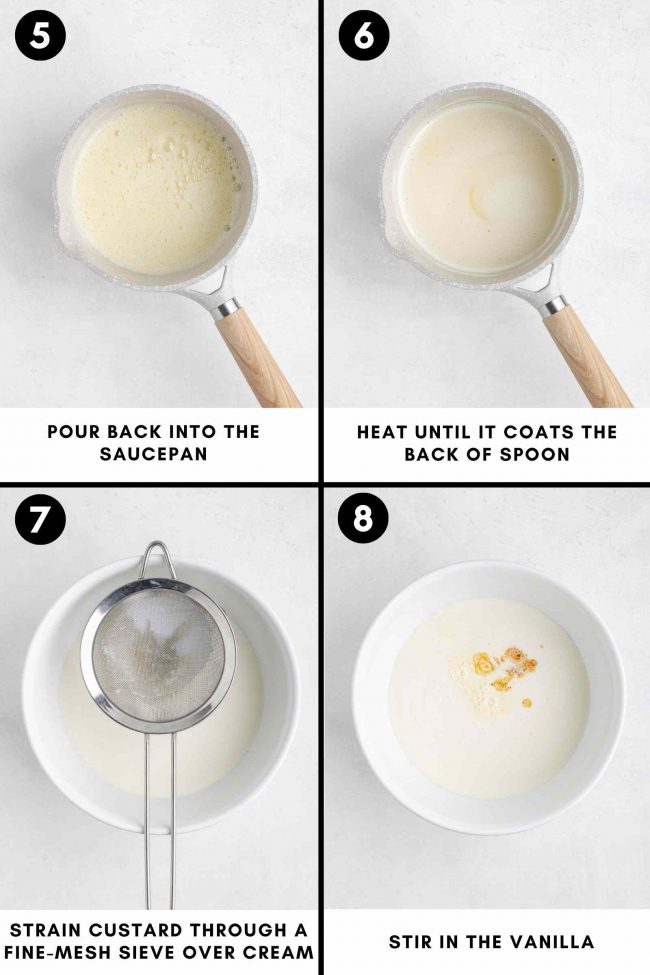
After thickening, strain the custard through a fine mesh sieve to remove any eggy bits. This results in an ultra-smooth texture.
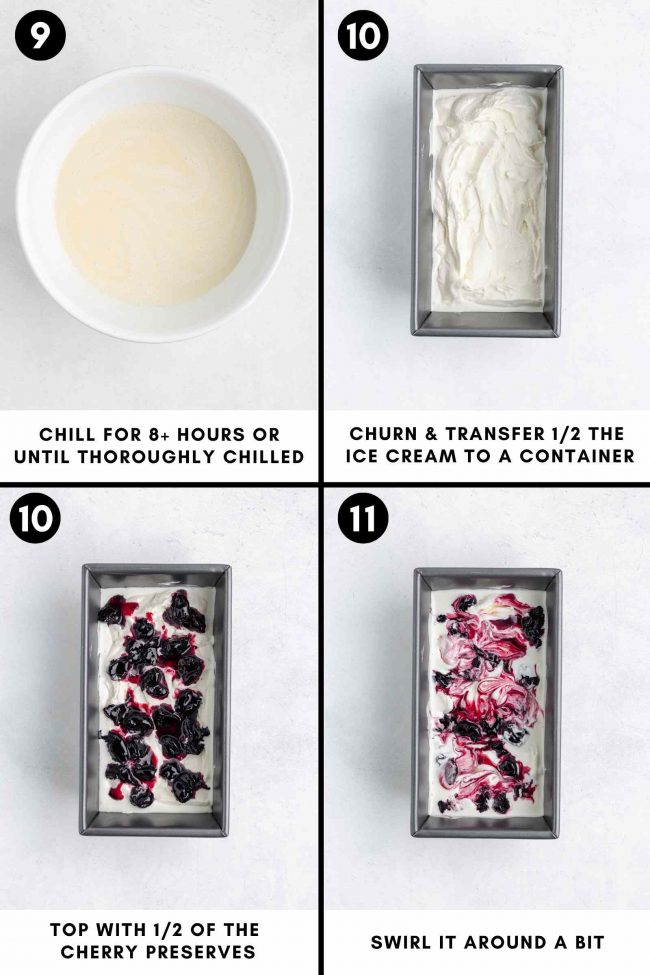
Cooling the custard base properly before churning is also vital. You need to refrigerate it for several hours or overnight to enhance the flavor and consistency of the churned ice cream.
How to make the cherry swirl
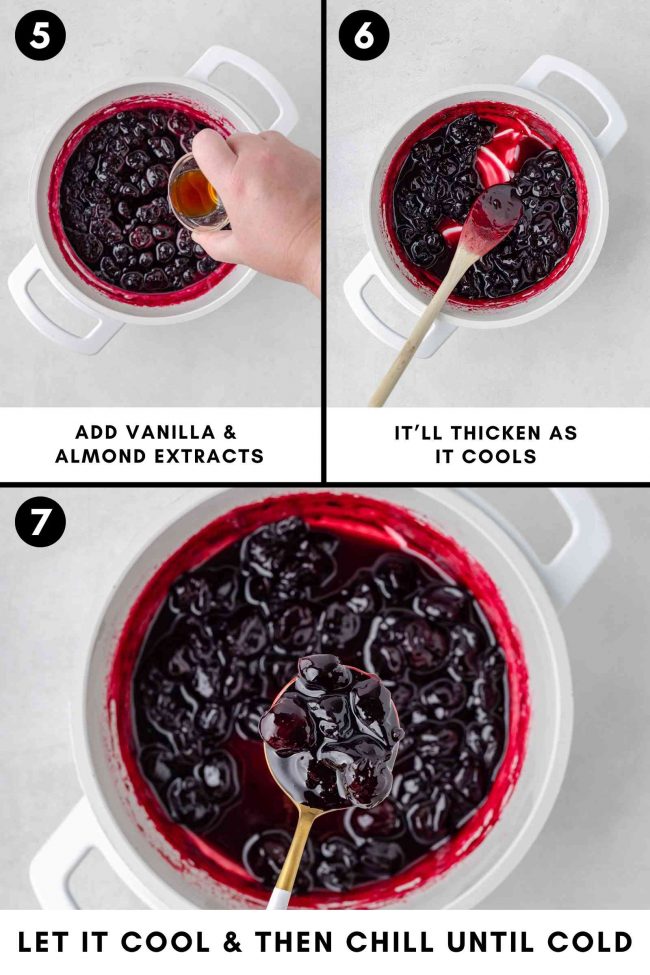
I have a whole post on how to make the Cherry Preserves needed for this recipe. But here’s a quick overview.
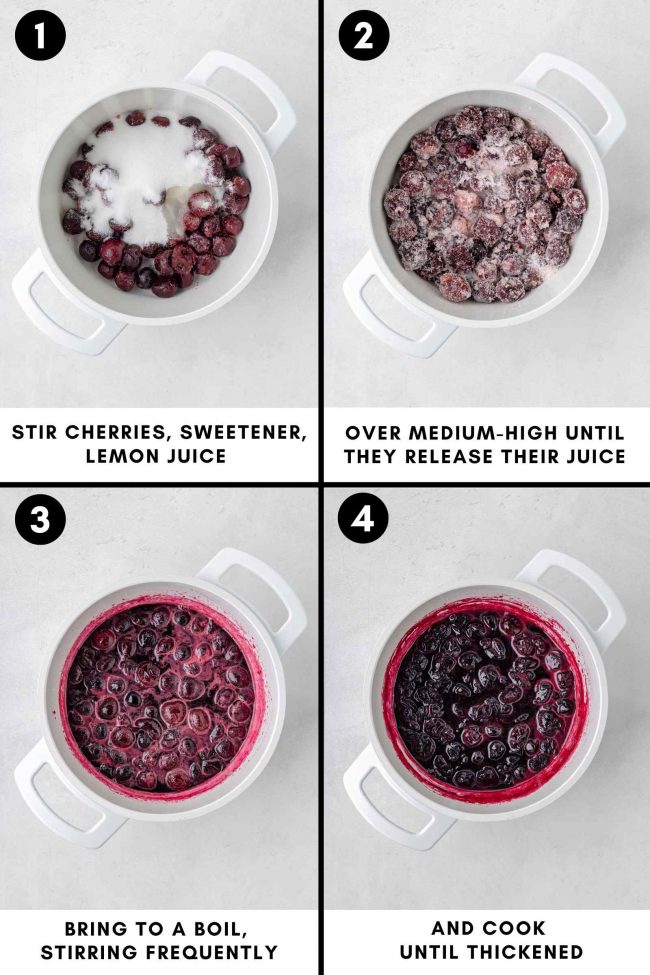
If you have any questions, check out the above post. I think I’ve covered everything in that post. :) And if I didn’t, feel free to ask here!
How to store
Make sure your container is freezer-safe. Transfer the ice cream into it, and cover the surface of the ice cream with plastic wrap before closing the container.
This helps prevent ice crystal formation. Store the container at the back of the freezer, where the temperature is most stable.
This way, if someone (me) accidentally leaves the freezer door slightly open and no one notices until hours later when the freezer alarm goes off, your ice cream won’t be melted. I speak from experience. ;)
The typical shelf life of ice cream is about 2-4 months when stored correctly. For the best quality, you’ll probably want to consume it within one month.
But I really doubt it will last more than a few days.
Source
This ice cream base was lightly adapted from David Lebovitz’s book, The Perfect Scoop.
I bought this book back in 2008 after getting it from the library, and all of the recipes have been incredible. If you enjoy rich ice cream, this is the book for you!
I also adapted my Green Ice Cream recipe from the same book because it’s truly perfect. I can’t imagine a better, creamier ice cream!
I hope you’ll enjoy this black cherry ice cream if you try it out! If you do, I’d love to hear your thoughts. :) Thanks!
Black Cherry Ice Cream

- Prep Time:
- Cook Time:
- Ready in:
- Yield: 1 quarter/liter
Prepare your ice cream bowl according to the manufacturer’s instructions by chilling it for 24 hours beforehand or however long is recommended. If you have the option to change the freezer’s temperature, it should be at least -18 C or -.4 F. If you can get it even colder, that’s even better as it ensures the freezer bowl will be as frozen as possible.
Ingredients
- 12 oz (340 grams)1 fresh or frozen pitted sweet cherries fresh or frozen pitted sweet cherries
- 3/4 cup (150 grams) granulated sugar OR 2/3 (213 grams) maple syrup OR honey for a non-vegan version + more to taste
- 2 teaspoons lemon juice
- 1 teaspoon vanilla extract
- 1/2 teaspoon almond extract
- 1 cup (236 ml) whole milk
- 3/4 cup (150 grams) granulated sugar, divided
- pinch of salt
- 4 large egg yolks
- 2 teaspoons vanilla extract
- 2 cups (473 ml) heavy cream
For the cherry swirl:
For the ice cream:
Directions
- Into a medium saucepan, add the milk, 1/2 cup (100 grams) of sugar and salt.
- Heat the milk over medium heat until it starts to steam. Avoid bringing it to a boil, as this can cause the milk to scald.
- In a separate medium bowl, whisk the egg yolks and the remaining 1/4 cup (50 grams) of sugar until the mixture is well combined and a bit lighter.
- Gradually pour in all of the warm milk mixture into the egg yolks - while whisking continuously, and then pour this mixture back into the saucepan.
- Stir constantly with a wooden spoon until it coats the back of the spoon and registers about 170 °F (77 °C) on an instant-read thermometer. This will take about 3-7 minutes. Be careful not to boil the mixture. The coagulation temperature is about 180 °F (82 °C), so keep an eye on it. My mixture had some tiny eggy bits, but they were removed when straining later on.
- Pour the heavy cream into a large mixing bowl. Set a fine-mesh sieve over the mixing bowl.
- Strain the ice cream into the heavy cream. This will do away with any eggy bits.
- Stir in the vanilla extract.
- Refrigerate the mixture for 8 hours or overnight so that it’s thoroughly chilled.
- Place a small plate in the freezer before you start cooking.
- In a medium saucepan, mix together the cherries, sweetener and lemon juice.
- Bring to a boil over medium-heat high while stirring frequently. This took me about 8-10 minutes. If you don't want large chunks or cherries in your preserves, use a potato masher or a wooden spoon to smash some of the cherries a bit as it cooks. If making the maple syrup or honey version, carefully taste (it'll be hot!) and add more sweetener, if needed.
- Turn the heat to the lowest you can to keep it at a boil. Let it boil for about 10-20 minutes, turning the heat down, if needed, towards the end to prevent the cherries from burning, until the sugar version reaches a temperature of 220 °F (104 °C) or the honey or maple syrup version reach 227 °F (108 °C). It’ll still be a bit runny but will thicken as it cools and more as it’s chilled.
- When you think the preserves are ready, drop a small spoonful onto the cold plate and let it sit for a minute. Push it with your finger - if it wrinkles and holds its shape, the preserves are done.
- When it’s done, stir in the vanilla and almond extract.
- Remove the saucepan to a wire rack to cool completely, about 2 hours. It can be refrigerated for up to 2-4 weeks, but I like to freeze what I don't use after 1 week to be on the safe side.
- It should be chilled for a few hours before adding to the ice cream.
- Pour the chill ice cream base into the totally frozen ice cream bowl and churn according to the manufacturer’s instructions. The ice cream will be like soft-serve straight from the machine.
- Transfer about half of the mixture to a freezer-safe container.
- Top with about half of the cherry preserves and use a skewer to swirl the ice cream.
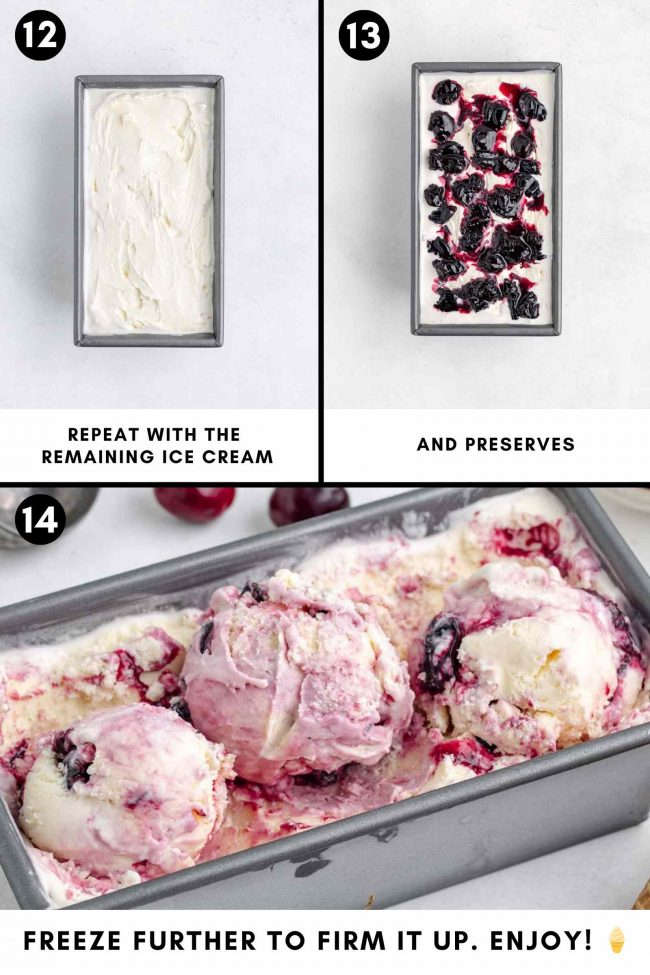
- Top with the rest of the ice cream and swirl again.
- Top with the rest of the preserves, and freeze for 4-8+ hours to help it firm up. I could still easily scoop it after it had been in the freezer overnight.
- Can be frozen for up to 3 months.


1 comment on “Black Cherry Ice Cream” — Add one!
8 comments are awaiting moderation!
Oh I love that blackberry sauce! What a beautiful ice cream…such a wonderful treat to cool down with. I’ve not tried blackberry ice cream yet!